Skip to search Skip to navigation menu Skip to main content Selecting option will reload page

Category: For the Home

DIY Succulent Embroidery Hoop Wreath Tutorial

Difficulty level: Beginner
Time required: 15 minutes
Age range: 12 and up

Things you’ll need:
7″ embroidery hoop
Wire cutters
Wood slices
Reindeer moss
Scissors
Assorted artificial succulents
Hot glue and hot glue gun
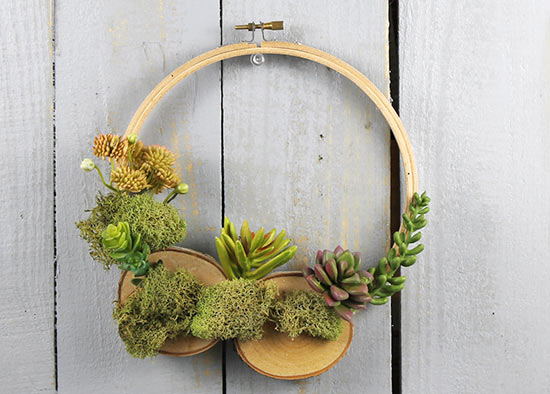
Things to do:

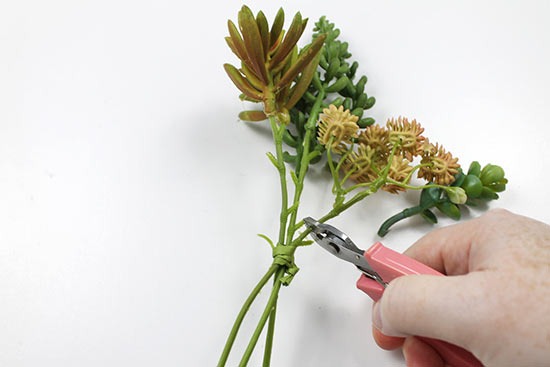
  1. Prep the succulents for the wreath. If the succulent has a thick stem that is heavy or inflexible, you can pull the stem from the bottom of the succulent.
  2. Using wire cutters, snip small stems of succulents.
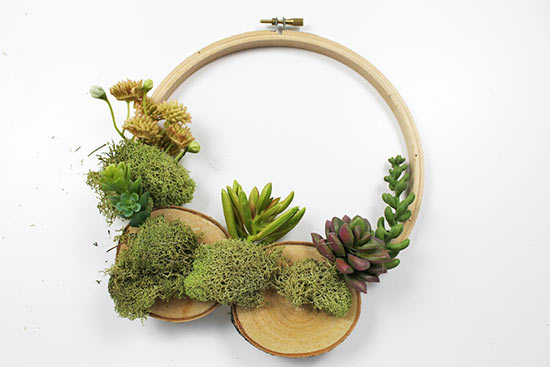
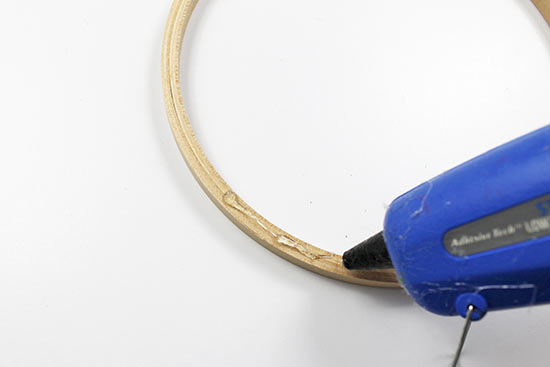
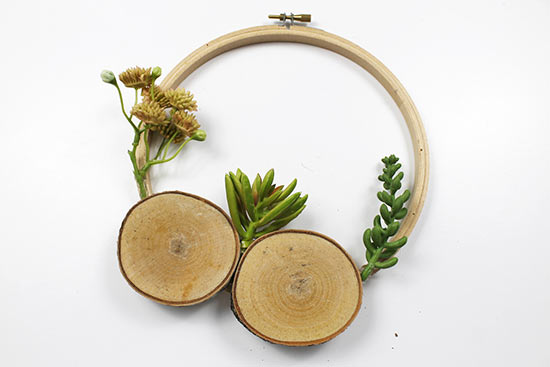
  3. Add a thick line of hot glue to the lower left corner of the embroidery hoop. The line should be the same width as about two wood slices.
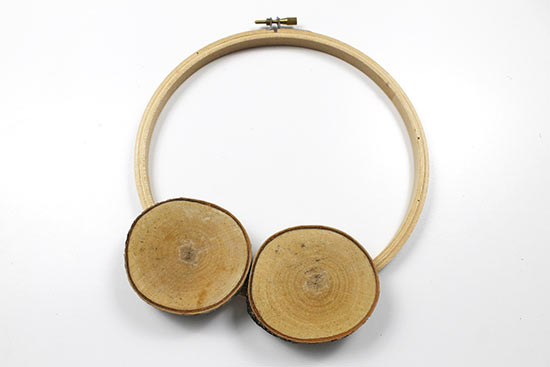
  4. Place the two wood slices side by side on the embroidery hoop, pressing them into the hot glue to secure them.
  5. Begin hot gluing succulents around the wood slices. You can place the succulents on the sides and between the wood slices. Don’t worry about stems sticking out; you can hide those later.
  6. Hot glue succulents on the wood slices, again not worrying about visible stems.
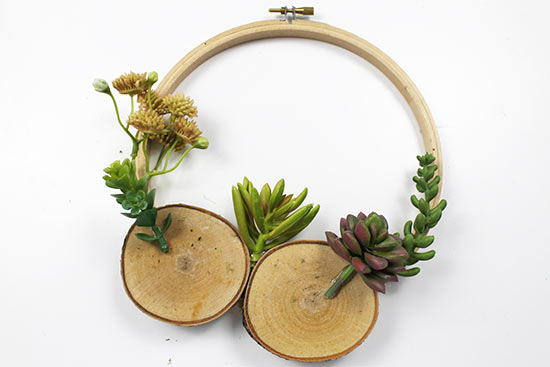
  7. Pull small clumps of reindeer moss from the bag. Hot glue the moss onto and around the wood slices, using the moss to hide the stem ends. You can also pull lightly on the reindeer moss to spread it out a little.

Continue Reading

How to Make a Moon Dreamcatcher Tutorial

Difficulty level: Intermediate
Time required: 45 minutes
Age range: 12 and up

Things you’ll need:
8″ gold metal craft ring
Cotton yarn
Ruler
Ribbon
Scissor

Things to do:

  1. Fold the cotton yarn into a loop that’s about 3″ long. Place the loop around the metal ring, tying a knot to secure it.
  2. Begin wrapping the yarn around the craft ring.
  3. Wrap until the yarn extends just over halfway around the ring, using the loop as a guide for the midpoint. Tie the yarn in a double knot around the ring, then trim it.
  4. Tie a new length of yarn to the ring near the loop. Place the working yarn behind the ring…
  5. …then bring the yarn up and around the ring and through the center of the loop. Pull gently to tighten.
  6. Repeat across the length of the tied yarn, spacing the loops evenly and ending at the edge of the yarn wraps.
  7. Flip the ring over to the other side, then repeat the loops across, this time looping the yarn through the loops of the previous row. When you reach the edge, just loop the yarn around the metal ring, then flip the ring to the other side to tie loops in the opposite direction.
  8. Continue working back and forth until you have about 6 tied rows, or until you have the desired moon shape.
  9. Cut 7 lengths of 20″-long ribbon.
  10. Fold a piece of ribbon, then lay the folded loop under the craft ring along the bottom.
  11. Pull the ends of the ribbon through the loop, then tighten to secure. Repeat steps 10-11 along the bottom of the ring until you have used each length of ribbon.
Continue Reading
Change Your Country
Please select your country, this will change the site to your country's currency:

Cancel