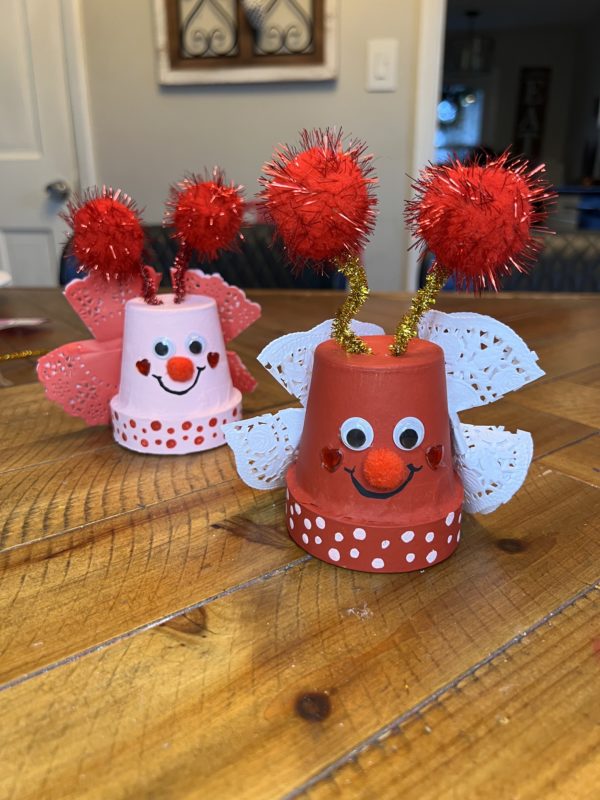
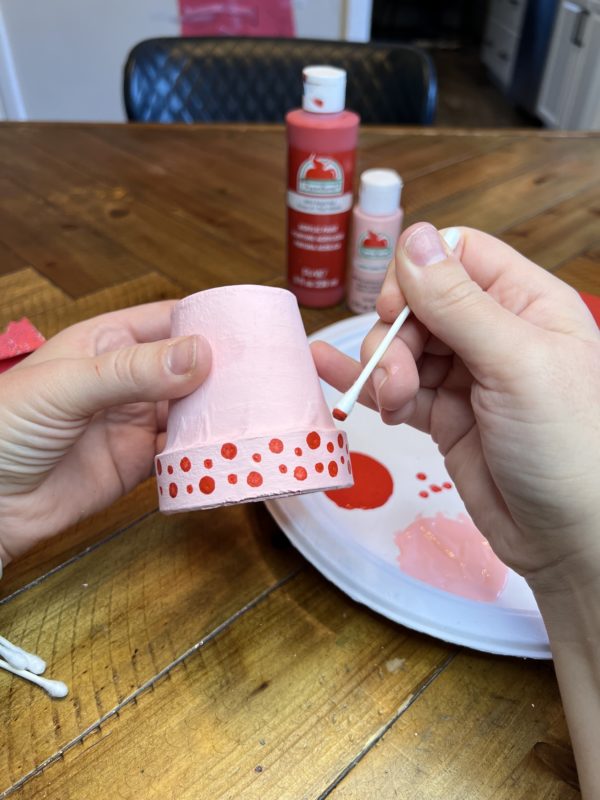
Such a simple and easy craft for the kiddos to take part of and share with their classrooms this Valentine’s Day! No glitter, that’s ok! Painting using their favorite color or the traditional Valentine colors!
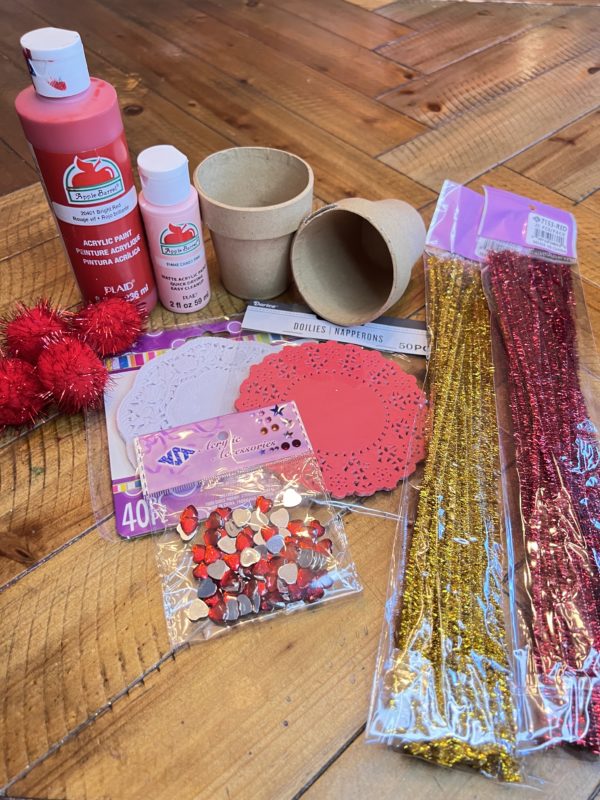
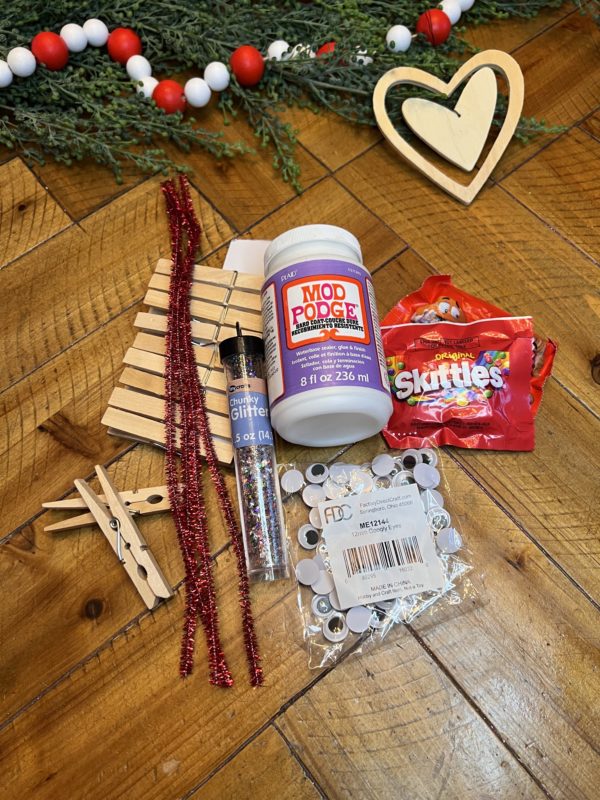
Material needed:
1 pack – Wood Clothespins
10mm Googly Eyes
Red Metallic Tinsel Pipe Cleaners
Mod Podge Hard Coat
Glitter
Scissors
Hot Glue Gun and Glue Sticks
Candy of your choice
Shop materials here:
https://factorydirectcraft.com/catalog/advanced_search_result.php?keywords=fbvlbgcndyclthspn
Let’s grab your supplies, channel your inner artist, and let get crafting!
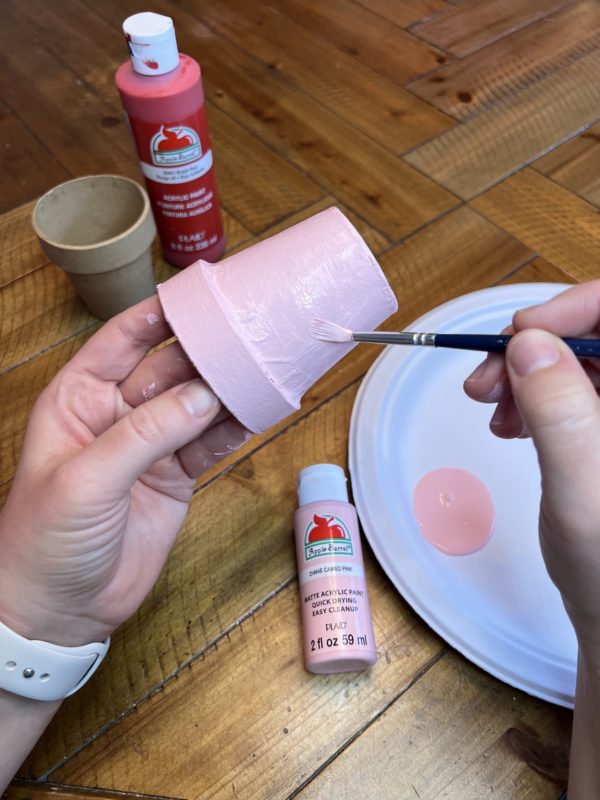
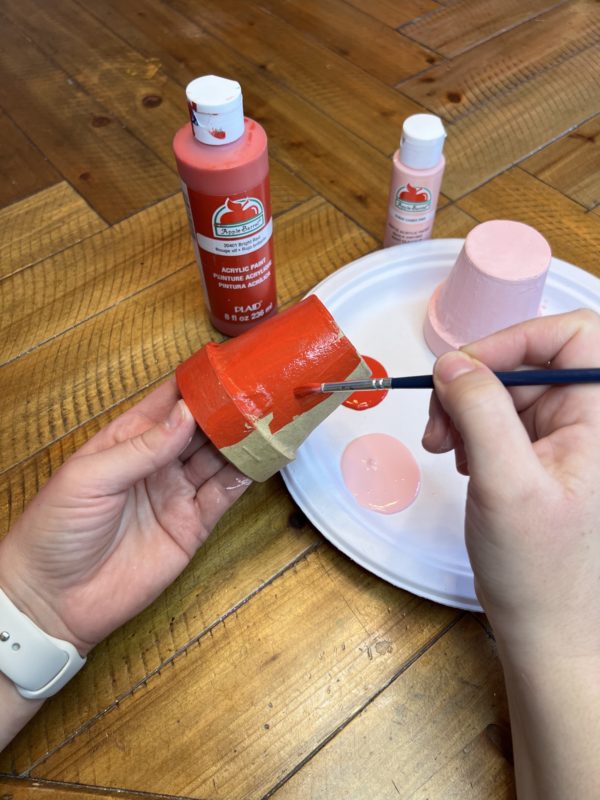
Step 1:
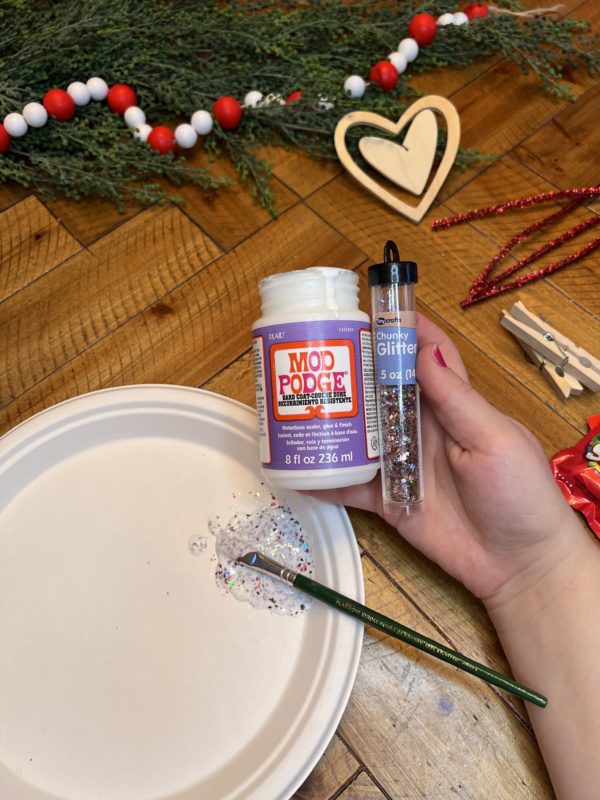
Grab your mod podge and glitter of choice. I went with a multicolor glitter to add more fun to the clothespins. You will then mix the two together. You will need more glitter than glue.
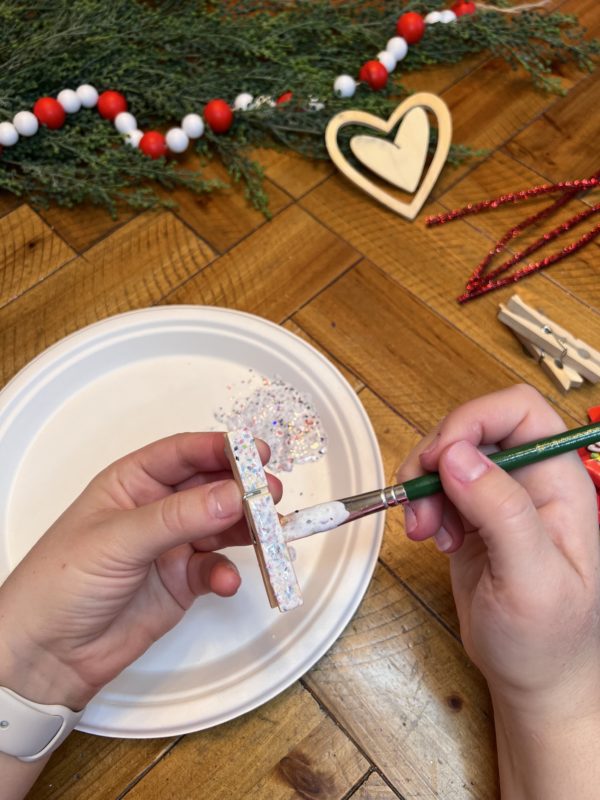
Layer on the mixture over the front and back of the clothespin. You can do sides too, if you would like. You may need to go back with a 2nd coat to get the fullness of the glitter. Take a hair dryer and dry (speeds up the process).
Look at that sparkle

Step 2:
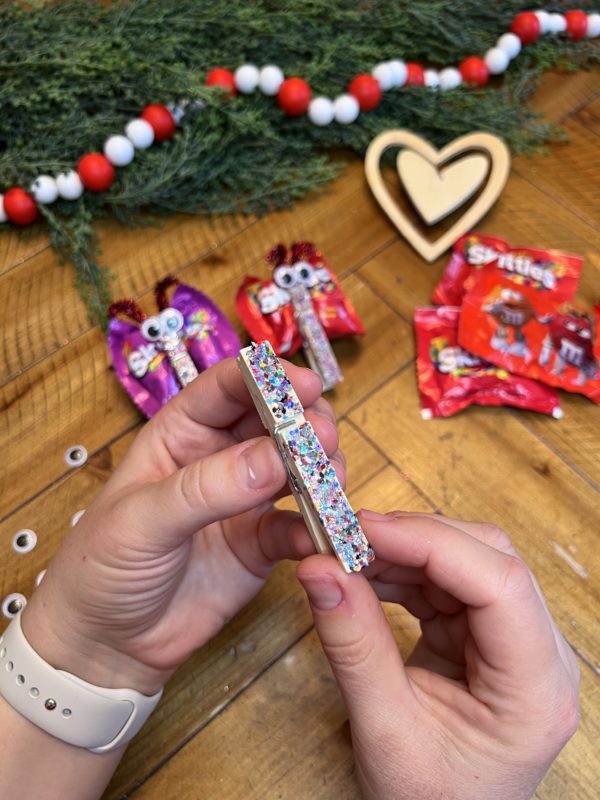
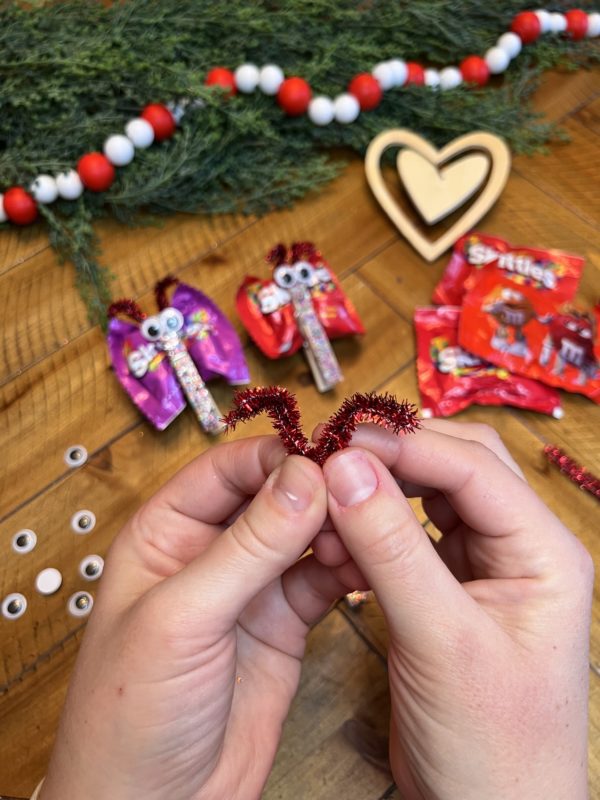
As the clothespins are drying, here you can start creating the love bugs “antennas”. I chose to go with a tinsel red pipe cleaner.
You will fold the pipe cleaner in half and twist together. Fold in half again and twist. Then you will bend down the tops at a angle to get that antenna look.
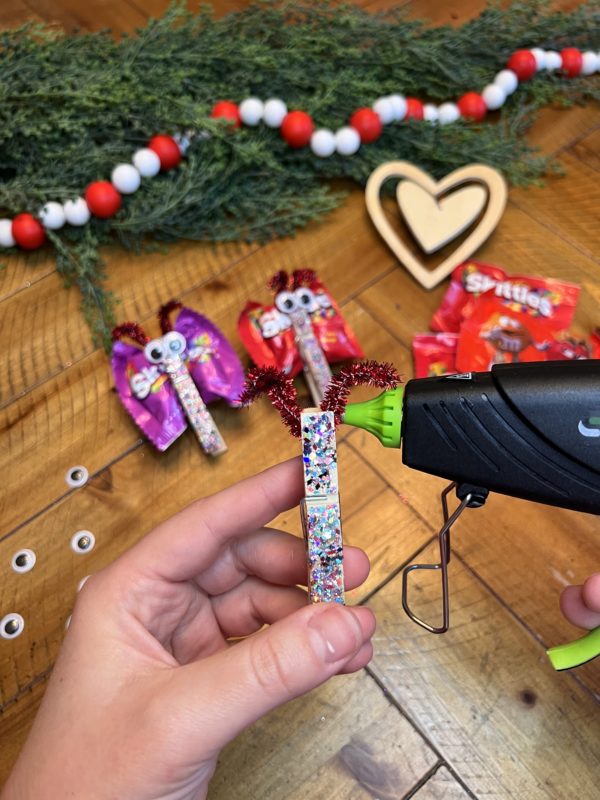
After shaping the “antennas” to your preference, use your hot glue to glue them onto one side of the clothespins’ opening. Apply pressure by closing the clothespin. This will help ensure a good hold
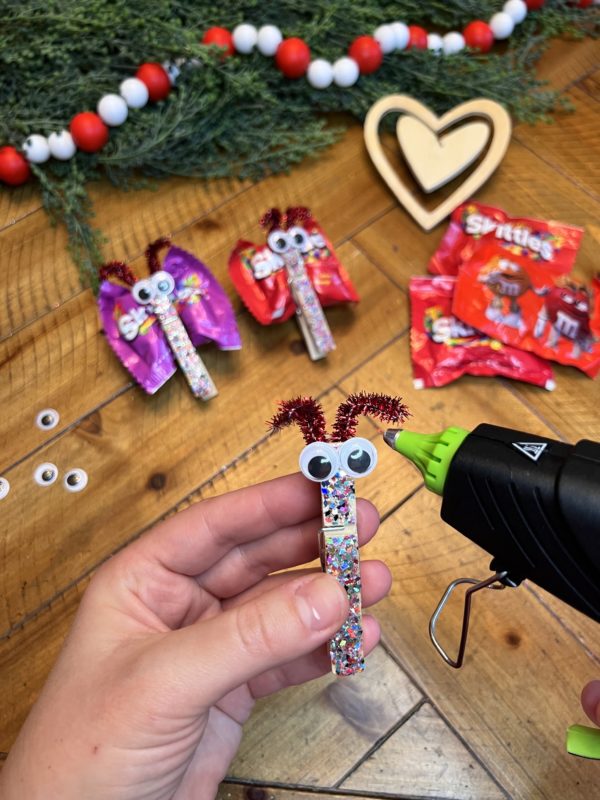
Grab some fun googly eyes and glue into place on the top near the opening of the clothespin. Here i went with the 10mm googly eyes.
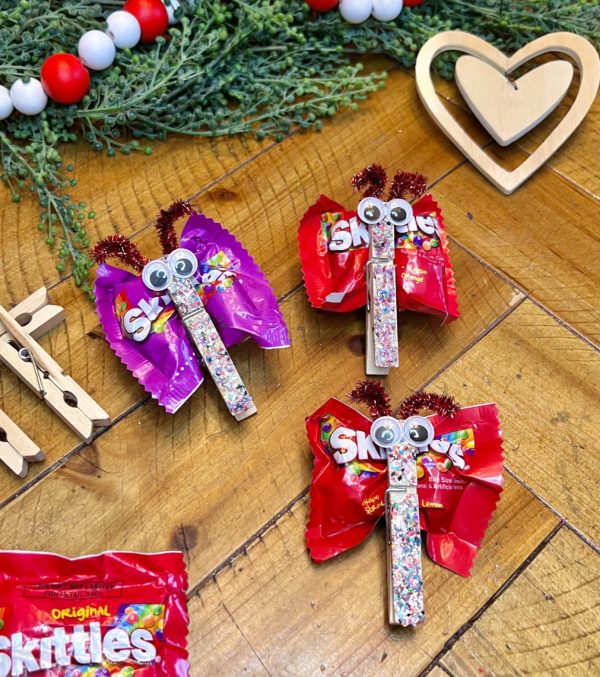
Fill it with your favorite bagged candy for the wings! Then you are all set. Hand out to your family, classroom friends, and any others that might need a smile on Valentine’s day!