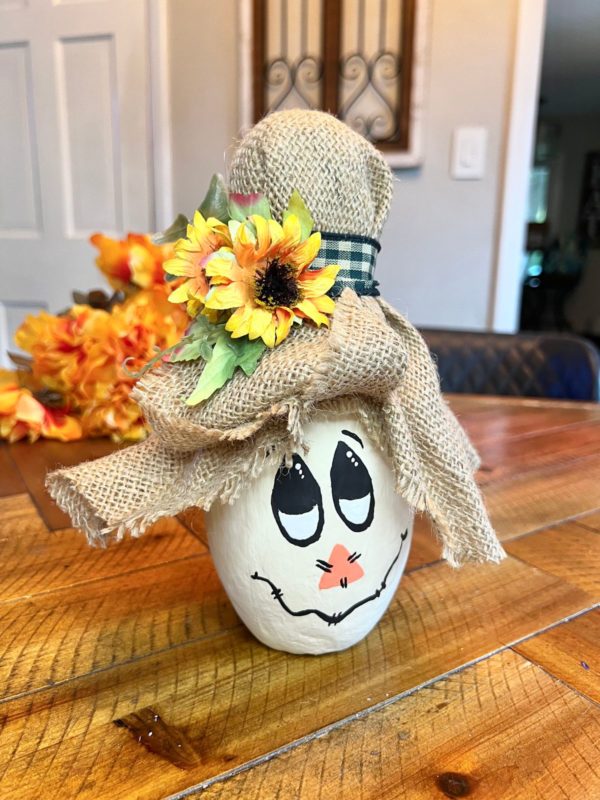
Let’s spruce up your autumn de or with a unique twist! Crafting this super CUTE scarecrow using a paper mache bowling pin! 🎳 It’s fun and SIMPLE! Place alongside your favorite fall pieces and enjoy your creativity.
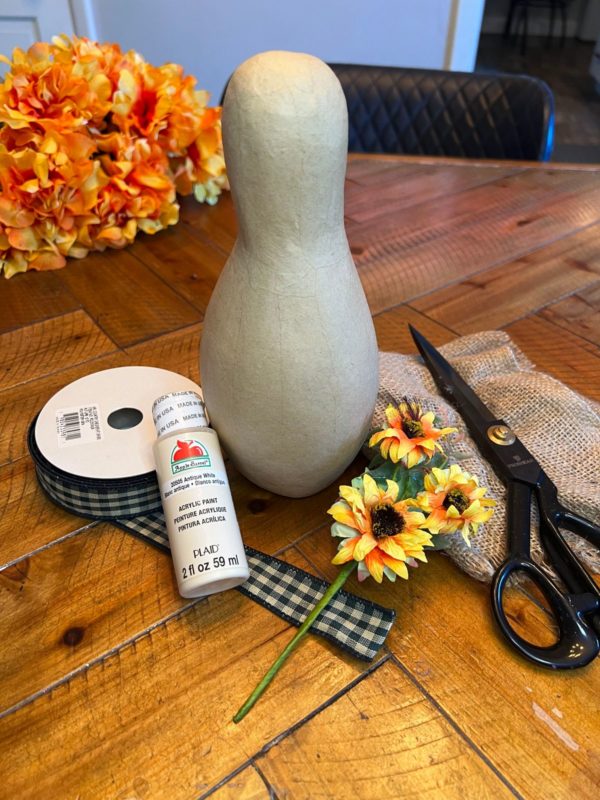
Needed supplies:
- Paper Mache Bowling Pin
- Artificial Yellow Sunflower Pick
- 12″ Burlap Fabric Squares
- 1″ Green Gingham Check Wired Ribbon
- Antique White Apple Barrel Acrylic Paint
- White Apple Barrel Acrylic Paint
- Harvest Orange Apple Barrel Acrylic Paint
- Black Apple Barrel Acrylic Paint
- Scissors
- Hot glue gun and sticks
- Paint brush
- Rubber Band
Shop the needed material here:
https://factorydirectcraft.com/catalog/advanced_search_result.php?keywords=Fbscrcrwbwlngpn
Let’s grab your supplies, channel your inner artist, and let get crafting!
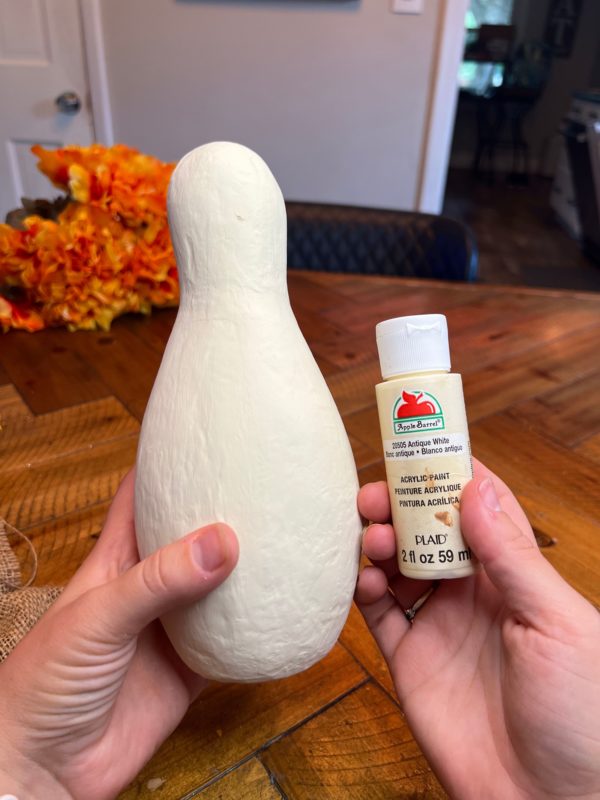
Step 1 – Painting
First you will grab your base color to coat your bowling pin. Here i went with the Antique White Apple Barrel Paint. Coated with at least 2 coats.
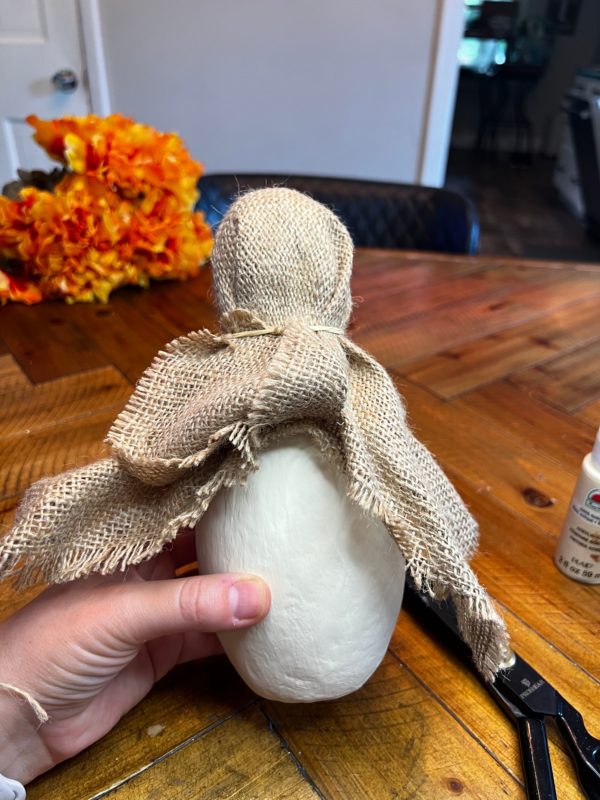
Step 2 – Create the Hat
Once paint is dry, grab your 12 inch jute squares. Drape it over the top of the paper mache bowling pin. Secure it in place with a rubber band.
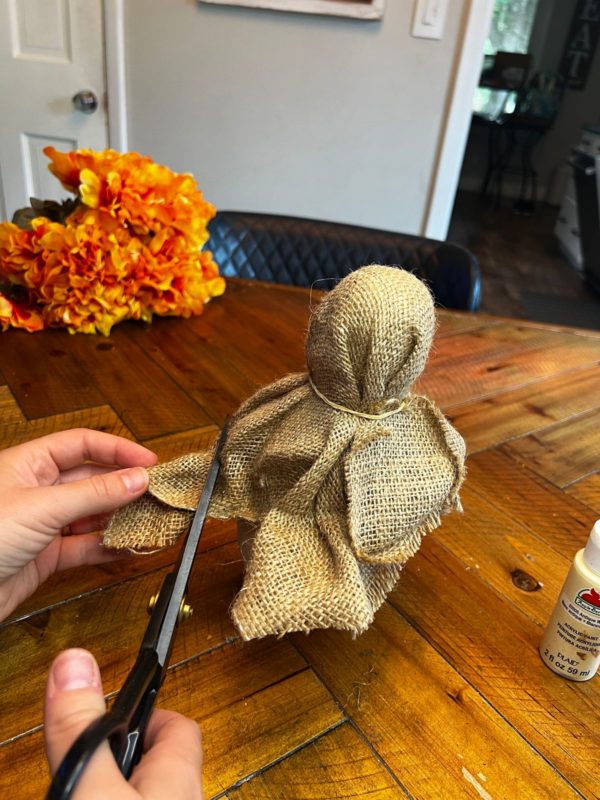
You may need to trim a couple corners. In the front, i folded one of the corners up in the rubber band to add a little more character to the hat.
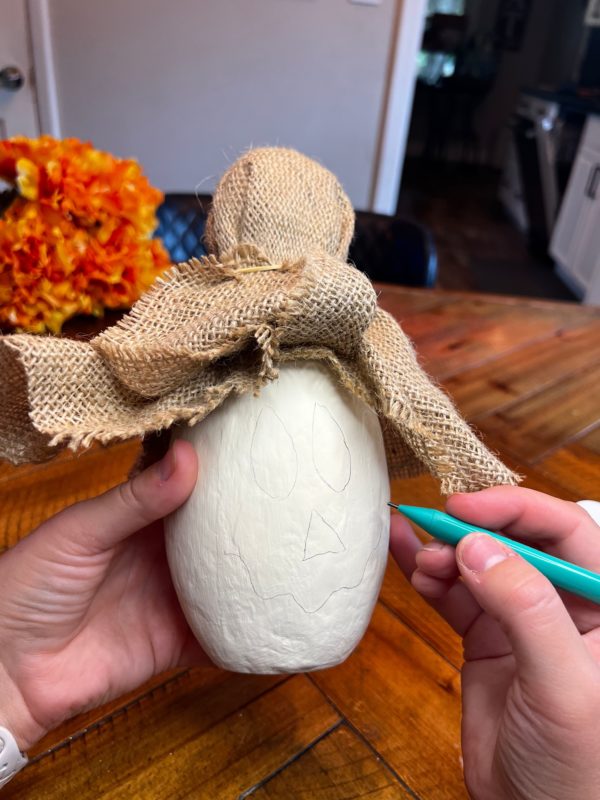
Step 3 – Add the face
Before painting on the face, i came in with a pencil to help me decide and get a temple of what i am aiming for.
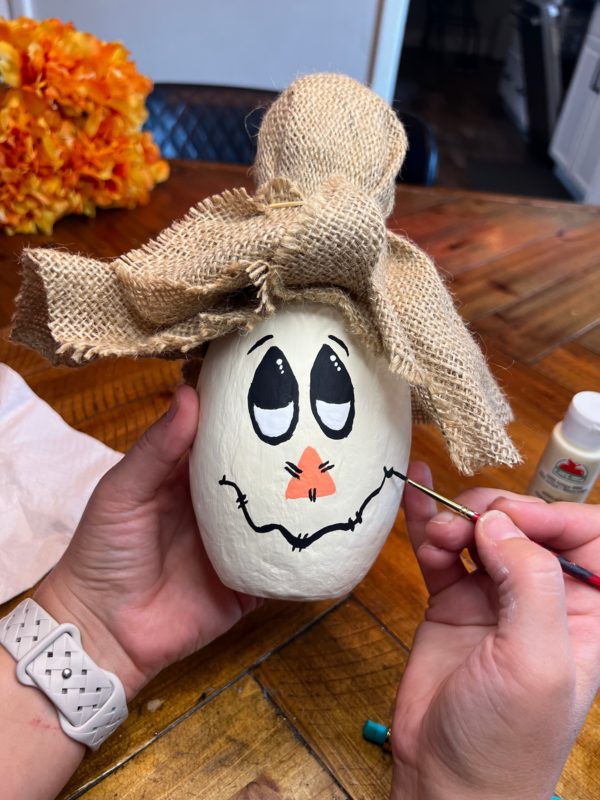
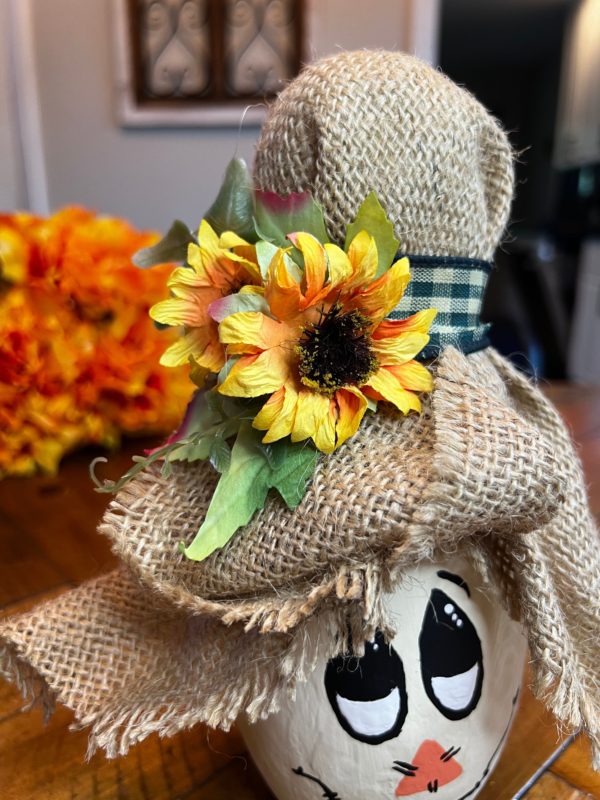
Then you come in and paint in the face once you got the correct face look you were going for. Don’t forget to add those cute little stitchings around the nose and the month.
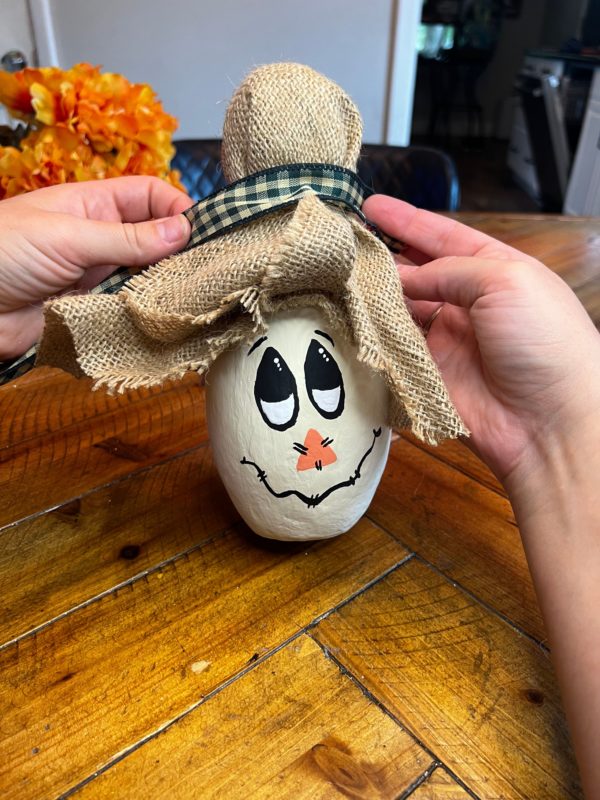
Step 4 – Add the Accessories
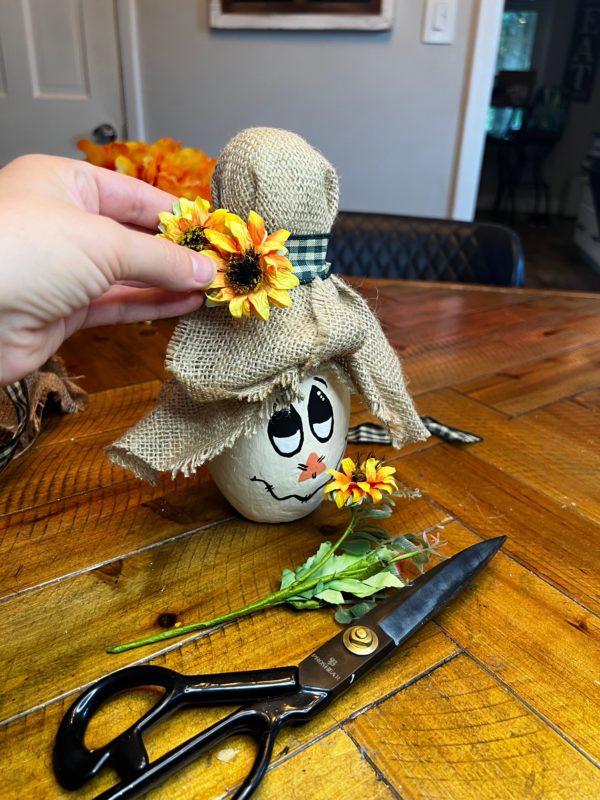
Select your preferred autumn ribbon. For this project, I opted for the Green Gingham Check Wired Ribbon. I carefully wound it around the neck of the bowling pin and secured it in position using hot glue. Then, I repurposed a sunflower pick by removing the floral heads and leaves. I attached these clippings with hot glue to embellish the straw hat’s side.

Creating a paper mache bowling pin scarecrow is a delightful and imaginative way to celebrate the fall season. Not only is it a fantastic DIY project, but it also allows you to recycle and repurpose items you might have lying around. Plus, it’s a great way to spend quality time with family and friends. Get ready to enjoy the fall festivities with your unique, handcrafted scarecrow guarding your home in style!