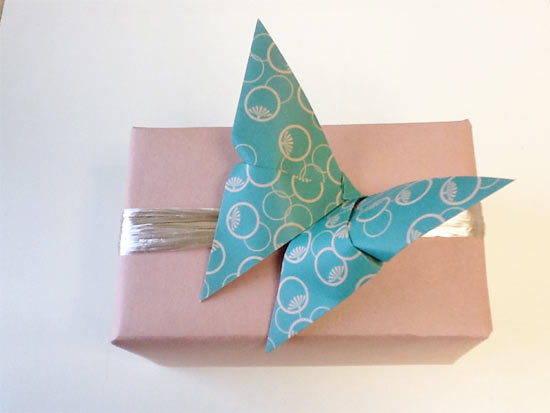
Origami butterflies are a fantastic way to dress up a wrapped gift or a bare wall. The decorating concepts are endless with these easy-to-make butterflies. Using different pieces of origami paper means that your butterflies can be any color you want. These butterflies are just what you need for all your Springtime celebrations.
Things you’ll need:
Origami paper
Things to do:
1. First, fold your paper diagonally in half, corner to corner.
2. Do the same on the opposite side, creating an X on your paper when you open it back up.
3. Fold your paper in half.
4. Fold your paper in half the other way. Your paper should now look like it has an X fold and a + fold on it.
5. Collapse your paper into a folded triangle by bringing two sides of your paper inward and letting the other two sides rest on top in a triangle shape.
6. Your triangle will have a top flap and a bottom flap. Bring the right bottom corner of the top flap of your triangle up to the top corner of your triangle and crease.
7. Bring the left bottom corner of the top flap of your triangle up to the top corner of your triangle and crease.
8. Now flip your paper over.
9. Take the top corner of your triangle on this side (the back side) and fold a small tab of the corner over the bottom of the triangle. This should create tension between the top and bottom flaps of your triangle. Do not squish this! You want the tension.
10. Flip your paper over again and bend your butterfly in half to hold the little tab in place.
11. Tape or glue your butterfly to a gift, pin it to a wall, or place it in a shadow box for a mock-pinned butterfly look.


