Skip to search Skip to navigation menu Skip to main content Selecting option will reload page

Category: Spring Crafts

DIY Felt Heart Pocket Tutorial

DIY_Felt_Heart_Pocket_Tutorial_main
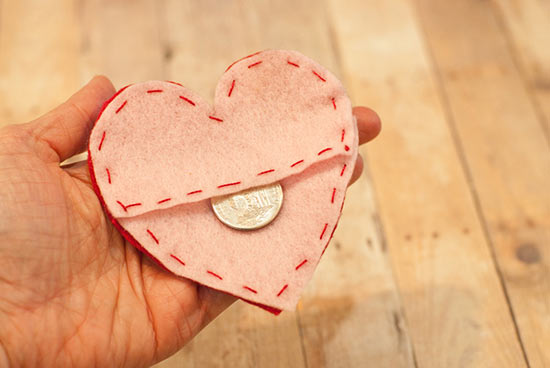
Keep all of your secret Valentine notes, change, or other important baubles in this cute felt heart pocket. These would be fun to give out as Valentines for kids, with notes inside!

Difficulty level: Easy
Time to complete: 30 minutes
Age range: 8+

Things you’ll need:
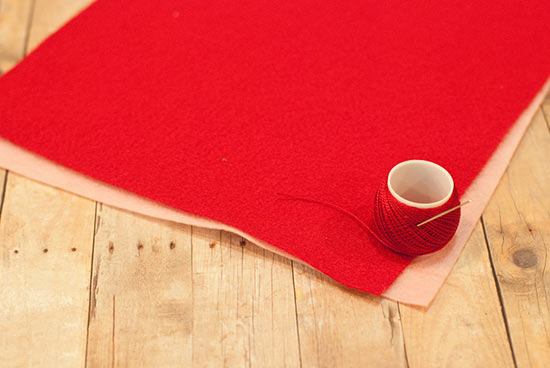
Red and pink felt sheets
Embroidery floss
Scissors
Needle with large eye
Paper
Pencil
Pins

DIY_Felt_Heart_Pocket_Tutorial1

Things to do:
1. Draw a heart about 3 1/2 ” to 4″ high and wide onto your paper, and trace onto three pieces of felt. Two should be the same color.
DIY_Felt_Heart_Pocket_Tutorial2
2. Cut the two same-color hearts as shown. The bottom of one should be cut longer, and the top of the other should be cut longer. You’ll use both larger sides for this project.
DIY_Felt_Heart_Pocket_Tutorial3
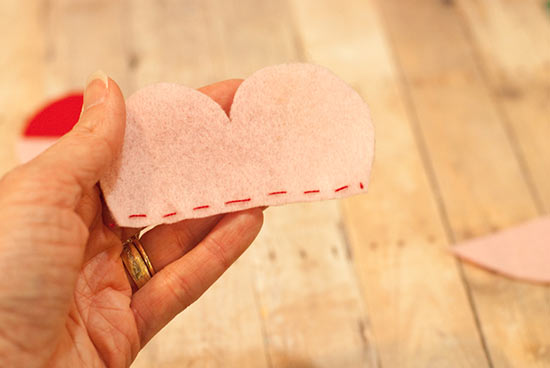
3. Decorate the straight edge of one piece with a running stitch, as shown.
DIY_Felt_Heart_Pocket_Tutorial4
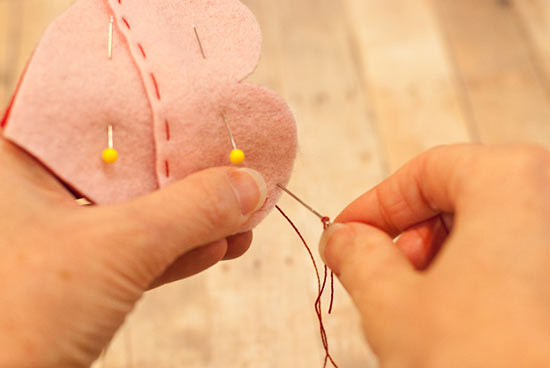
4. Pin both pieces to the full heart, so that they overlap. Begin stitching around the outer edge with a running stitch.
DIY_Felt_Heart_Pocket_Tutorial5
5. Complete so that the heart is stitched all the way around the perimeter.
DIY_Felt_Heart_Pocket_Tutorial6

Continue Reading

“Spring Showers” Watering Can Wind Chimes Tutorial

Watering_Can_Wind_Chimes_Tutorial_main
Show off your love for gardening by hanging a wind chime made of mini watering cans on your deck or from the eaves of your gardening shed. Add as many strands of buttons as you’d like, or even add more miniature cans for a bigger wind chime sound.

Difficulty level: Easy
Time to complete: 30 minutes
Age range: 10+

Things you’ll need:
3-5 miniature watering cans
Buttons
Scissors
Hot glue gun
Glue sticks
Heavy thread
Needle with a large eye

Watering_Can_Wind_Chimes1

Things to do:
1. Thread a button onto one end of the thread and knot the thread, then glue in place.
Watering_Can_Wind_Chimes2
2. Add other buttons to the thread and tie off. If desired, keep them in place with hot glue along the length of the thread. Create at least two threads of buttons, but you can also have more. Leave enough thread at the top to tie onto the watering cans.
Watering_Can_Wind_Chimes3
3. Add the strings of buttons to the can handles.
Watering_Can_Wind_Chimes4
4. String the cans together at varying lengths so they’ll clank together with themselves and the button strings, to create the wind chime sounds.
Watering_Can_Wind_Chimes5

Continue Reading
Change Your Country
Please select your country, this will change the site to your country's currency:

Cancel