Skip to search Skip to navigation menu Skip to main content Selecting option will reload page

Cupcake Push Pops


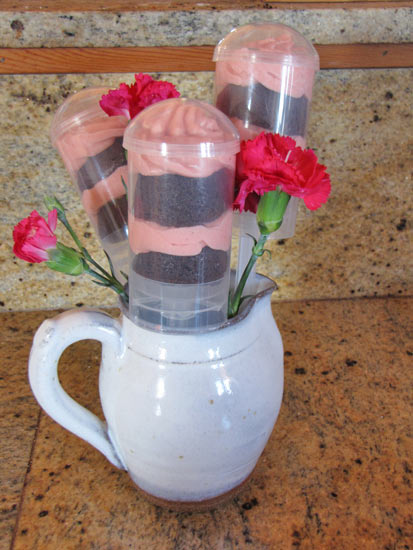
These new Cupcake Push-pops are a fun, less-mess way to eat cupcakes. These push-pops allow you to layer cupcakes and icing for a pretty treat that everyone will enjoy.

Things you’ll need:
Cupcake Push-pops
Mini Cupcake pan
Icing
Icing Pen

Things to do:
1. First remove the mess free top from the cupcake push-pops by holding onto the main cylindrical shape and pulling up on the top dome piece.
2. Make sure the push-pop handle is pulled all the way down before inserting your first mini cupcake. Gently push the mini cupcake all the way to the bottom of your push-pop container.
3. Use your icing pen to add a layer of icing on top of your first mini cupcake.
4. Gently push your second mini cupcake into the push-pop tube. Be careful not to squish your first layer of icing too much.
5. Use your icing pen to paint your second layer of icing on top of the second mini cupcake layer. Finish this layer with a pretty swirled design.
6. To store your cupcake push-pops and keep them mess free, place the dome-shaped toppers on the cupcakes and store them in the fridge or arrange them in a bouquet until you are ready to serve them. *Be careful not to put pressure on the handles while arranging your cupcake push-pops because the cupcake and icing design will be smooshed.
7. To eat the cupcake push-pops, simply remove the dome-shaped top, and push the handle up until your cupcake emerges. Enjoy your cupcake push-pop bite-by-bite without getting your hands messy.
Continue Reading

Easy Balloon Flowers


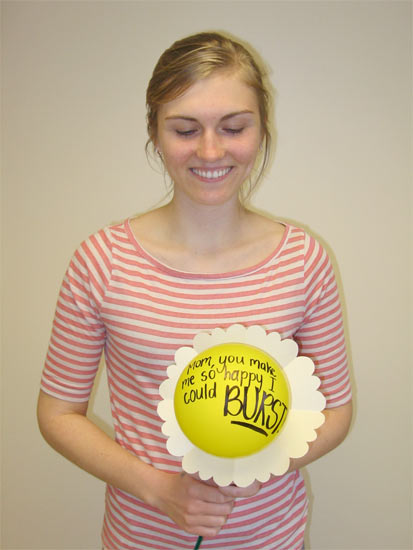
Make these Balloon Flowers for a non-traditional Mother’s Day bouquet. Blow Mom or party guests away with these hand-made, personalized flowers. Great for party decorations and personalized gifts, these flowers are sure to please everybody!

Difficulty level: Beginner

Things you’ll need:
Balloon
White construction paper (cut into a large square)
Green construction paper (cut into a small square)
2 – Green pipe cleaners
Permanent marker

Things to do:
1. Make your flower petals by folding your large white paper square in half, corner to corner making a triangle.
2. Create a smaller triangle by folding this paper triangle again, corner to corner.
3. Create an even smaller triangle by folding this triangle again, corner to corner.
4. Hold the point of your paper triangle where all of your folds meet and cut a curve on the opposite end of your triangle. This is your petal design, so shape it the way you would like.
5. Now snip the point of your triangle where all the folds meet.
6. Open your paper up and you should have a petal design with a small hole in the center of your paper circle.
7. Do steps 1-6 with your small green paper square. Make sure the whole at the center of this piece is fairly small so that your balloon knot will fit snugly through it.
8. Blow up your balloon to a size that is big enough to write on but not big enough to cover up your petal paper, and knot it closed.
9. Twist the ends of your pipe cleaners around your balloon knot.
10. Twist your 2 pipe cleaners together
11. Slip your white petal paper on your pipe cleaners through the center hole.
12. Slip your green sepal paper onto your pipe cleaners through the center hole, and carefully pull the balloon knot through your paper holes to secure into place.
13. Write a message with permanent marker on your balloon and create many more balloon flowers for a fun, pollen-free bouquet!

Continue Reading
Change Your Country
Please select your country, this will change the site to your country's currency:

Cancel