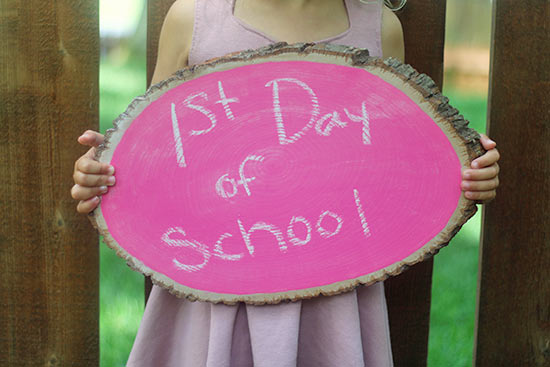
My little girl started school this year. I quickly realized I only had one chalkboard for two kids. This sounded to me as the perfect excuse to make her a new pink chalkboard on a wood plank.
Difficulty level: Beginner
Time required: 2 Days
Age range: 10+
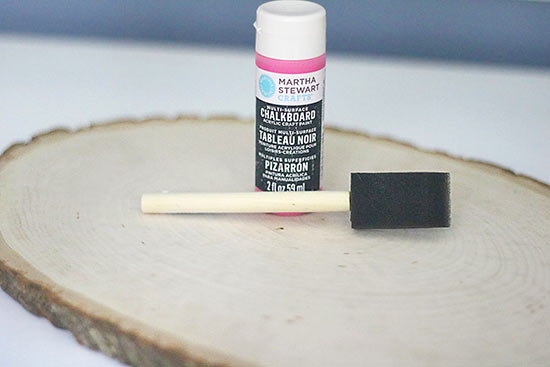
Things you’ll need:
Natural Wood Tree Trunk Slice Base
Raspberry Martha Stewart Crafts Chalkboard Paint
Small Poly Foam Brush
Chalk
Things to do:
1. Start painting the edges of the inner circle of the wood plank with the Raspberry Martha Stewart Chalkboard Paint. Gently dab the paint along the edges, then pull the paint towards the center of the wood plank.
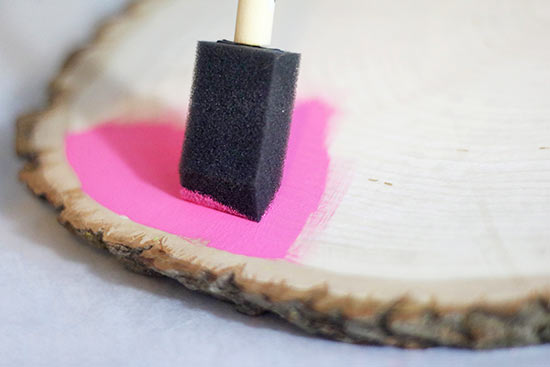
2. Continuing painting along the edges until you have painted all of the edges of the inner circle of the wood plank. Try to smooth in any globs of paint, as much a possible for a more even drying.
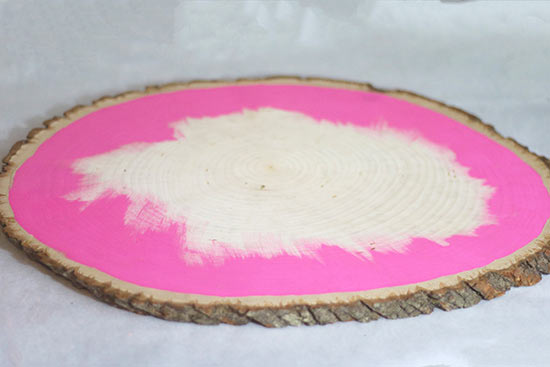
3. Fill in the the rest of the inner circle of the wood plank with the Martha Stewart Raspberry Chalkboard paint. Allow the chalkboard paint to dry for at least one hour.
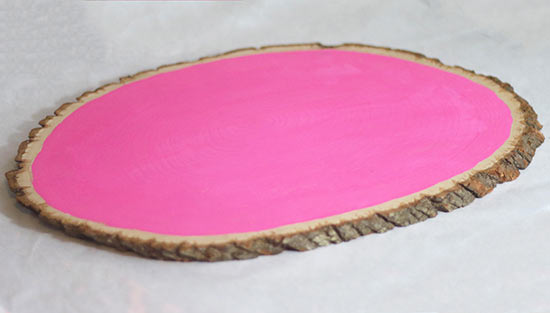
4. After waiting a least one hour between coats, repeat steps 2 and 3 until final color desired has been reached. The instructions on the Martha Stewart Chalkboard Paint says to use at least two coats of paint. I used 3 coats of paint.
5. Allow the chalkboard paint to dry for at least 24 hours after final coat.
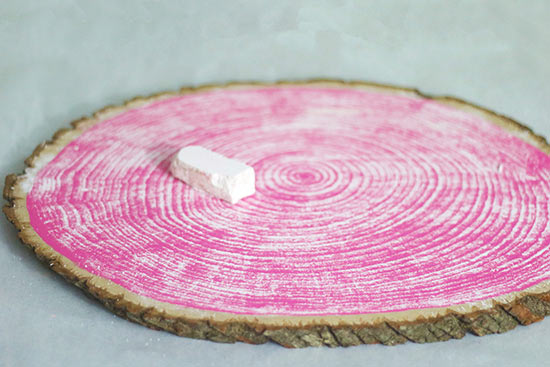
6. Condition the chalkboard by rubbing chalk back and forth across the chalkboard over the entire chalkboard.
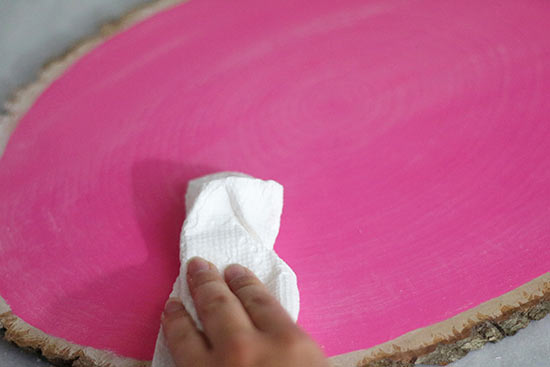
7. With a slightly damp cloth, wipe off excess chalk from the wood plank chalkboard.

Voila you now have your own Pink Chalkboard Wood Plank!
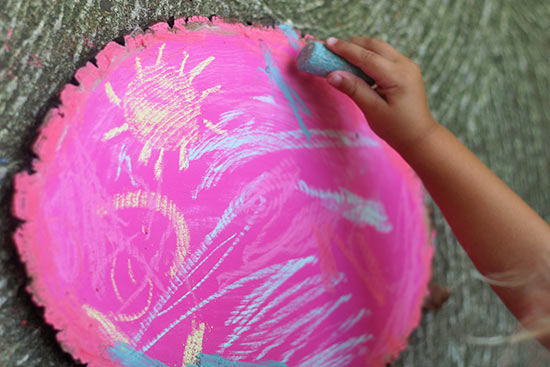
My daughter was so excited to draw on her new pink chalkboard, I could barely get her to pose for this photo. The Pink Chalkboard Wood Plank would be great for first day of school, weddings, baby showers, every day fun and more!