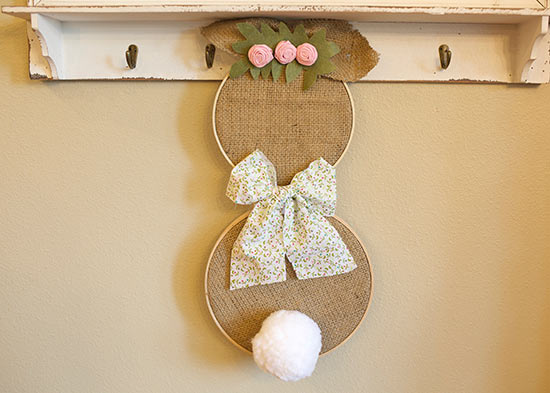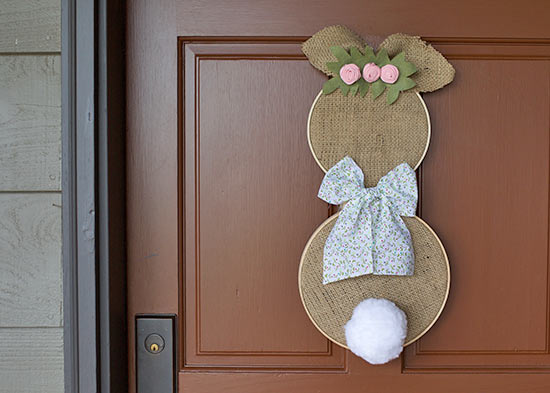
Welcome spring with this adorable door decoration! This burlap bunny perfectly complements shabby-chic home decor, extending your personal style to your front door!
Difficulty level: Intermediate
Time to complete: 45 minutes
Age range: 12 and up
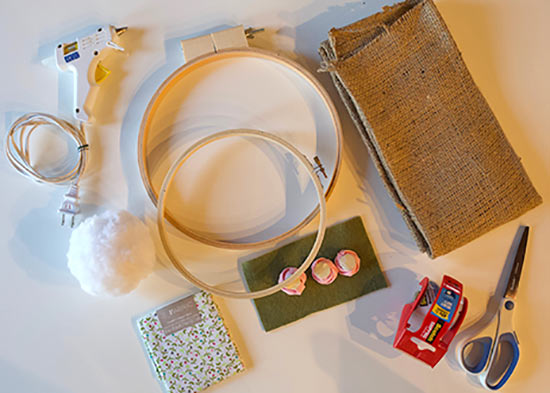
Things you’ll need:
10-inch embroidery hoop
8-inch embroidery hoop
Print fabric
Burlap fabric
Green felt
Large pom pom
Fabric rosettes
Packing Tape
Hot glue gun and hot glue sticks
Things to do:
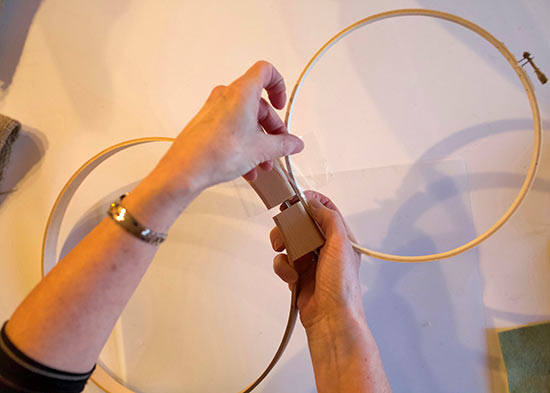
1. First, loosen the screws on your embroidery hoop and tape them together in the center.
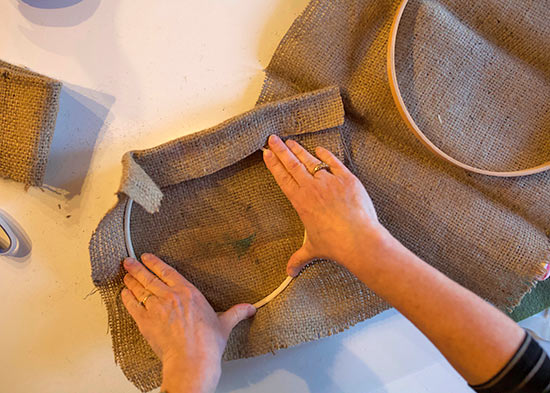
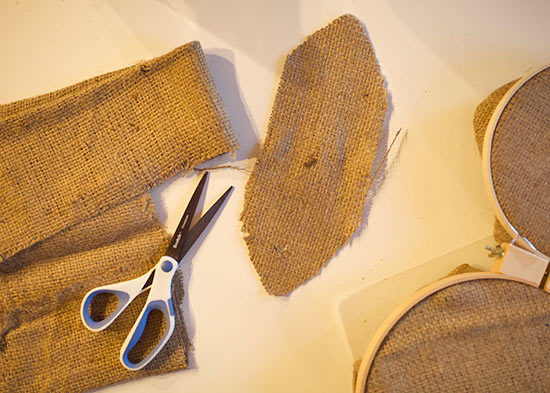
2. Next, fill your embroidery hoops with burlap fabric. Lay a piece over both hoops and slide the centers in, holding the fabric in place.
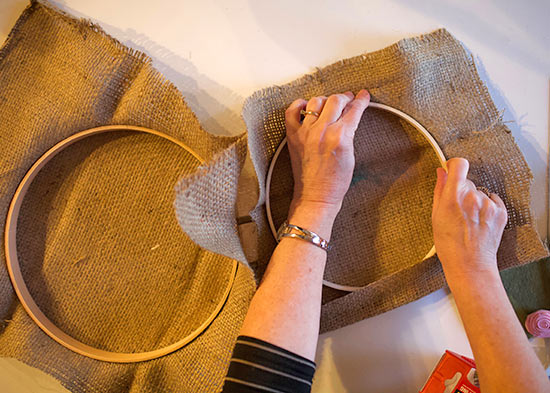
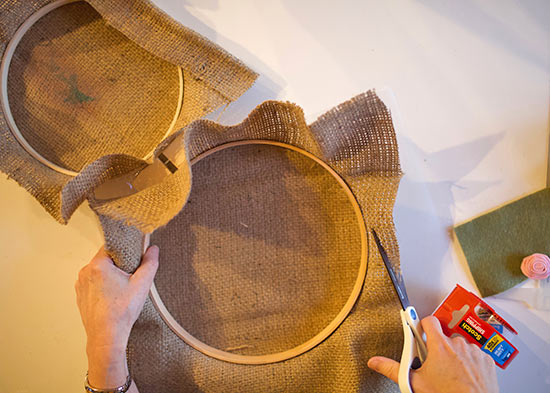
3. Trim the excess fabric, leaving a bit extra around the edges. When you’ve finished trimming, use hot glue to tuck the excess fabric under the back of the hoops.
4. Next, we’re going to add the ears. Cut a 12-inch x 4-inch piece of burlap and fold it in half length wise. Round the edges, so they look like ears. Use a piece of jute to secure the ears to the top of the bunny rabbit.

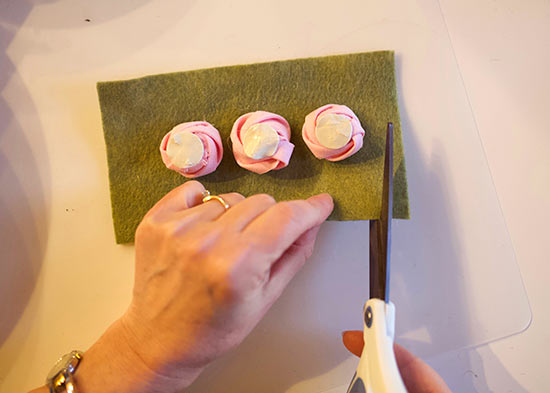
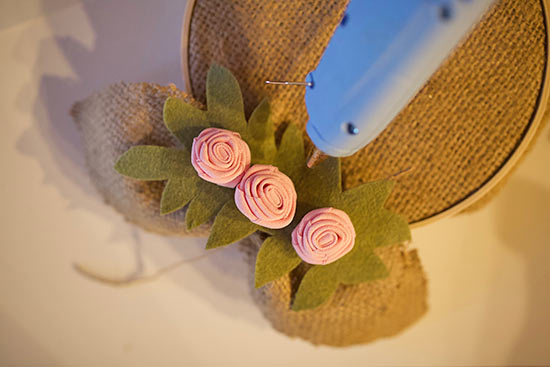
5. Stick your rosettes on a piece of green felt. Cut out leaf-shaped pieces around the rosettes. Use glue to attach the felt to the top of the bunny.
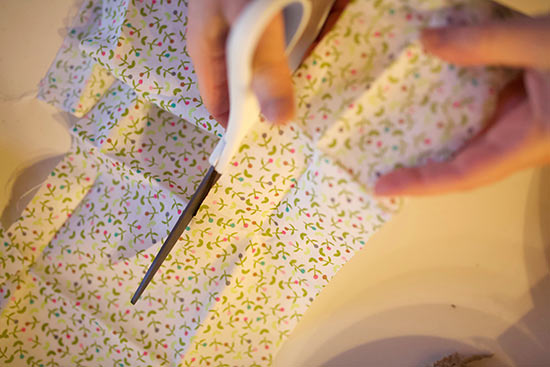
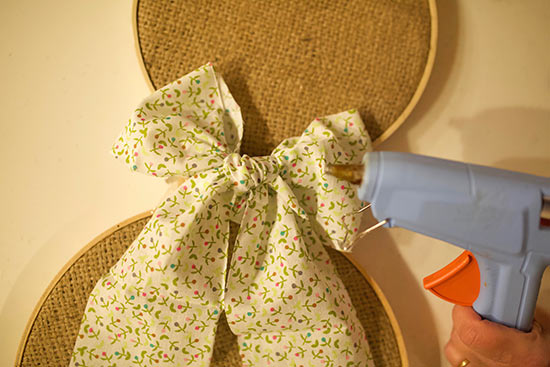
6. Use your patterned fabric to tie a bow and attach it to the front of your bunny, where the embroidery hoops are attached.
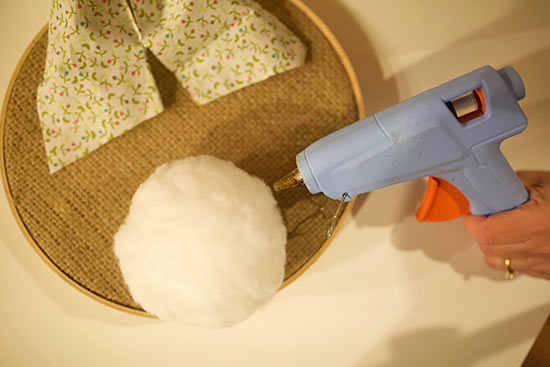
7. Finish your bunny by using hot glue to attach a large pompom tail.