Skip to search Skip to navigation menu Skip to main content Selecting option will reload page

Category: Winter Crafts

Wintry Unicorn Terrarium Tutorial


Difficulty level: Beginner
Time required: 15 minutes
Age range: 8 and up

Things you’ll need:
Micro mini unicorn pick
Glass terrarium
Reindeer moss
Green bottle brush tree
Mulberry wine bottle brush tree
Artificial snow

Things to do:
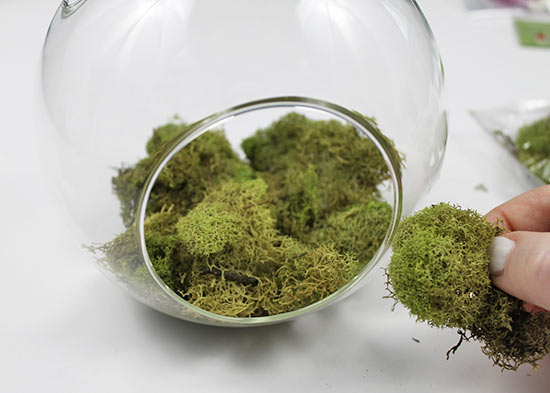
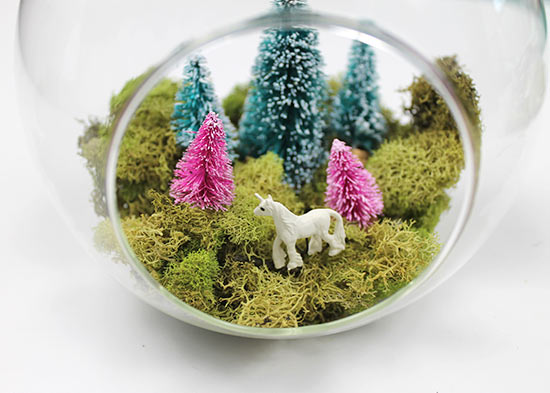
1. Break up a few clumps of reindeer moss, then place it along the bottom of the glass. Spread the moss evenly.

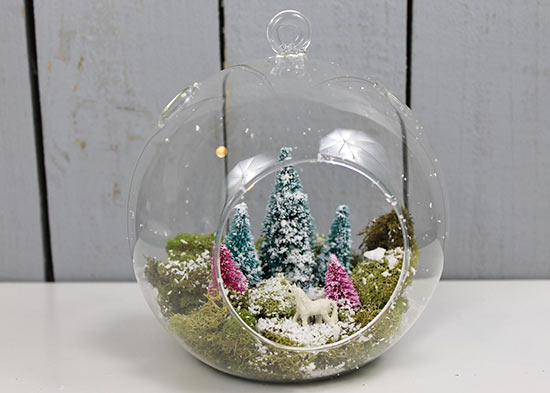
2. Add bottle brush trees of your choice, pushing the trees into the moss to secure them. We added three green bottle brush trees and two mulberry wine bottle brush trees, placing the tallest trees in the back of the terrarium.

3. Grab the unicorn pick. Bend the wire to the side.

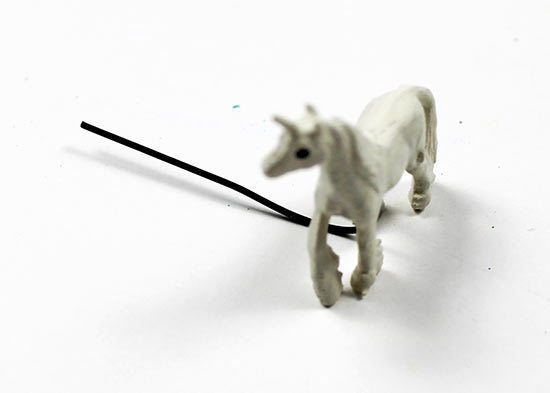
4. Push the unicorn’s wire into the moss to secure the unicorn.

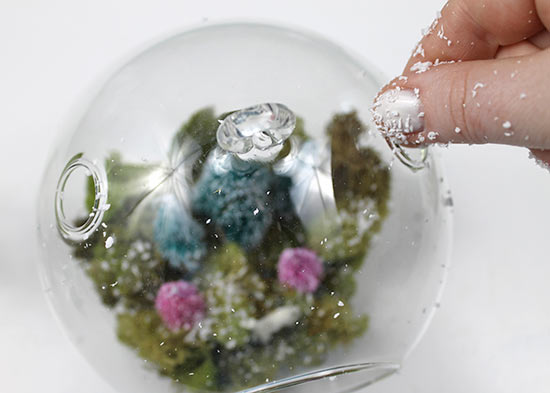
5. Grab a pinch of artificial snow with your fingers. Be careful, as the snow can get a little messy and fly everywhere. Sprinkle the snow inside the terrarium, covering everything with snow as evenly as possible.

6. If you’re having problems reaching the back of the terrarium, sprinkle the snow through the holes in the top of the terrarium.

Continue Reading

Kid Friendly Paper Plate Yarn Snowflake Art Tutorial

Difficulty level: Beginner
Time required: 30-45 minutes
Age range: 5 and up

Things you’ll need:
Paper plate
Pencil
Ruler
Yarn (medium-weight yarn works best for this project)
Blunt yarn needle
Scissors
Tape
Push pin

Things to do:
1. Using a pencil and a ruler, draw a snowflake design inside the plate where you’d normally put your food. Kids can freehand this design, if they’d like. Don’t worry about messing up; the pencil marks won’t be visible.

2. When your design is finished, use a push pin to push holes in the intersection where each line meets.

3. Repeat this until you’ve poked holes in each intersection.

4. Using the blunt yarn needle, poke each hole that you made in step 3 to make it larger. This will make it easier later when you’re threading the yarn through.

5. Repeat this until you’ve re-poked each hole.

6. Cut a long strand of medium-weight yarn. We cut ours to about 151″ long, but the length will depend on how complex your design is.

7. Thread the yarn through the blunt needle, then tie several knots near the yarn tail. Since the yarn length is so long, it may also be helpful to slide the blunt needle down the length of yarn a bit farther so that you don’t have as much yarn to pull through each hole.

8. Begin by inserting the blunt needle through the center of the snowflake with the pencil side of the plate facing you. Be sure your knot doesn’t slide through the hole.

9. Insert the blunt needle through a nearby hole, pulling the yarn through.

10. Continue threading the yarn, tracing along the lines you’ve created. You may need to insert the yarn through the same hole more than once.

11. Continue until you have filled the entire design. Check the side opposite the pencil side of the plate to ensure the entire snowflake is outlined with yarn.

12. Flip the plate over to the pencil side. Cut the yarn tail close to the plate, then secure both the yarn end and the beginning knot with a piece of tape.

Continue Reading
Change Your Country
Please select your country, this will change the site to your country's currency:

Cancel