Skip to search Skip to navigation menu Skip to main content Selecting option will reload page

Category: Party and Special Occasion

DIY Paint Stir Stick Bushel Basket Tutorial

DIY_Bushel_Basket_Tutorial
Looking for the perfect centerpiece for your next dinner party? This shabby chic basket will look lovely on your table, filled with decorative apples or a vase set in the center with flowers. How you style it is up to you!

Difficulty level: Beginner
Time to complete: 30 minutes
Age range: 12 and up
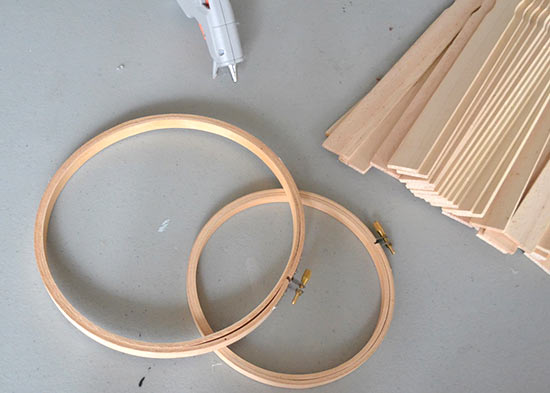
Things you’ll need:
Paint sticks
6 inch Embroidery hoop
8 inch Embroidery hoop
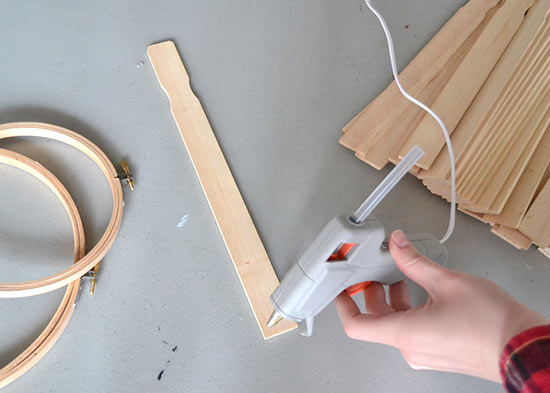
Hot glue gun
Hot glue sticks

Things to do:
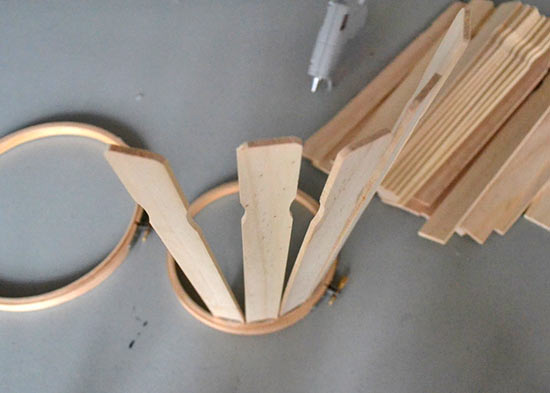
1. Use hot glue to attach your paint sticks to the 6-inch embroidery hoop. Hold them in place at a slight angle until the glue dries completely.
DIY_Bushel_Basket_Tutorial2
DIY_Bushel_Basket_Tutorial3
DIY_Bushel_Basket_Tutorial4
DIY_Bushel_Basket_Tutorial5
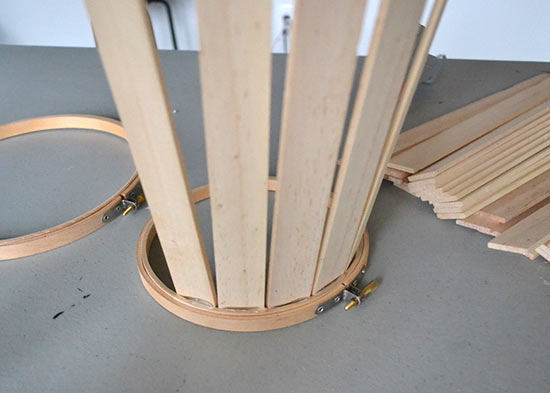
2. When all of your paint sticks are in place, flip the basket upside down and slide the 8-inch hoop over the bottom. When it slides up as far as it can, apply hot glue to the inside rim to attach it to the paint sticks.
DIY_Bushel_Basket_Tutorial6
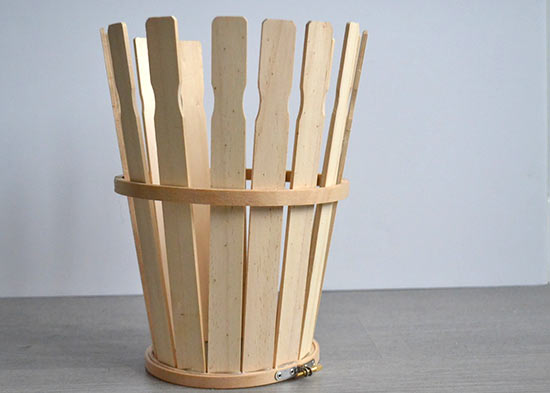
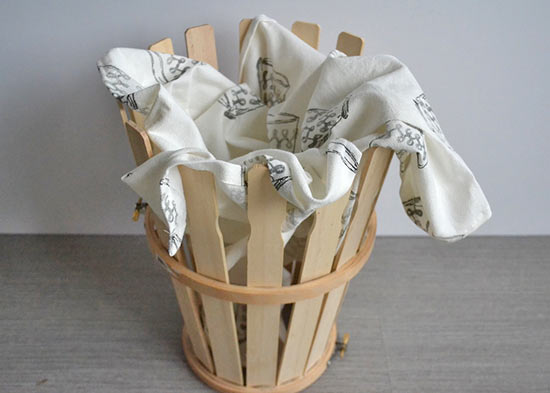
3. To finish your basket, you can either cut a bottom out of foam board and attach it with hot glue, or fill the basket with a dish towel/burlap fabric to serve as the holder of your decor.

Continue Reading

Kid Approved Ice Cream Cones Tutorial

Ice_Cream_Cones_Tutorial_main
Whether or not it’s summer, ice cream is always a treat! Craft adorable ice cream cone treats that will never melt. These can be used as package toppers, kitschy lapel pins, or string a bunch together to create a mouth watering bunting for your next party.

Difficulty level: Easy
Time to complete: 30 minutes
Age range: 8+

Things you’ll need:
Burlap sheet
Large craft pom poms
Small craft pomp poms
Hot glue gun
Glue sticks
Scissors
Ruler
A plate
Pencil
Needle with a large eye, and thread *optional
Rotary cutter *optional

Ice_Cream_Cones_Tutorial1

Things to do:
1. Cut 4-inch square pieces of burlap for cones.
Ice_Cream_Cones_Tutorial2
2. Either trace the curve of a plate onto the corner of the burlap and cut with scissors, or use a rotary cutter on a protected surface. Warm up your hot glue gun, unless you plan to sew your cones.
Ice_Cream_Cones_Tutorial3
3. Fold the cone as shown, and either glue or sew into place.
Ice_Cream_Cones_Tutorial4
4. Fill the cone with burlap scraps, and glue a large pom pom to the top.
Ice_Cream_Cones_Tutorial5
5. Add a small pom pom for a cherry on top!
Ice_Cream_Cones_Tutorial6

Continue Reading
Change Your Country
Please select your country, this will change the site to your country's currency:

Cancel