Skip to search Skip to navigation menu Skip to main content Selecting option will reload page

Category: Kid's Arts and Crafts

Product Review: Precious Impressions Memory Mold 3-D Keepsake Kit

Precious_Impressions_Memory_Mold
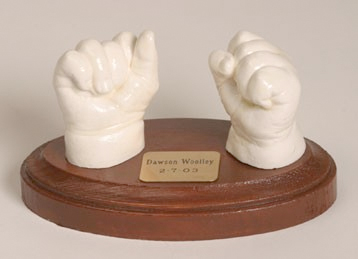
The Precious Impressions Memory Mold 3-D Keepsake Kit is really a great idea and can make a wonderful gift for yourself or someone else as long as you have the patience (and that means baby too!). I strongly suggest that you read the directions numerous times before even attempting this project. There are a lot of instructions that are time sensitive, so if you have an idea of what to expect before you begin you will not feel quite as panicked when you are actually making the mold. Another thing to be aware of before you begin is that you will need some at home materials that are mentioned in the directions, such as: a drinking cup, measuring cup, rubber spatula, and at the end of the process it suggests having a high gloss crystal clear glaze to seal your statue. The box also mentions that there is no base, so if you really want the look as shown on the box I suggest looking further on this website so you can purchase the kit, gloss, and unfinished wooden base all at one time.
Precious_Impressions_Memory_Mold2
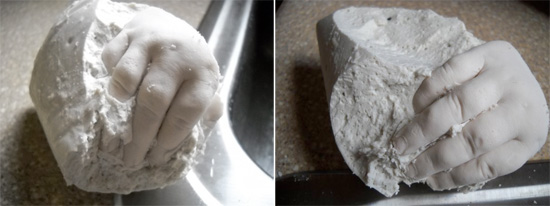
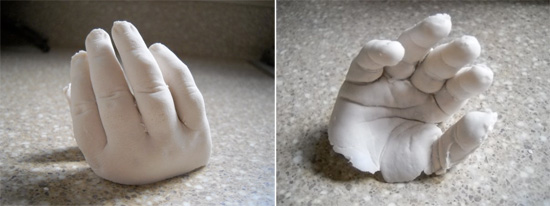
I highly recommend having four hands available with children 6 months and older, so find someone to help you. One thing we did before getting my sons hand in the mold was to put on one of his favorite shows, so that he was distracted for the whole process. I found it helpful to have my husband holding my son while I was able to hold his hand in the bag and mush the gel around his hand. The gel worked just as directed, but it was only after the mold had set that I realized my sons thumb had been too close to one side of the bag and it left some openings along that side of the mold, so keep an idea of where their hand is in the bag. I was however, able to fix this minor flaw at the end of this project with extra plaster I had set aside for such an incident. Looking at the finished product makes me wish I had found something like this when my son was younger so I could do both his hand and foot, the mold really took on every aspect of his hand right down to the lines on his fingers. Like I said in the beginning, this is a fantastic gift but just needs a touch of patience for a remarkable keepsake. Enjoy!
Precious_Impressions_Memory_Mold3

Lisa Lahiff at Lisa’s Creative Niche

Continue Reading

Sweeten Any Celebration with Fun to Make Styrofoam Ball Cupcakes

styrofoam_ball_cupcakes4
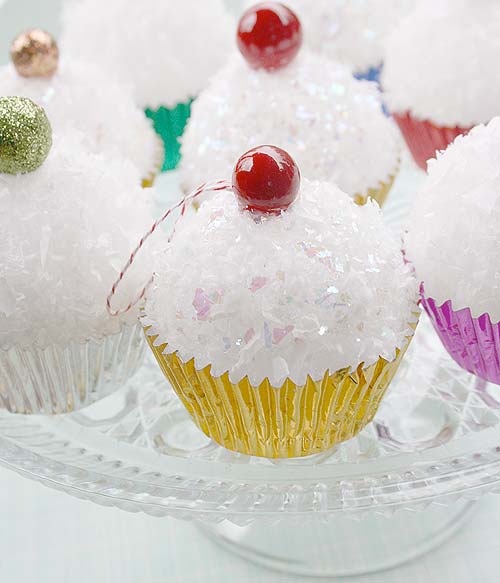
If you’re looking for a unique and sweet decorative touch for an upcoming bridal or baby shower or are itching to get a jump-start on holiday crafting, these easy to make Styrofoam cupcakes are sure to satisfy. You don’t need to be a pastry chef to whip up a batch of these tempting treats for the eyes. The best part? They’re 100% calorie free, so you can indulge to your heart’s content.
styrofoam_ball_cupcakes2
Things you need:
2 1/2″ Styrofoam Balls
Heavy-duty foil cupcake liners
Iridescent White Soft Snowflakes
Berry Spray (color of your choice)
Craft Glue
Paint Brush or Foam Sponge Brush
Hot Glue Gun and Glue Sticks
Scissors
Ribbon or decorative string for hanging
Skewers or Dowel Rods
styrofoam_ball_cupcakes3
Things to do:
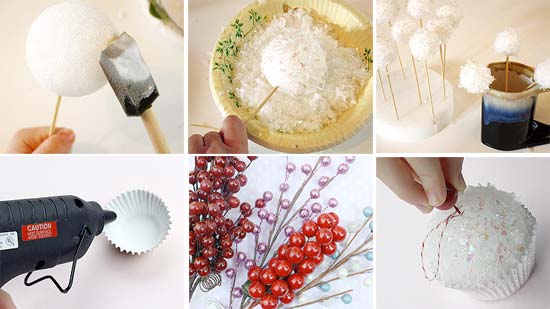
1. Press a dowel rod into each Styrofoam ball, and coat a little more than half of the top of the ball with a generous layer of craft glue.
2. Roll the glue-coated Styrofoam ball in a shallow pan filled with artificial snowflakes, then use your fingers to press the flakes securely to surface. Tap gently to remove excess flakes, and prop in a coffee can or mug to dry. Try to wait patiently because if you try to glue liners on before the styrofoam balls dry, the sides won’t stick. If you are having little hands help you with this project… they will LOVE this step!
3. After glue sets and dries, add a generous dollop of hot glue to the bottom and the top inside of each foil cupcake liner and press the Styrofoam ball in firmly. Be sure to carefully press the sides of the foil so the liner is tightly glued on. Also, keep in mind that you may not want to push the styrofoam ball down too far or the bottom will curve and your cupcake will not sit flat, (not a big deal if you’re planning on hanging them though.) If you are having little hands help you with this project… be sure to only have big-kids or adults handle the hot glue step.
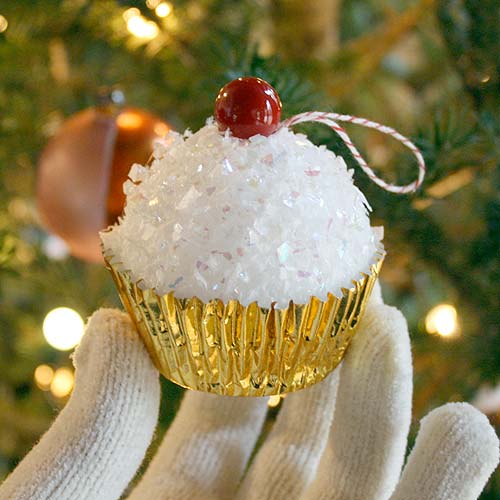
4. Snip the berries from the branch, leaving about an inch of stem, and cut lengths of ribbon or decorative thread for hanging. Add a dollop of hot glue to the top of each Styrofoam ball, pressing the tails of the ribbon (if you are wanting to hang your cup and berry into the Styrofoam. You can also flip your cherry around with the step showing upwards to make it look like a cherry stem! Allow to dry thoroughly before displaying.

Tip: For mini cupcakes, use 1 1/2″ styrofoam balls and mini cupcake liners.

You can also try making your cupcakes a little more retro by gluing your styrofoam balls to galvanized tart pan to the bottoms instead of the cupcake liners. Use a 3″ tart pan with a 3″ styrofoam ball for a large cupcake or use a 2-1/4″ tart pan with a 1-1/2″ styrofoam ball to create little mini cupcakes!
styrofoam_ball_cupcakes
Create a mouth-watering centerpiece by dangling these sweet decorations from a table top ornament tree, or make a sweet bouquet by inserting dowel rods into the bottom and displaying in a festive vase. While you’re at it, be sure to make an extra baker’s dozen to share with family and friends.

Photo Credits: Bake it Pretty

Continue Reading
Change Your Country
Please select your country, this will change the site to your country's currency:

Cancel