Skip to search Skip to navigation menu Skip to main content Selecting option will reload page

Category: Kid's Arts and Crafts

Easter Bunny Treat Mason Jars Tutorial

Easter_Bunny_Treat_Mason_Jars_main
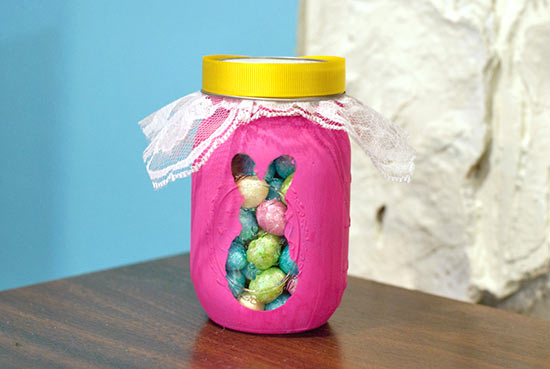
Paint this bunny jar for your own decor or for gift-giving. Fill with faux miniature eggs or with jelly beans – yum!

Difficulty level: Easy
Time to complete: 1 hour
Age range: 10+

Things you’ll need:
Clear mason jar
Paint brush
Acrylic paint
Yellow ribbon
Lace
Hot glue gun
Glue sticks
Scissors
Bunny template
Tape

Easter_Bunny_Treat_Mason_Jars1

Things to do:
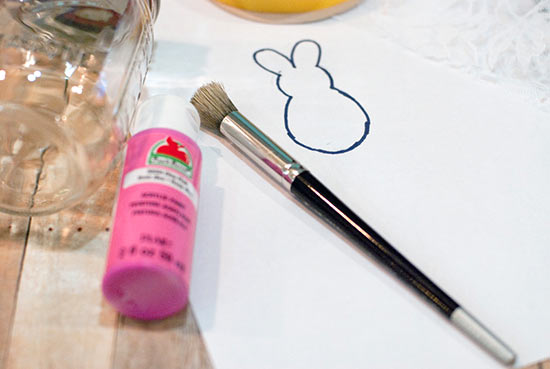
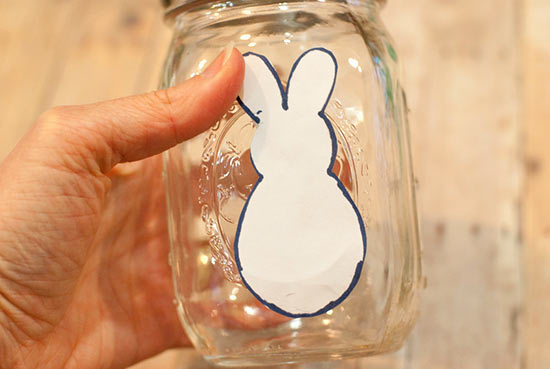
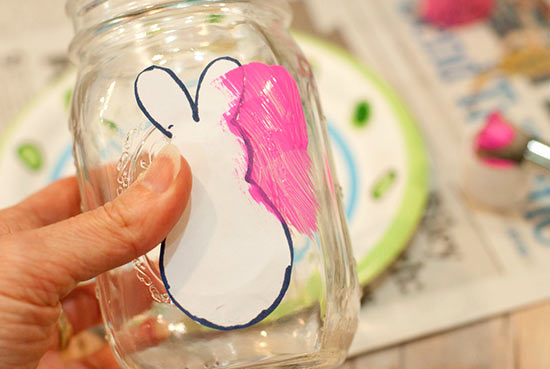
1. Cut out the bunny from the template and add tape to the back of the template. Secure it to the jar as shown.
Easter_Bunny_Treat_Mason_Jars2
2. Paint the first coat, taking care not to get paint under the template.
Easter_Bunny_Treat_Mason_Jars3
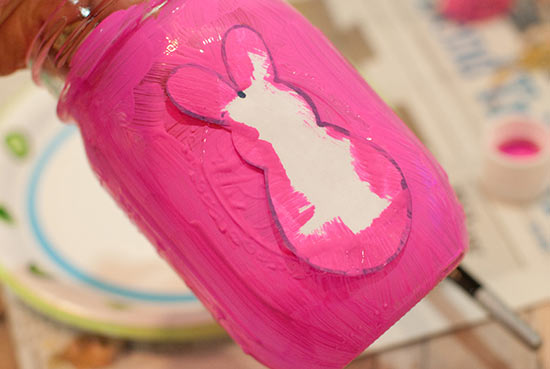
3. After the paint dries, paint another coat. Allow to dry again.
Easter_Bunny_Treat_Mason_Jars4
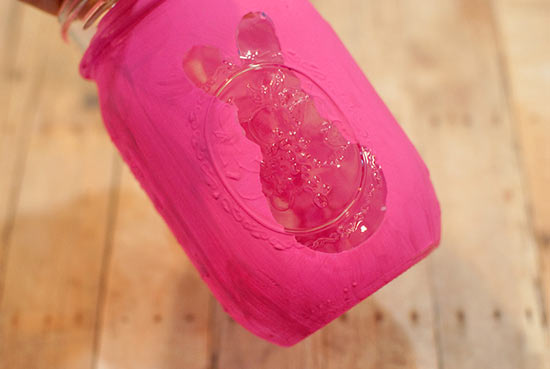
4. Remove the paper template.
Easter_Bunny_Treat_Mason_Jars5
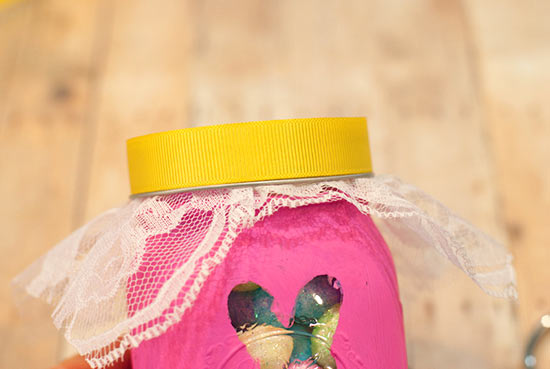
5. Cut the lace to fit under the lid as shown. Warm up your hot glue gun.
Easter_Bunny_Treat_Mason_Jars6
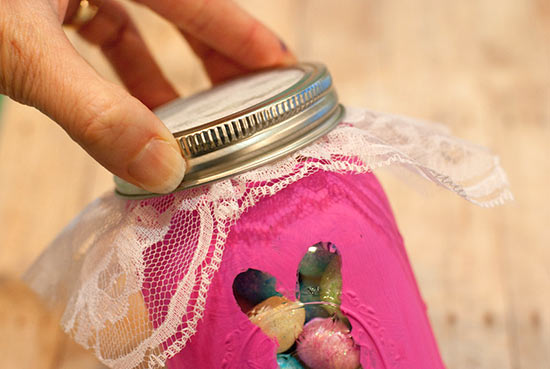
6. Glue a strip of ribbon around the edge of the lid to finish the bunny jar.
Easter_Bunny_Treat_Mason_Jars7

Continue Reading

DIY Troll Hair Headband

DIY_Troll_Hair_Headband_main
Those cute, quirky trolls are all the rage because of their adorable antics, and this troll headband dress-up prop will allow your little one to magically transform into a troll herself! These could also be great fun for a party favors for a troll-themed birthday party.

Difficulty level: Easy
Time to complete: 30 minutes
Age range: 10+

Things you’ll need:
White plastic headband
Purple tulle netting
Two colors of 5/8″ wide purple ribbon
Narrow pink ribbon
Hot glue gun
Glue sticks
Scissors
Button
Needle with large eye, and perle cotton thread

DIY_Troll_Hair_Headband1

Things to do:
1. Warm up your hot glue gun. Glue the end of the ribbon to the back of the headband, and start wrapping as shown, keeping the ribbon on the spool.
DIY_Troll_Hair_Headband2
2. Continue wrapping as shown. If you’d like more detail, please follow the directions in this project.
DIY_Troll_Hair_Headband3
3. Cut 10 pieces of the tulle netting to 18″ long each.
DIY_Troll_Hair_Headband4
4. Tie the first piece of tulle onto the center of the headband. Make sure both ends are even after tying.
DIY_Troll_Hair_Headband5
5. Repeat for the remaining pieces of tulle, making sure the “hair” is all centered.
DIY_Troll_Hair_Headband6
6. Cut a piece of narrow ribbon to 18″ and tie about 3″ down from the ends of the tulle.
DIY_Troll_Hair_Headband7
7. Cut a piece of lavender ribbon to 7-9 inches long. Fold it as shown.
DIY_Troll_Hair_Headband8
8. Using your needle and thread, tie the center as shown.
DIY_Troll_Hair_Headband9
9. Glue a button to the center of the bow.
DIY_Troll_Hair_Headband10
10. Glue the bow to the center of the headband.
DIY_Troll_Hair_Headband11

Continue Reading
Change Your Country
Please select your country, this will change the site to your country's currency:

Cancel