Skip to search Skip to navigation menu Skip to main content Selecting option will reload page

Category: Kid's Arts and Crafts

Heart String Art Tutorial

Heart_String_Art_Tutorial
String art is a fun project you and your kids can do together, and it’s a perfect gift for a parent, grandparent or teacher, or to keep and hang on your wall.

Once you have the basics down you can use all sorts of shapes in the center, from the outline of your state to your child’s initial letter or the first letter of your last name. Keep the string winding in a regular pattern or go wild with multiple colors wrapped haphazardly.

Difficulty level: Intermediate
Time to complete: 1 to 2 hours
Age range: 12+

Things you’ll need:
Round wood slice
White distressed nails
Cotton embroidery thread
Scissors
Tack hammer
Pencil

Things to do:
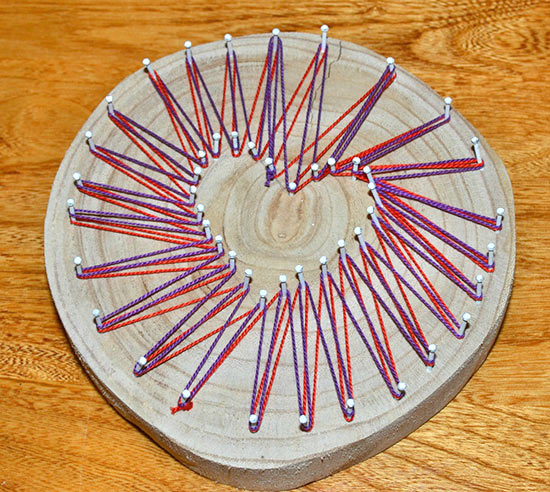
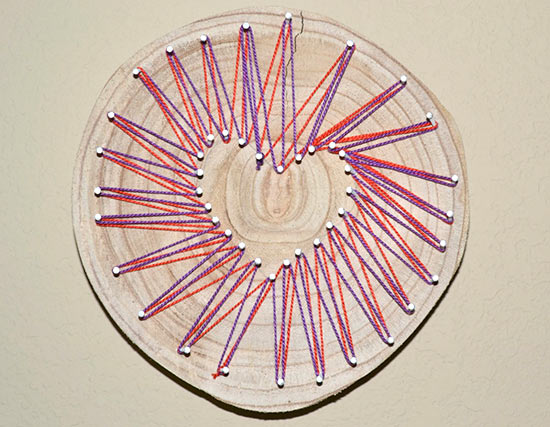
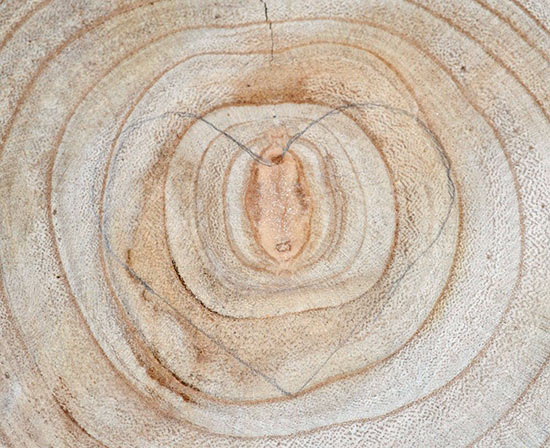
1. Decide which side of the birch slice is the front and which part you want to be the top. Use something heart-shaped as a guide or freehand draw a heart shape at the center of the wood slice.
Heart_String_Art_Tutorial1
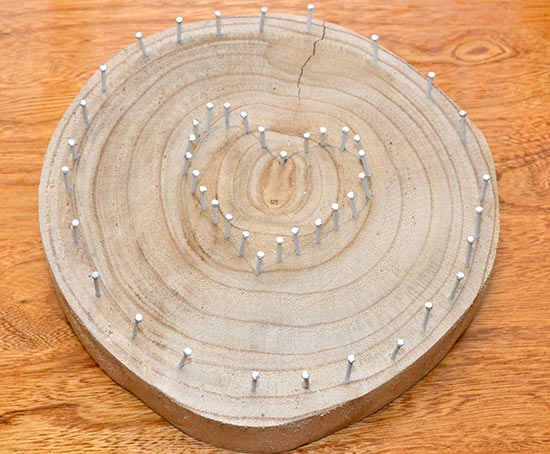
2. Beginning at the bottom of the heart, hammer in nails around the heart shape. There are 48 nails in a pack, so I used 24 on the heart and 24 around the outside edge, but you can space them however you like.
Heart_String_Art_Tutorial2
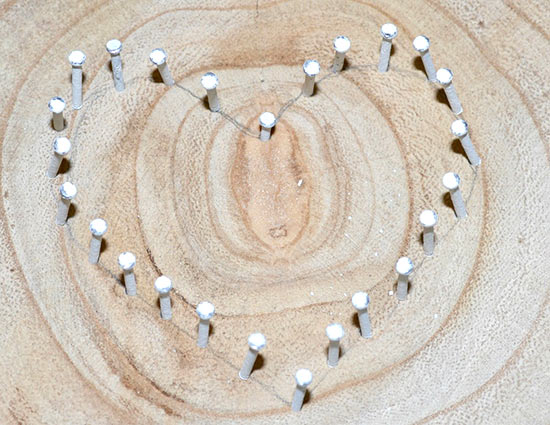
These nails have a portion toward the tip that looks like a screw; that’s a good guide to how deep your nails should be. You can mark out in advance where you want each nail to go or just eyeball it like I did. Banging on the nails will cause some of the paint to chip off, which gives them an even more weathered look. The nails don’t have to be perfectly straight.
3. Hammer the remaining nails around the outside of the birch slice. I started by putting them in the positions of a clock face, then filled in between them until I was out of nails.
Heart_String_Art_Tutorial3
4. Choose the thread you want to use and tie it to one of the nails.
Heart_String_Art_Tutorial4
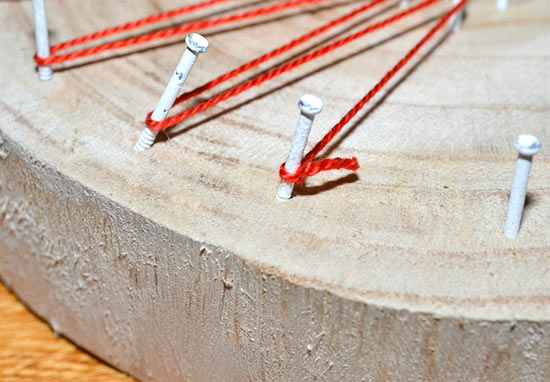
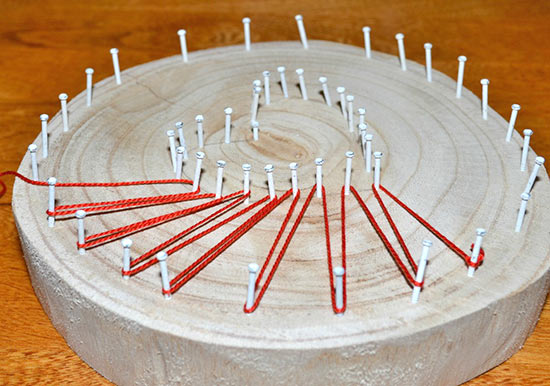
5. Begin wrapping the thread as you like, first around a nail on the outside, then a corresponding nail on the inside. Because I had the same number of nails in each section, I could wrap around each nail once all the way around. You may need to do something different if you have a different number of nails or if you want a different look.
Heart_String_Art_Tutorial5
6. When you’ve made it all the way around, cut the thread, leaving a couple inches of tail. Tie the thread to the nail, then tie the thread ends together and trim.
Heart_String_Art_Tutorial6
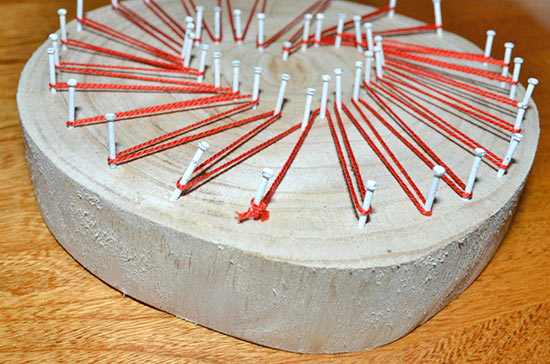
7. Just for fun I added a second color, starting at a different place and from the inside instead of the outside. You can continue to add colors, work in different directions, wrap double instead of single, whatever you like. It’s hard to decide when to stop!
Heart_String_Art_Tutorial7

Continue Reading

DIY Dog and Cat-Themed Photo Booth Props

Dog_Cat_Photo_Booth_Props_catears
Whether you’re planning a birthday party for kids, a fun wedding or just a silly afternoon in the backyard, these easy to make animal photo booth props are a perfect thing to make and use.

Kids can help with the painting and advise on colors, but don’t let younger kids use hot glue without close supervision.

Difficulty level: Beginner
Time to complete: 30 minutes to an hour, plus drying time
Age range: 10+

Things you’ll need:
Unfinished wood dog mask
Unfinished wood cat mask
Paint in colors of your choice; we used purple, brown and black
Paintbrushes
Assorted felt
Headbands
Hot glue gun
Hot glue sticks

Things to do:
1. I let my daughter paint the cat mask, and she chose solid purple. Paint and allow to dry.
Dog_Cat_Photo_Booth_Props1
2. For the dog mask, I went with classic brown. Paint and allow to dry.
Dog_Cat_Photo_Booth_Props2
3. If you want to add more details, do so now. I opted for painting my dog’s ears black and adding a few dots to the face. You could also add whiskers or other embellishments as you like.
Dog_Cat_Photo_Booth_Props3
4. For the cat ears, cut two pieces of felt the color you want for the outside of the ear (I went with light brown) in a triangle shape with an inch or so tab at the bottom for gluing.
Dog_Cat_Photo_Booth_Props4
5. Cut two smaller pink (or color of your choice) triangles to make the inside of the ear. Use hot glue to attach the inner ear to the outer ear.
Dog_Cat_Photo_Booth_Props5
6. Use hot glue to attach the ear to the headband. Fold the felt at the bottom of the ear around the headband and glue securely.
Dog_Cat_Photo_Booth_Props6
7. Repeat with the second ear.
Dog_Cat_Photo_Booth_Props7
8. For the dog ears, I cut elongated ovals, again with a flat tab at the top, out of dark brown felt.
Dog_Cat_Photo_Booth_Props8
9. Use hot glue to attach the ears to the headband, this time rolling the top of the ear around the headband sideways so the ears hand down.
Dog_Cat_Photo_Booth_Props9
10. Allow glue to dry.
Dog_Cat_Photo_Booth_Props10
11. Photo shoot time!
Dog_Cat_Photo_Booth_Props_dogears
Dog_Cat_Photo_Booth_Props_catmask
Dog_Cat_Photo_Booth_Props_dogmask

Continue Reading
Change Your Country
Please select your country, this will change the site to your country's currency:

Cancel