Skip to search Skip to navigation menu Skip to main content Selecting option will reload page

Category: Kid's Arts and Crafts

DIY St. Patrick’s Day Hair Clip Tutorial

felt_four_leaf_clover_hairclip_main
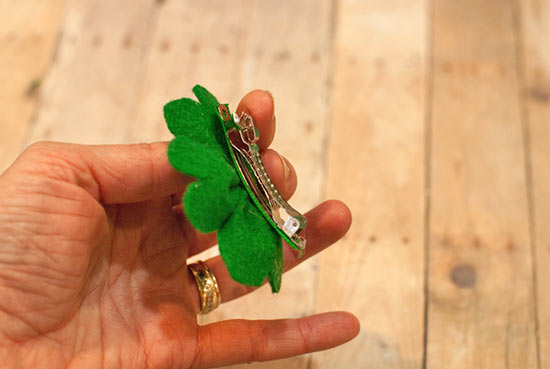
Show your Irish side! This four-leaf clover is a snap to make, using basic sewing skills. If you’d rather not wear this as a barrette, you may add the clover to a pin back.

Difficulty level: Intermediate
Time to complete: 30 minutes
Age range: 10+

Things you’ll need:
Green felt sheets
Green grosgrain ribbon
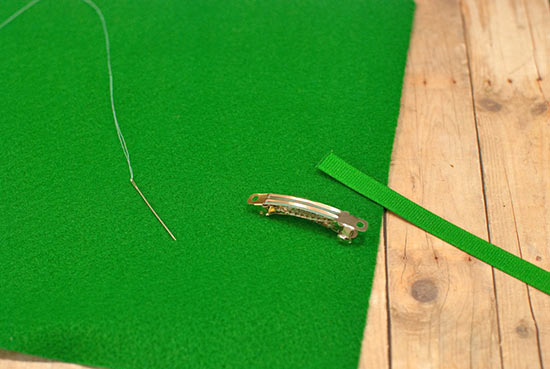
Barrette
Hot glue gun
Glue sticks
Scissors
Card stock
Pencil

felt_four_leaf_clover_hairclip1

Things to do:
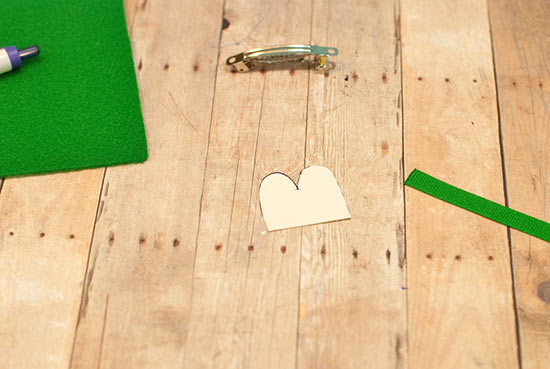
1. Draw a 2-3 inch wide piece of card stock into the shape of an M, as shown. Cut it out.
felt_four_leaf_clover_hairclip2
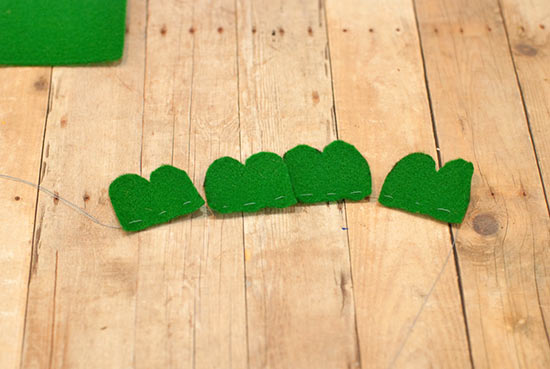
2. Trace this four times onto a piece of felt.
felt_four_leaf_clover_hairclip3
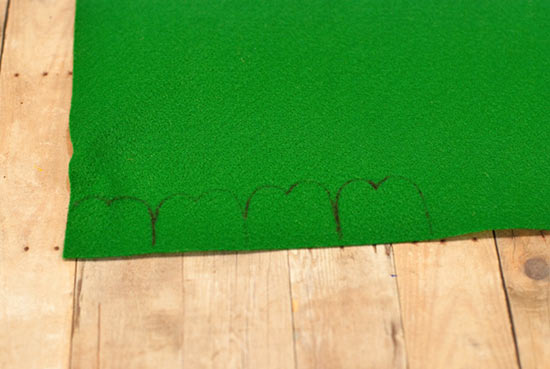
3. Cut out the four pieces of felt. Warm up your hot glue gun.
felt_four_leaf_clover_hairclip4a
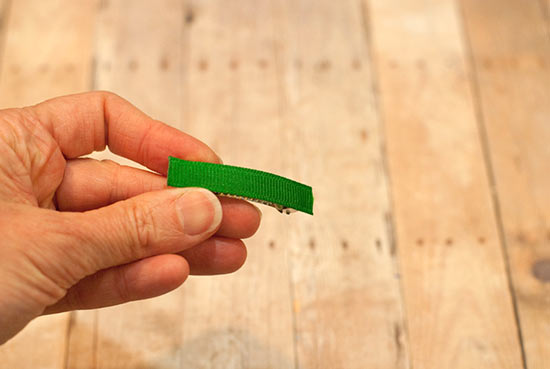
4. Glue a piece of ribbon to the barrette. If using a pin back, this step is unnecessary.
felt_four_leaf_clover_hairclip4
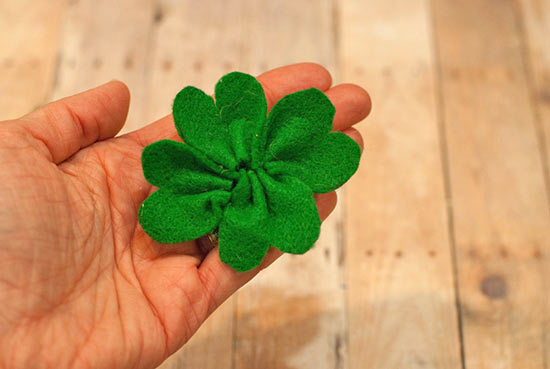
5. Thread your needle, knot the end, and use a running stitch along the bottom of the first shape.
felt_four_leaf_clover_hairclip6
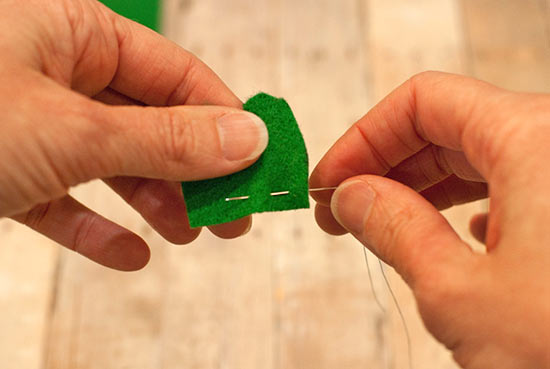
6. Add the other three pieces onto the same piece of thread, not cutting it between.
felt_four_leaf_clover_hairclip7
7. Pull the thread to gather the pieces of felt into a circle.
felt_four_leaf_clover_hairclip8
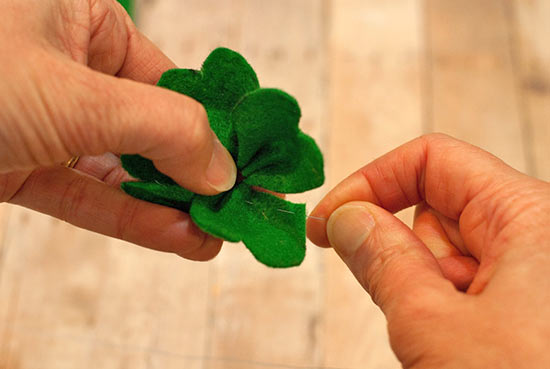
8. Sew the first piece to the last, resulting in a clover shape.
felt_four_leaf_clover_hairclip9
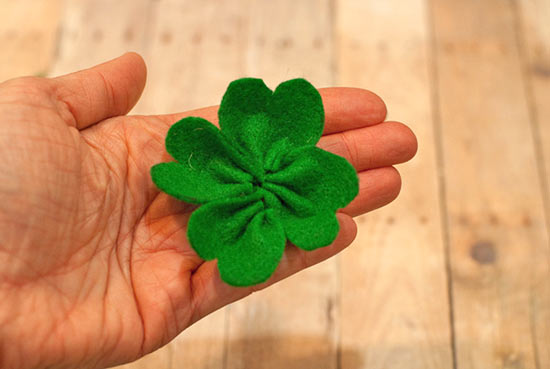
9. Glue the barrette to the back of your 4-leaf clover.
felt_four_leaf_clover_hairclip10

Continue Reading

Kid Approved Ice Cream Cones Tutorial

Ice_Cream_Cones_Tutorial_main
Whether or not it’s summer, ice cream is always a treat! Craft adorable ice cream cone treats that will never melt. These can be used as package toppers, kitschy lapel pins, or string a bunch together to create a mouth watering bunting for your next party.

Difficulty level: Easy
Time to complete: 30 minutes
Age range: 8+

Things you’ll need:
Burlap sheet
Large craft pom poms
Small craft pomp poms
Hot glue gun
Glue sticks
Scissors
Ruler
A plate
Pencil
Needle with a large eye, and thread *optional
Rotary cutter *optional

Ice_Cream_Cones_Tutorial1

Things to do:
1. Cut 4-inch square pieces of burlap for cones.
Ice_Cream_Cones_Tutorial2
2. Either trace the curve of a plate onto the corner of the burlap and cut with scissors, or use a rotary cutter on a protected surface. Warm up your hot glue gun, unless you plan to sew your cones.
Ice_Cream_Cones_Tutorial3
3. Fold the cone as shown, and either glue or sew into place.
Ice_Cream_Cones_Tutorial4
4. Fill the cone with burlap scraps, and glue a large pom pom to the top.
Ice_Cream_Cones_Tutorial5
5. Add a small pom pom for a cherry on top!
Ice_Cream_Cones_Tutorial6

Continue Reading
Change Your Country
Please select your country, this will change the site to your country's currency:

Cancel