Have you ever looked at a lovely felt handbag and wondered how to felt? Anyone who’s ever machine washed a 100% wool sweater, and had it turn into a stiff, shrunken version of its former self, already knows the process. Animal fibers are coated with keratin, a protein, which forms a layer of scales on the surface of each strand. When an animal fiber, like sheep’s wool, is exposed to heat, water and friction, the scales open and grab onto each other. As it dries, the scales close and lock the tangles in place as felt. The home crafter makes felt in three ways: using a washing machine, using your hands, or using a needle.
Felting from hand-knitting requires the project to be worked larger than the finished size to allow for shrinkage during the felting process. In Leigh Radford’s book, Alterknits Felt: Imaginative Projects for Knitting and Felting, she advises estimating shrinkage for hand-knits at approximately 85% of the original width and 65% of the original length. For thrift-store knits, the easiest thing to do is to felt the item first, then cut the pattern from the felted material.
To make felt in your washing machine, use a detergent made for wool, set your washer to the hottest temperature, the fastest agitation, and the lowest water level. Add your project to the wash cycle, stopping it periodically to check the progress. Keep restarting the wash cycle until the texture is the way you want it. Then take it out and rinse it in the sink with cool water. You can roll up the piece in a towel to squeeze out excess water and then reshape and air-dry.
Felt can also be created by hand, but it’s time-consuming and labor-intensive. Fill a sink or tub with hot water and add some wool detergent. Use rubber gloves to make it easier to work with the hot water. Wet the project and rub it against something textured, like a washboard. Keep shifting, scrunching and rubbing your piece until it felts; some projects take over an hour to felt this way. When you have the texture you want, rinse and air dry in the same manner as for the washing machine felting.
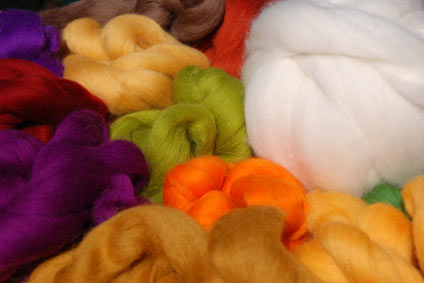
Needle-felting is a method by which a special needle is used to felt dyed wool roving fibers, which are formed into sculpture or flat designs. You’ll need special felting needles, available in varying gauges, dyed wool roving, and a foam felting block. You’ll have to protect your work surface as you use hot soapy water to dampen the wool roving using a sponge or your fingers. As you poke the wet wool roving with the needle, it will begin to felt, sticking to itself, or to another piece of flat wool material, depending on the kind of project you’re making.
Making your own felt is a satisfying, easy to learn, and highly addictive craft. Felted fabric can be used to make anything from toys, to clothing, to home decor.
