Skip to search Skip to navigation menu Skip to main content Selecting option will reload page

Category: General Crafts

Learn to Make Hair Bows – The Korker Bow with Grosgrain Ribbon

korker_bows
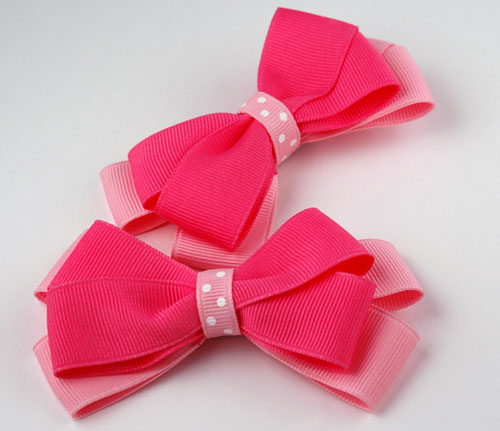
You can make hair bows using headbands, alligator clips, and even elastic bands to create a ponytail holder! You can make hair bows for cheerleaders. Cheerleaders love them because they add a little more bounce to their already spirited routine. You can make hair bows with korker ribbons for small children and even babies. Korker bows add a little flair and extra cuteness to those already cheek pinching outfits. Learning how to make bows with korker ribbons can quickly become an addicting new hobby. Once you have the routine down, you can make hair bows your way– customizing and perfecting!

Things you need:
30-50 2-1/2″ Korker Ribbons
Needle and Thread
Clear Nail Polish or Lighter
Alligator ClipHeadband – Elastic Band – Barrette (choose only one for your hair bow)

Things you do:
1. To make hair bows using korker ribbon, you will first need to refer to our previous blog with step-by-step instructions on how to make korker ribbons.
2. Once you have created enough korker ribbons you are ready to make hair bows! First, you will need to cut your korker ribbons into 2-1/2″ (this will depend on how big you want your bow) pieces. You will need between 30 and 50 pieces (this will also depend on full you would like your bow) for a bow. Be sure to add a little clear nail polish or burn the ends with a lighter so that you can prevent fraying.
3. Thread your needle and begin threading on the korker ribbons. You can also try laying your korker ribbons into a pile over the center of the thread and tie a tight knot over the korker ribbons. Threading the korker ribbons will ensure that they stay put.
4. Continue threading your ribbons onto the thread until you are satisfied. Once your are finished threading the ribbons on, tie the thread off.
5. Finally, cover the metal of your alligator clip with a matching ribbon. Add the ribbon to your alligator clip with just a dab of hot glue. Then add your alligator clip to the back of the korker bow using a little bit of hot glue. If are wanting to add your korker bow to a headband, just simply glue the bow to the band or you can sew the korker bow to the headband. To make a ponytail holder with your korker bow, just thread the elastic band before you start threading the korker ribbons on. If you went with the “pile and knot” method, just string your thread through the elastic band before you lay down your korker ribbons.

Continue Reading

Learn to Make Hair Bows – The Basic Hair Bow

basic_hair_bow
Learning to make hair bows can be fun hobby, and is a great way to complete and customize outfits. You can make hair bows to match clothing, and suit special occasions. You could even make hair bows to match for sisters, cousins, friends, and teammates. You can use ribbon or fabric to make hair bows, and add any embellishments you like.
The directions below create a basic bow. once you have the technique down you can make hair bows to suit your needs.

Things you need:
1 yard – 1″ Ribbon
1 – 50mm Metal Hair Barrette
26 gauge wire or Thread
Fabric Glue or Hot Glue
Scissors
Tape measure
Fray Check or a Lighter

Things to do:
1. Measure and cut a length of ribbon about 24″ long.
2. Loop about 4″ of the ribbon down, leaving the rest as a tail in the front. Bring the tail up and behind while holding the first loop, then lay it down to make a second loop.
3. Bring the tail up again, so that you have two loops and a cut end of ribbon sticking out on each end. Use your fingers to pinch across the middle and form neat folds. You may also want to consider using an alligator clip to hold the formed loops in place. This will help in the next step as you tie the wire or thread around the ribbon.
4. Wrap the craft wire, or thread around the center to secure the loops, keeping the folds tight. Pull and position the loops to make them even. Cut the free ends to be even as well, and then seal them with the lighter or fray check.
5. Use wire to secure the bow to the barrette.
6. Cut another piece of ribbon about 8″ long and tie a neat knot in the center. Using the hot glue gun or fabric glue, put a small spot of glue in the center of the front of the bow. Place the knot onto the glue. Wrap one end of the knotted ribbon around to the back. Glue it down to the barrette and trim.
7. Repeat with the other end of the knotted ribbon. Heat seal these cut ends, and you are finished!

basic_hair_bow2
Project Ideas:
You can make hair bows from strips of fabric to match a special outfit, and top with a matching button. You may also want to stack several bows on top of one another before finishing off for an extra special look. Consider using themed buttons, or a button-maker kit to create custom bows for different events or holidays.

Project Notes:
You will need to select ribbon that will hold its shape well for this project. Grosgrain ribbon is one of the best kinds to use, and it is available in different widths.
You will also need to choose the kind of clip to use. There are alligator clips, barrettes and even combs which are available in different sizes.

Choose supplies based on hair type and the size of the bow you want to make. You may have to experiment to determine which kinds and sizes you like best.
Very small (under 2″) bows are not acceptable for small children, as they could pose a choking hazard.

You will also need a heat sealing method. The cut ends of ribbon need to be sealed to prevent fraying. There are three different ways of doing this. You can use Fray Check, heat the ends with a match or lighter, or heat the ends with a wood burning tool. The heat melts the ends of the ribbon so that they will not ravel. Use extra care when using the heat sealing methods so that you do not burn the ribbon or yourself!

Learn_to_Make_Hair_Bows_Basic_Hair_Bow

Continue Reading
Change Your Country
Please select your country, this will change the site to your country's currency:

Cancel