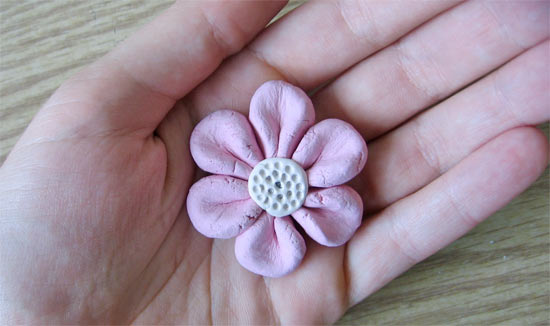
Adding pigment to air-dry clay provides your with so much more creative flexibility. If you are pressed for time and do not want to wait for clay to dry before painting it, add pigment to it beforehand and you will not have to! I have used this technique for arts and craft workshops with kids because they can create colorful projects in a snap, and do not have to wait for the firing process of traditional clay. In my demo I created a simple flower pin, but the possibilities with Pigmented Clay are practically endless!
Difficulty level: Easy
Age range: 5+
Time required: 15 minutes
Things you need:
DIY air-dry clay
Acrylic paint
Pin back
Hot glue gun and glue sticks
Pen (*optional-to add texture to your flower center)
Pigmented Air-Dry Clay:
1. Roll a ball of air-dry clay about the size of your fist and press an indentation with your finger.
2. Squirt a quarter-sized dollop of paint into the indentation.
3. Work the paint into your clay until the two are mixed well.
4. Add more paint and repeat step 4 for a fuller color.
Flower Pin:
1. Roll 6 tiny balls.
2. Lightly press on each ball so it flattens out a little bit.
3. To make the flower petals, pinch one side of the little clay discs and arrange next to one another in a circle pattern.
4. Place one more ball of clay in the center of your flower to hold all the petals together.
5. Once the clay flower is dry, glue a pin back to the back of your flower and wear!