
Search results
80 results found.
80 results found.
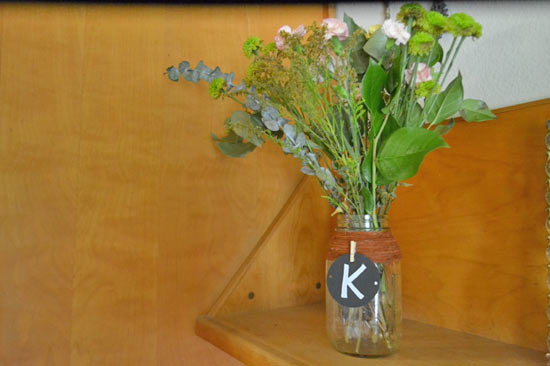
This DIY will teach you how to transform a plain mason jar into a trendy vase in just a few simple steps. Make a few and give them away with bouquets to friends, or use them to decorate your house. However you choose to display them, they are sure to be a fun way to make a rustic style statement.
Time to complete: 30 Minutes
Age range: 12 and Up * Younger ages may need assistance.
Difficulty level: Beginner
Thing you’ll need:
Suede cord
Scissors
Hot glue gun
Glue sticks
Chalkboard tags
Chalk Ink marker
Mini clothespins
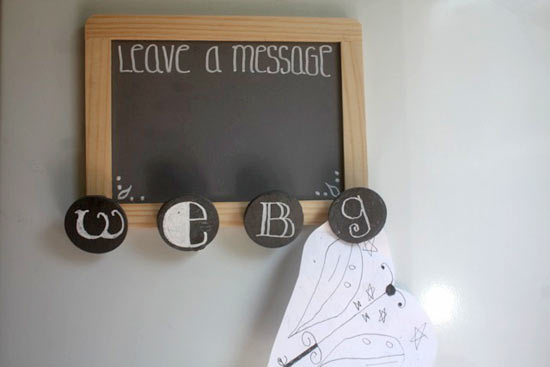
The older my kids get, the more to-ing and fro-ing they seem to do and the more it has become necessary for a place to leave messages for one another! School notes, love notes, I’m going to be at so-and-sos house notes, we have been in serious need of a place for it all to land! So this is absolutely the perfect project for me, and for a lot of mom’s out there I bet!
Difficulty level: Moderate
Time required: 30 minutes plus dry time
Things you’ll need:
Small chalkboard
Chalkboard clips
Craft glue
Chalk Ink Pen
Magnets
Things to do:
1. Using your chalkboard ink pen, write the first initial of each family members name on a chalkboard pen.


2. Write a message in chalk ink on the board, leaving room for chalk messages of course.

3. Glue magnets onto the back side of the chalkboard to hang it from a fridge or ribbon to hang it on a nail.

4. Attach each of the clips to the bottom edge of the chalkboard with glue. Allow the glue to dry completely before hanging and using.
