Skip to search Skip to navigation menu Skip to main content Selecting option will reload page

Congratulate the Graduate With These Fun and Easy Crafts

graduation_crafts
Whether you’re planning a full-tilt party or will honor the graduate with a smaller-scaled bash, handcrafted decorations will add a special touch to this milestone celebration. The best part is, you won’t need an art or decorating degree to make these simple crafts.

Hat’s Off to the Graduate Mortarboard Banner

Things to you need:
6 x 6 or 8 x 8 cardboard squares
Apple Barrel Acrylic Paint (in school’s colors)
2″ Poly Foam Sponge Brush
Ribbon
Paper fasteners
Nail, awl, or other device for poking small holes through cardboard

Things to do:
1. Paint cardboard squares. While the squares are drying, make tassels by wrapping ribbon loosely around a book (or cardboard) to desired fullness. Remember when making your tassels, that you can control the size by the size of the object you use to wrap your ribbon or twine around and also how many times you wrap it around the object. Just keep in mind, if you are making smaller tassels, you will want to stick with a thinner ribbon or twine and larger tassels will require thicker ribbon or twine. When you have reached the desired fullness, cut your ribbon at the same end as the end that you started wrapping. Cut a piece of ribbon long enough to wrap around your bundle of ribbon. Slip the ribbon off the book and hold together so that it will not unravel. Wrap the length of ribbon around the “top” portion of your bundle of ribbon, leaving an inch at the top. Tie and knot, then take your scissors and cut the bottom looped ends of your tassel straight across. This will free them at the bottom nod and your tassel will be complete.
2. Punch two holes at the center of each cardboard square, and at opposite corners. To affix tassel, insert one tail of the ribbon into each hole at the center, and tie a knot on the reverse side of the cardboard.
3. Use paper fasteners to adjoin the corners of the cardboard squares. Drape across a doorway, or festoon the cake or gift table.

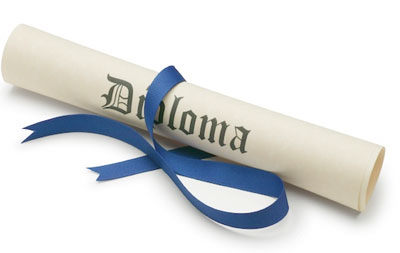
Handmade Diploma Decor

Things you need:
Ribbon
Paper towel tubes
Parchment colored construction paper
Aleene’s Craft & School Glue

If only the real thing was this easy to have in hand! To make this fun and decorative accent, simply glue parchment-colored construction paper to the outside of paper towel tubes and adorn with a coordinating ribbon. Viola!

While you’re in a crafty frame of mind, you’ll probably want to start planning your menu. What could be more fun than a mortarboard cake, or one dressed up with miniature graduate figurines? With a little creativity, you’ll plan a milestone celebration that your special graduate will remember forever.
Continue Reading

DIY Quick and Simple Wine Charms

wine_charmsWriting names on cups with a Sharpie may be an acceptable method for keeping track of drinks at a kid’s birthday party, but an adult gathering calls for a more refined solution. Wine charms serve as an elegant glass identifier, and will bring a touch of bling to any tabletop. These quick and simple wine charms also make fun and creative party favors, so your guests will always have a reminder of their wonderful evening.

Things you need:
Eye Pins
Bead Kit
Long-nose Pliers
1/2″ Dowel Rod (or similar round object)
Wire Cutter
Charms
Jump Rings

Things to do:
1. Wrap your wires individually around the dowel rod (or similar sized item) to create the loop which will fit around the stem of a wine glass. Take your long nose pliers and bend the end of the wire without a loop about 1/8″ to create a hook to fit through the eye, creating a latch so that your charms will stay in place.
2. Thread beads onto wire to create a pattern, adding the charm at the midpoint. You can also make fancier versions, by adding a second eye pin, creating a long dangling piece to your loop. Just simply slightly open the eye of your second eye pin, slip on a charm and close the loop back. You can then add your beads to the “stem” of the eye pin, cut about 1/4″ above the last bead and create loop to secure around your first eye pin.

To create a cohesive tabletop, add charms to water goblets and make matching napkin rings using longer lengths of heavier gauge jewelry wire.

In addition to dressing up your favorite vintage, wine charms also serve as make outstanding hostess gifts. To create, simply cut wire to a pleasing dangle length,” thread on beads and charms, and fasten with a hook and loop closure.
wine_charms2

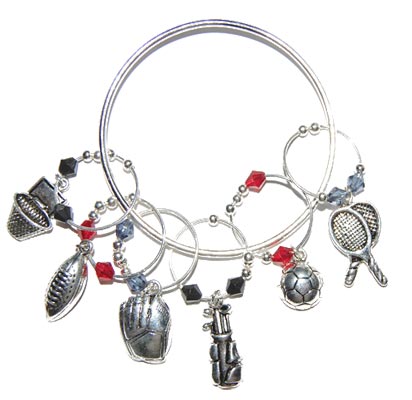
For added fun, use personalized charms that suit your guests’ interests, such as:

Evening Bag Charms: Perfect for the shopaholic or purse addict
Football Charms: Ideal for the weekend warrior or armchair quarterback
Soccer Ball Charms: For the Soccer Mom”, of course!

You could also use personalized charms for special events, such as:

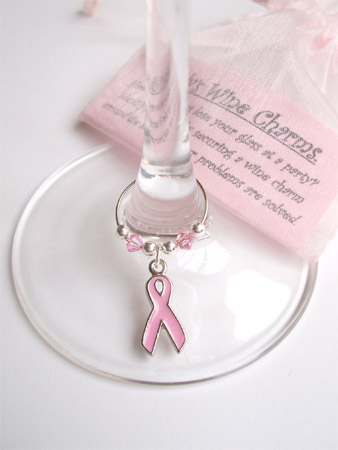
Pink Awareness Ribbon Charms: For specific charity events or in honor of someone special
Silver Double Heart Charms or Engagement Ring Charms: Mark your wine glass for your wedding reception or bridal shower
New Baby Charms: Welcome baby in style!

Enjoy sharing these charming crafts with family and friends, and creating memories that will last a lifetime.

Photo Credits: Wendy’s Wine Charms and Unknown

Continue Reading
Change Your Country
Please select your country, this will change the site to your country's currency:

Cancel