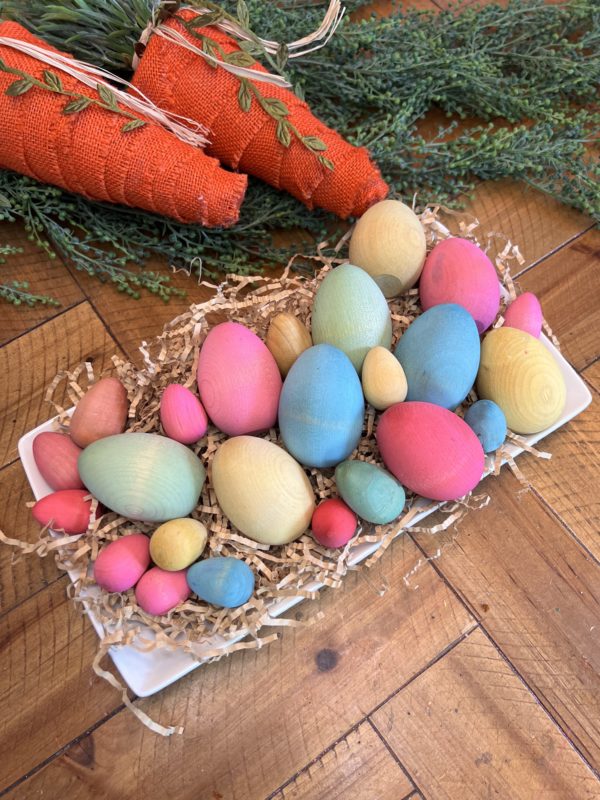
These vibrantly Dyed wooden Easter eggs are an easy DIY idea for kids. An educational toy that provides hours of play based learning fun! The best part is..these eggs will never go rotten.

Difficulty level: Beginner
Time to complete:6-8 hours
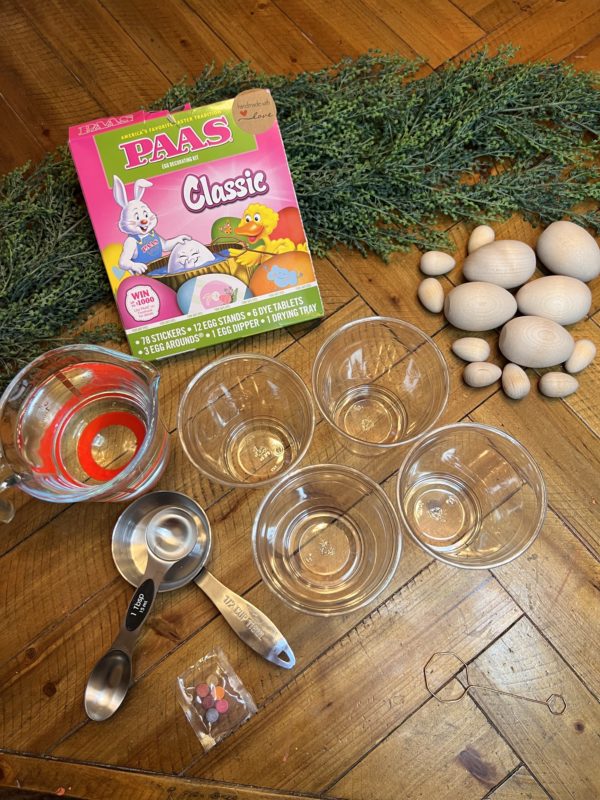
Materials Needed:
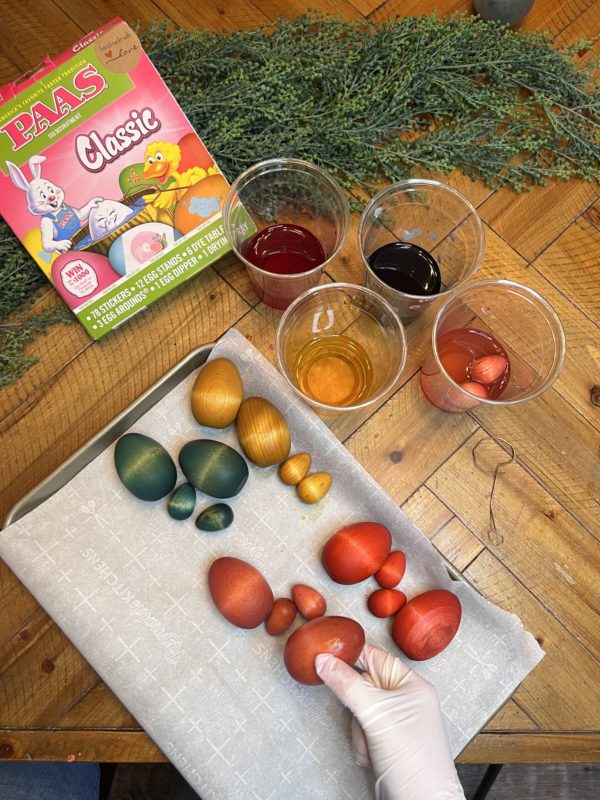
Assorted Size Unfinished Wood Eggs Set
Classic PAAS Egg Dye Kit
Cups
Water
Vinegar
Measuring cups
Parchment Paper
Cookie tray
Let’s grab your supplies, channel your inner artist, and let get crafting!

Step 1:
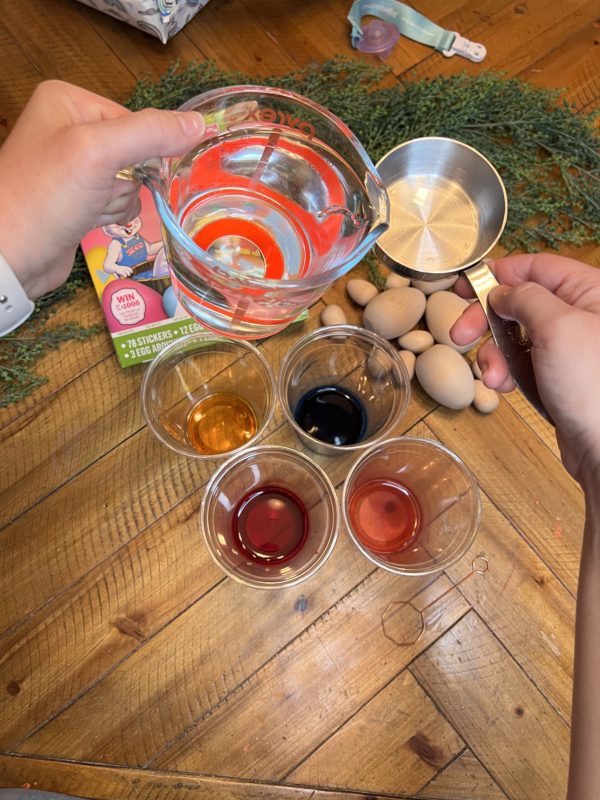
First you will follow the directions on the PAAS Classic egg dye kit.
*Drop a dye tablet in each cup
*Mix in 1 Teaspoon of Vinegar
*Wait for the tablets to dissolve
*Pour in 1/2 cup of warm water
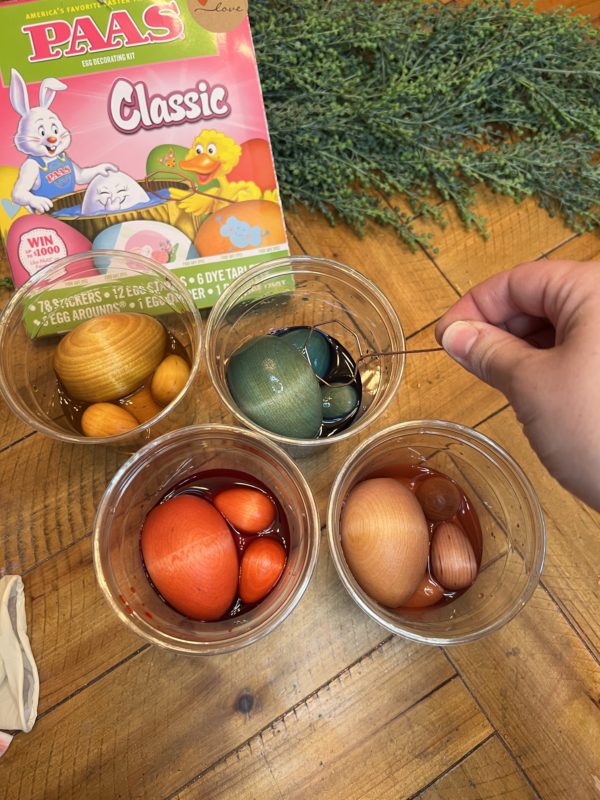
Step 2:
Once all colors are ready inside each cup, you will carefully drop the wooden eggs inside each cup. I was able to fit 2 big eggs and 2 smaller eggs in each.
Let them sit for about 3 hours. During this time, you will periodically turn the eggs over to make sure all areas are covered well and soak up the color.
Step 3:
Line a cookie sheet with parchment paper and place the eggs on to allow them to dry! Don’t worry about how dark they are…. once they dry, they become a beautiful vibrant color.
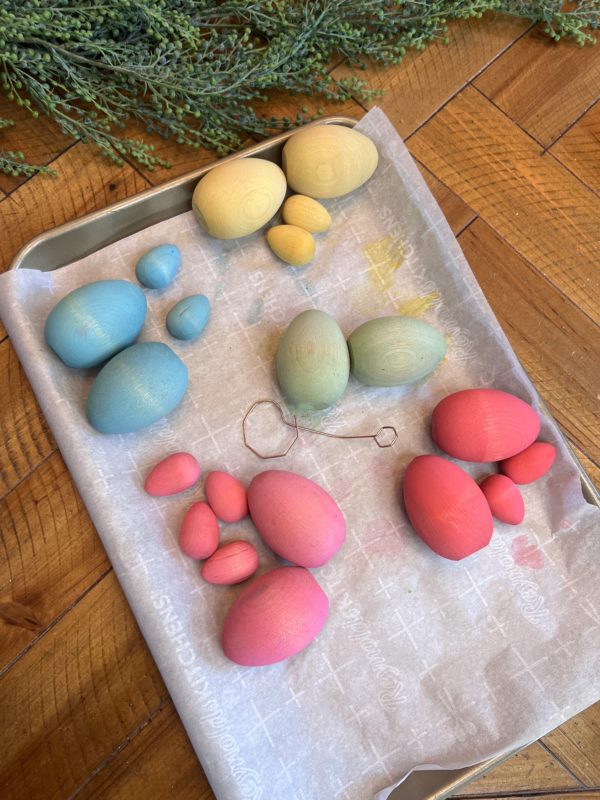
Let them dye completely – This may take about 4-6 hours.