
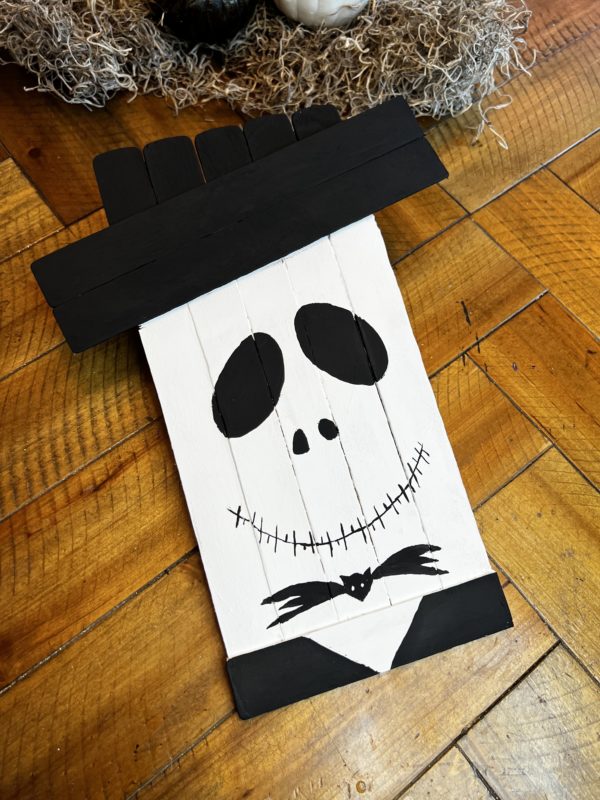
This time of the year, there is just one skeleton that makes it feel like Halloween – Jack from Nightmare before Christmas! Such a easy craft for all ages. This can be used as a door hanger, shelf sitter, added to a wreath or swag – Whatever your heart desires!
Difficulty level:Beginner
Time to complete: 25 minutes
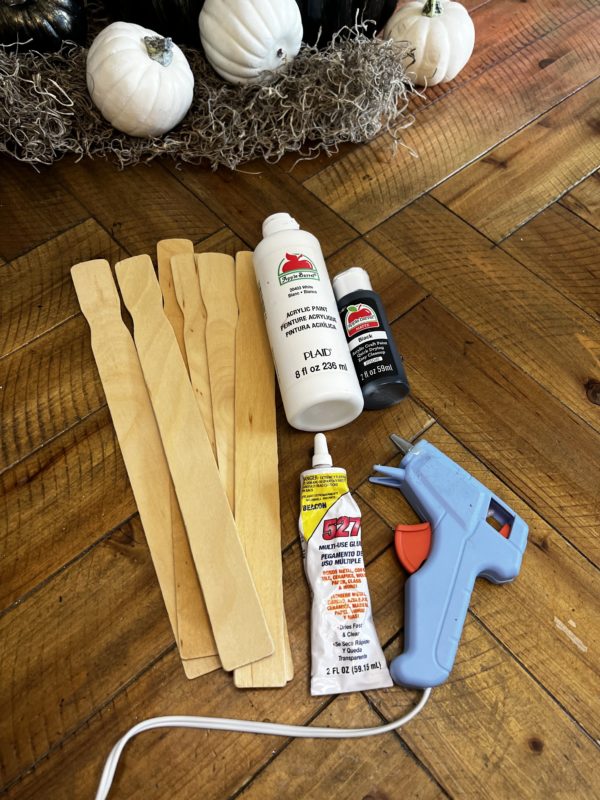
Needed supplies:
- 1 packages of Unfinished Wood Paint Stir Fan Sticks
- White Apple Barrel Acrylic Paint
- Black Apple Barrel Acrylic Paint
- Mini Trigger-Fed Hot Glue Gun and Glue Sticks
- Paint brushes
- Multi surface glue
- Pencil
- X-Acto Knife
Shop the needed material here:
https://factorydirectcraft.com/catalog/advanced_search_result.php?keywords=FBjckskltnstk
Let’s grab your supplies, channel your inner artist, and let get crafting!
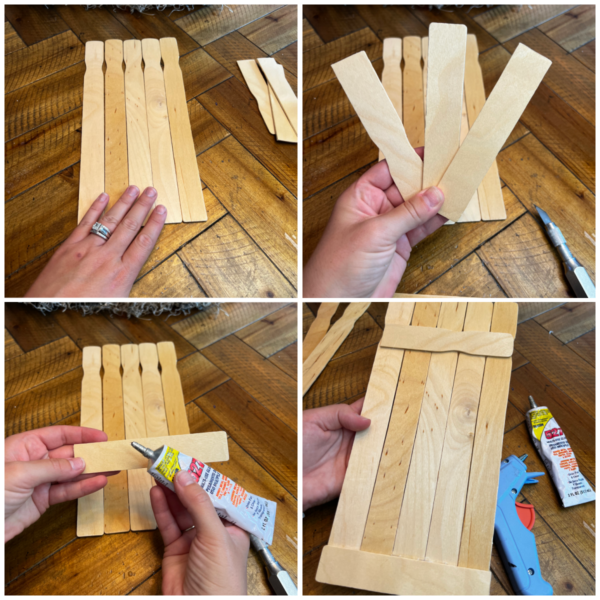
Step 1: Build the frame
Start by arranging five paint sticks in a straight line, ensuring they are aligned.
Next, take two stir sticks that have been cut to match the width of the paint sticks and position them horizontally across the row.
Apply a line of multi-purpose glue along the center of the horizontal sticks, followed by quickly encircling it with a hot glue gun. This will securely bond and create a great connection. I did this on the top and bottom.
Once step one is dry, flip over. This side will be the front on the Skeleton face.
You will take another stir stick and cut to match the bottom width of the frame, positioning it horizontally across the row.
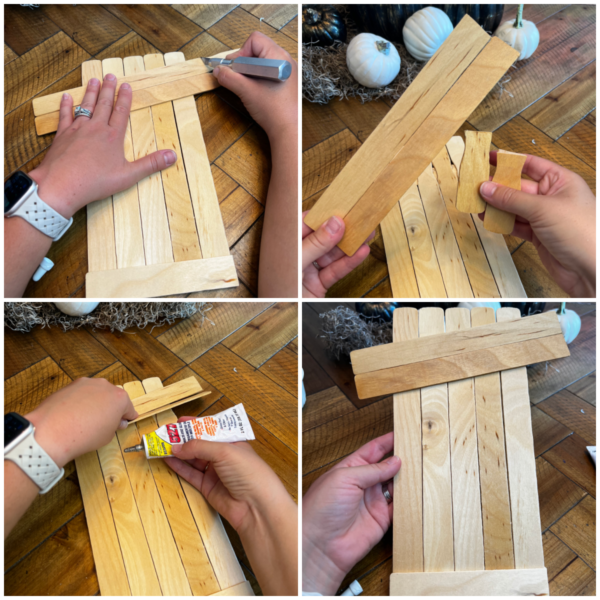
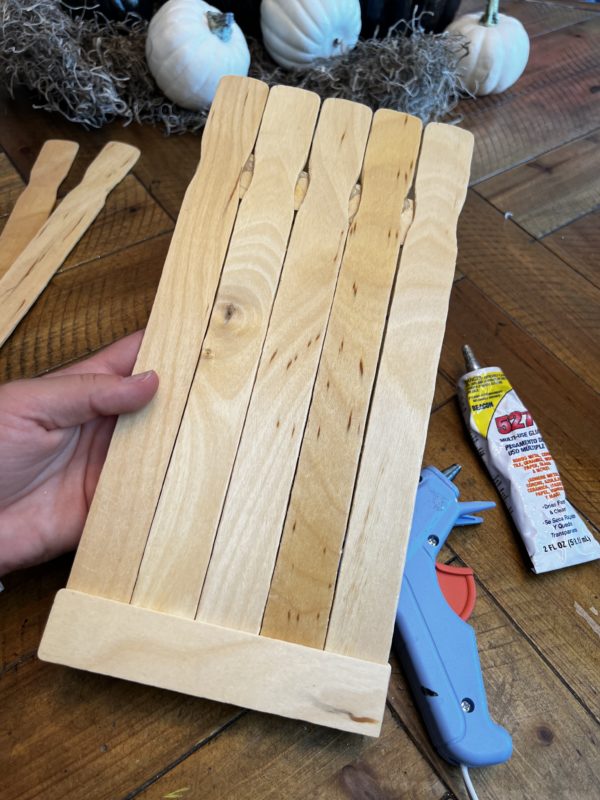
Step 2: Creating the Hat
Take 2 more paint sticks – this will end up creating the slanted hat at the top. When you have them slanted, this will help cover up the grooves at the top of the paint sticks.
Trim these two stir sticks just before they curve into the top handle, ensuring they are of equal length. Apply a line of multi-purpose glue along the center of these horizontal sticks, then quickly encircling it with a hot glue gun once more.
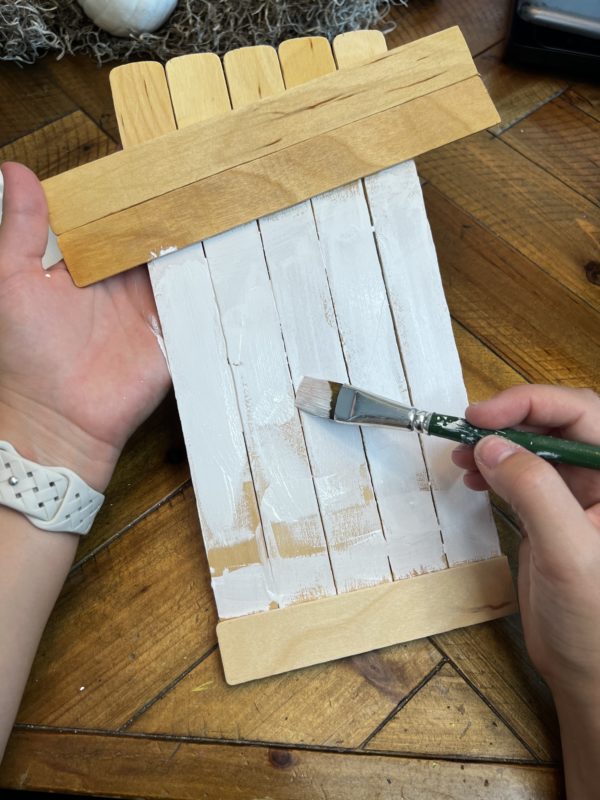
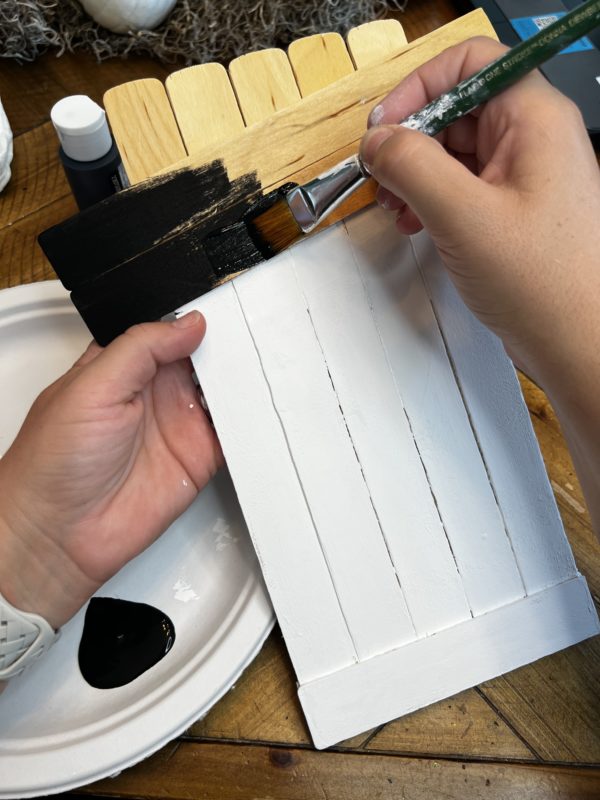
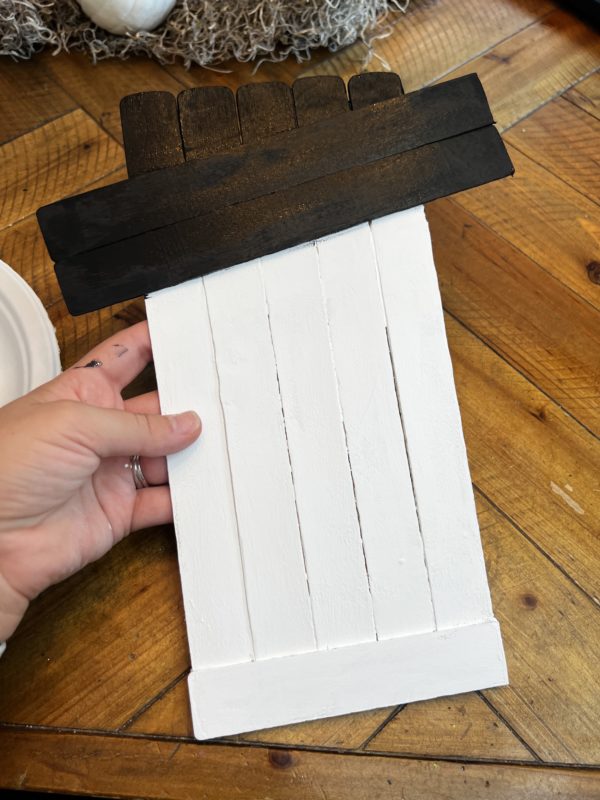
Step 3: Painting
Cover the vertical stir sticks with a layer of white paint. Then on the horizontal sticks, these will be painted with a black paint.
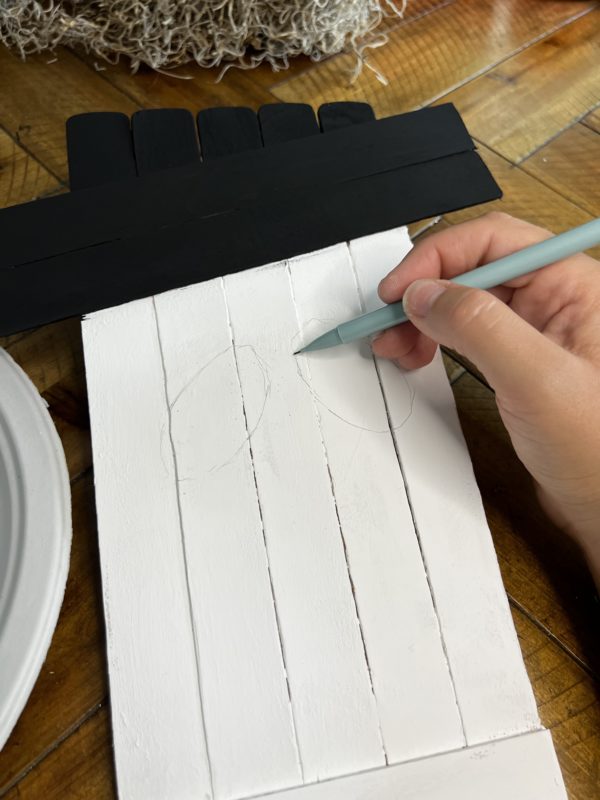
Step 4: Drawing the face
Here is where the fun comes. Creating Jack the Skeletons face. Now to help me figure out the spacing for all the facial features, i came in drawing it out with a pencil. Drawing the slanted oval eyes, nose, and the stitched mouth.
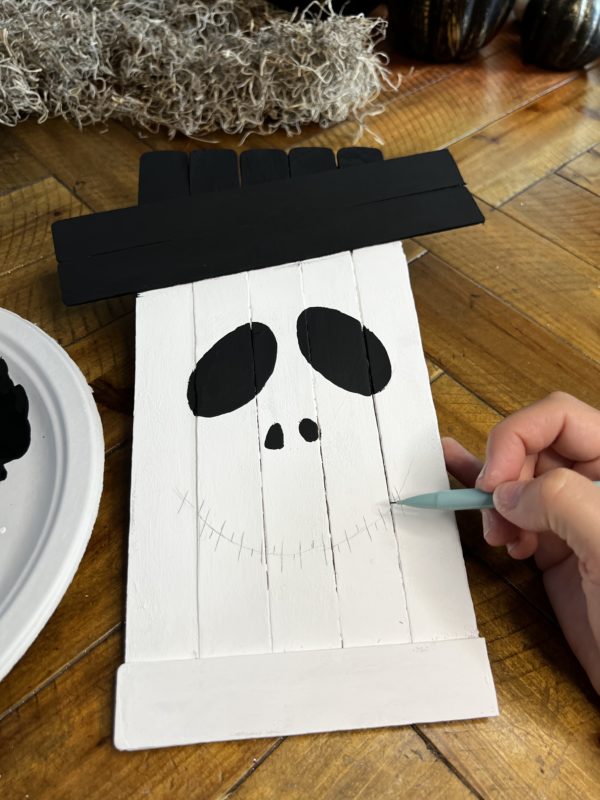
Come back through with the black paint and color in the areas.
Tip: My fine tip paint brush bristles were sticking all over the place. I came in and put a thin layer of vaseline to the bristles. This kept them held together to get cleaner lines.
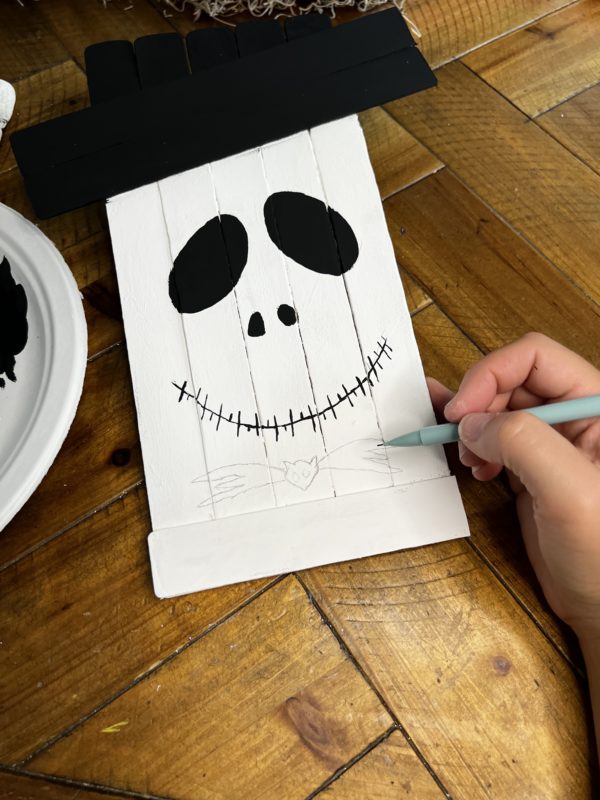
Can’t be Jack the Skeleton without his bat bow tie. Draw on your bow tie to help get the desired look. Once happy come in with the black paint and fill in. You can always come back and erase the lines if they show.

Here is the finished look! How cute… i mean spooky is jack?! I just love him so much. He can be added to a shelf, mantle, wreath, or swag – He will sure not let you down on the fun display added to your Halloween decor.