Skip to search Skip to navigation menu Skip to main content Selecting option will reload page

Category: "How to" Videos

DIY Scratch-Off Message Gift Bags


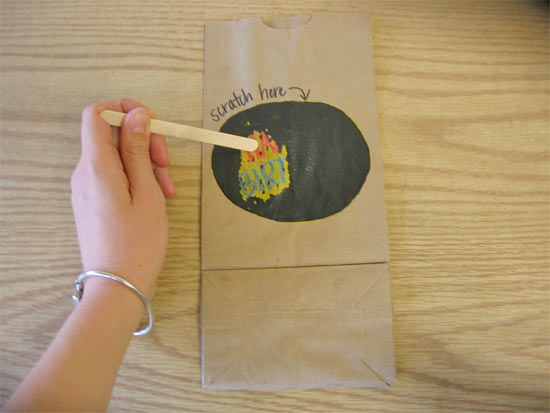
I love giving people Secret Message Bags. Not only is it a cute way to wrap a gift, it’s a great activity for you and the recipient! Kids love this craft, but I’ve also given it to adults, and they get a kick out of scratching away to find their secret message too! Make sure to wrap your gift with a popsicle stick, so that your recipient has something with which they can scratch. You can even decorate your popsicle stick or use it as a “To:” and “From:” tag for your gift. The trick to this project is coloring really hard with your crayons. You want a nice thick coat of crayon with no paper bag showing through. If you leave any gaps in your coloring, the paint will stick to the bag and the bag will rip when the person tries to scratch the paint away. A nice thick coat of crayon lets the paint rest on top without seeping through and sticking to your bag. These bags are perfect for any occasion, but this project is great fun for a rainy afternoon as well. Create secret messages on a piece of paper just for fun. Enjoy!

Difficulty level: Beginner
Time to complete: 25 minutes
Age range: 6+

Things you’ll need:
Crayons
Black acrylic paint
Paint brush
Gift bag
Popsicle stick

Things to do:
1. Draw your design with crayon, making sure you press hard with your crayons and do not leave any gaps where paint could seep through to your bag.
2. Brush away any lumps of crayon left on the surface of your drawing.
3. Cover your design with a medium-thick coat of black paint.
4. Once the paint is dry, you can wrap a gift and give your gift bag to someone and have them scratch away the paint to reveal their secret message!
Continue Reading

Ice Cream Cone Play Prop


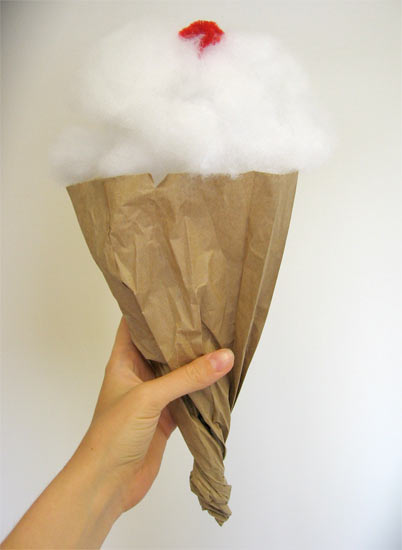
Making food sculpture is a great way to play with your food! I like this Ice Cream Cone Sculpture project because it’s easy to make and can be used as a prop for an impromptu play, decoration for a summertime celebration, or a fun work of art. Because this project is easy to assemble and dissemble, you can still use and reuse the stuffing for future projects as well. If you want to make your ice cream cone seem a bit more finished, you can also choose to glue the stuffing in place and add sequin sprinkles to the top. Want to add another layer to your ice cream cone? Older kids can spray paint their stuffing before assembling their ice cream cone to create different flavors of ice cream. Ice cream sculptures are a great way to stay cool this summer!

Difficulty level: Beginner
Time to complete: 5 minutes
Age range: 3+

Things you’ll need:
Stuffing
Red pipe cleaner
Brown paper bag

Things to do:
1. Start making your cone by twisting the bottom of your paper bag into a point.
2. Continue loosely twisting the rest of your paper bag up to the top.
3. Open the top of your bag so that it looks like an ice cream cone.
4. Twist your pipe cleaner into a round cherry shape with a tail on the end.
5. String the tail of your pipe cleaner cherry through your stuffing.
6. Work your stuffing into a ball shape, making sure that your cherry is sitting on top.
7. Place your stuffing in your paper bag cone, again, making sure that your cherry is on top.
8. Enjoy decorating, playing with, and admiring your Ice Cream Cone Sculpture!

Continue Reading
Change Your Country
Please select your country, this will change the site to your country's currency:

Cancel