Skip to search Skip to navigation menu Skip to main content Selecting option will reload page

Category: For the Home

Stars and Stripes Americana Clothespin Wreath Tutorial


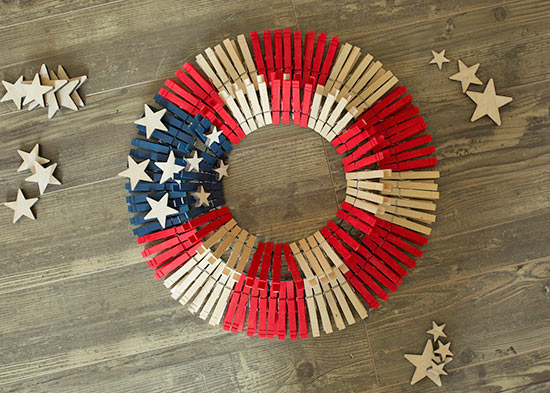
This wooden clothespin wreath is a lovely centerpiece or summer door decoration. If you’re looking to add a handmade touch to your home decor, give this DIY a try!

Difficulty level: Beginner
Time to complete: 45 Minutes
Age range: 8 and Up *Younger ages may substitute craft glue
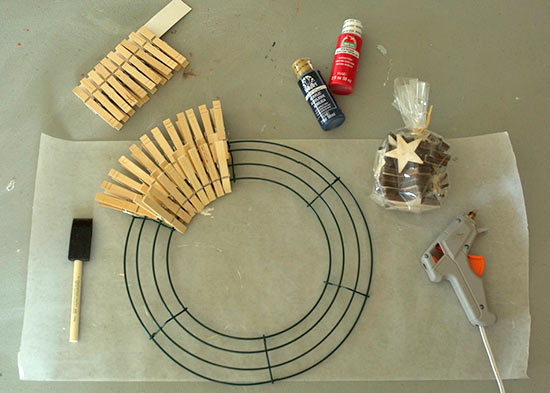
Things you’ll need:
Wooden Clothespins
Red and Blue Acrylic Paint
Foam Brush
Wooden Star Cutouts
Wire Wreath Frame
Hot Glue Gun and Glue Sticks

Things to do:
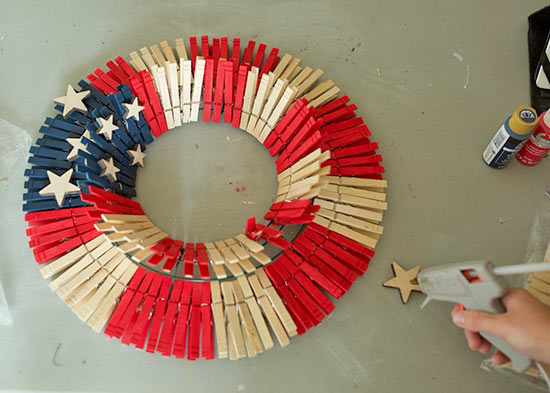
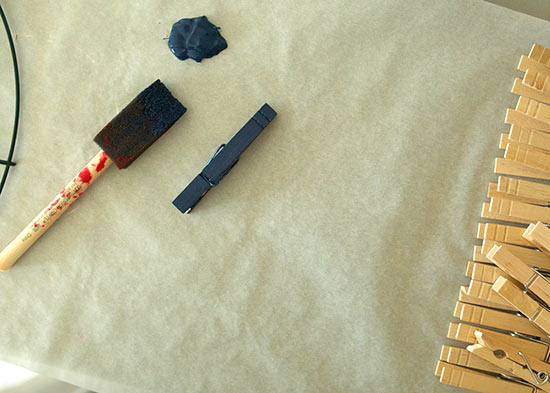
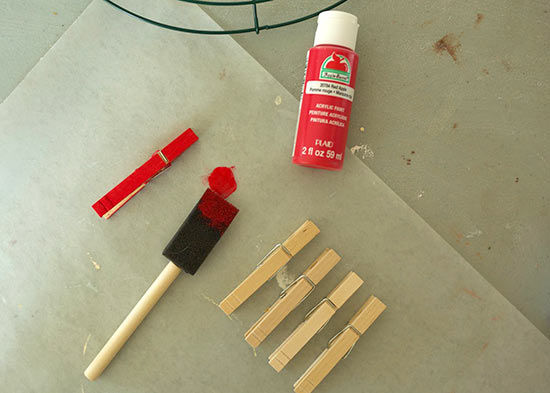
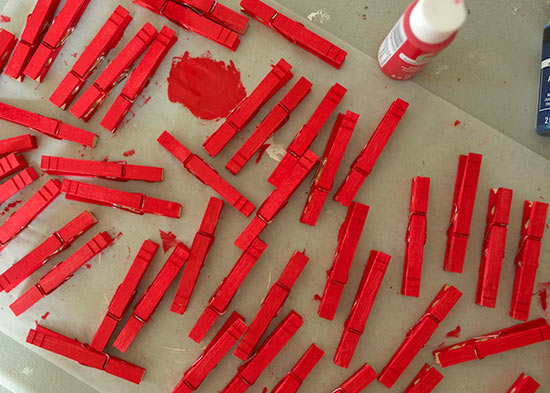
1. The first step is painting your clothespins. You’ll need roughly 20 blue clothespins and 60 red clothespins to cover a large wire wreath frame.


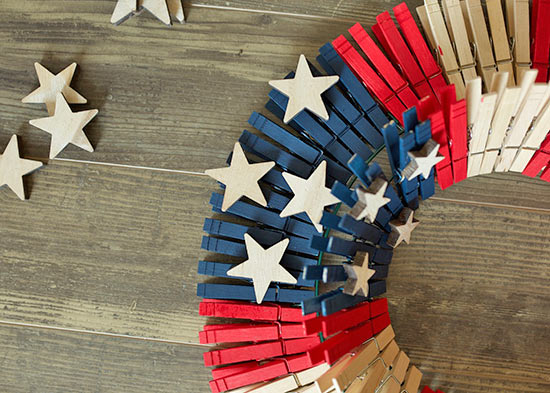
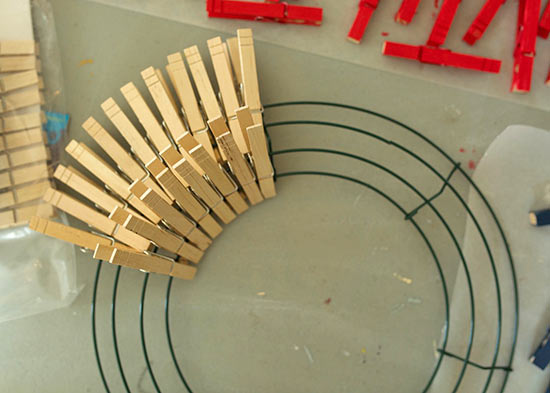
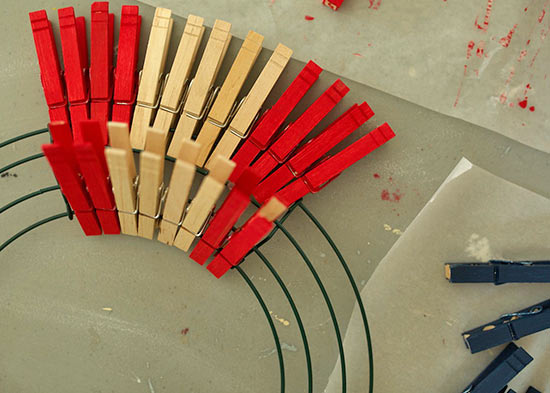
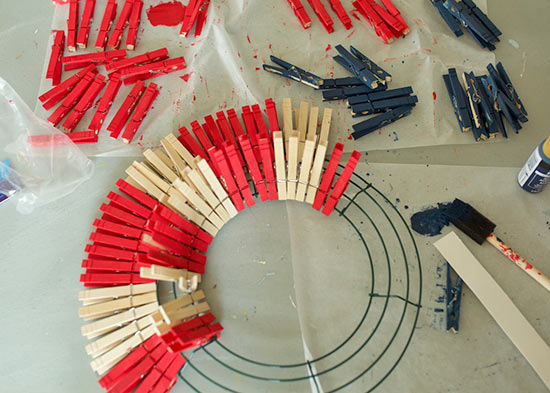
2. Next, you’re going to start clipping your clothespins onto your wreath form. You’ll need to choose a pattern for your stripes and stick to it – For my wreath form, I pinned 4 reds, 5 naturals, and 4 reds for each section on the top bar and 2 reds, 4 naturals, and 2 reds on the bottom. Repeat this pattern until the entire wreath form is covered, leaving one section of the wreath form for all blue clothespins.


3. To complete your wreath, use hot glue to add wooden stars to the section of blue clothespins.

Continue Reading

DIY Nautical Ombre Clock


My son is starting to learn to tell time. His bedroom is a nautical theme, so I knew he just needed a nautical ombre themed clock. Here is how you may easily make your own!

Difficulty level: Beginner
Time required: 1 hour of crafting plus paint drying
Age range: 10+

Things you’ll need:
Clock Maker Medium Stem Kit
Unfinished Wood Clock Face
Coastline Apple Barrel Acrylic Paint Set
Ocean Dreams Apple Barrel Acrylic Paint Set
Krylon Clear Sealer Spray

Things to do:
1. Choose the darker color of tan from your Coastline Apple Barrel Acrylic Paint set. Then, paint a small section at the bottom of the clock.

2. Choose the lighter color of tan from your Coastline Apple Barrel Acrylic Paint set. Before using this color, I like to mix a little of the darker color and the lighter color together. I then paint a small portion above the dark color. Then I paint with only the lighter color. I do not rinse my brush during this process, nor do I allow the colors to dry before starting the next color. I find this helps blends the colors.

3. You may add small brush strokes of each color throughout the other colors. Then allow the tan to completely dry.

4. Choose your blue colors. I used colors from both the Coastline and Ocean Dreams Apple Barrel Acrylic Paint sets. I like to squirt some of each of color on your paint tray from lightest to darkest to ensure I like the colors flow.

5. Once the tan paint has completely dried, paint on the lightest blue color in a small section lining up with the tan.

6. Repeat the same process as the tan. Mix a little of your next color with your previous color and paint a small section with your mixed colors. Then, paint on you darker color.

The ombre design will look as if you are using more colors than you will actually use.

7. Repeat process with all the blue colors until you have reached your darkest color.

8. Allow all the paint to dry completely.

9. Install the Clock Maker Medium Stem Kit by following the simple and thorough instructions. Voila you have made a charming Nautical Ombre Clock in no time at all!

Continue Reading
Change Your Country
Please select your country, this will change the site to your country's currency:

Cancel