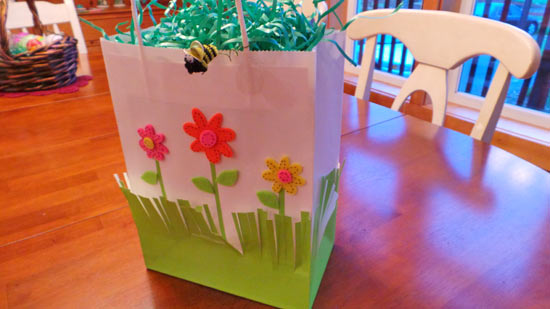
This adorable spring bag is perfect for spring birthdays or Easter. Any child would love to receive a gift in this fun wrapping, and you’re sure to enjoy making it!
Difficulty level: Beginner
Time to complete: 15 Minutes
Age range: 10 and Up
Things you’ll need:
Ruler
Two Gift Bags (Green and White)
Scissors
Permanent glue dots
Felt Flower Stickers
Bumblebees
Craft Glue
Things to do:
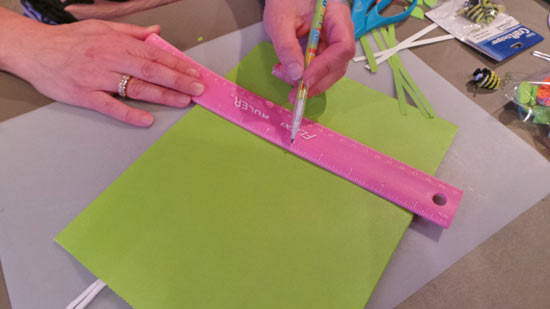
1. Measure 4 inches from the bottom of the green bag, and cut off the top. This will become the grass for your decorated bag. I’ve found that it works best to make marks along the 4 inch line with a pencil, so you can get a straight cut.
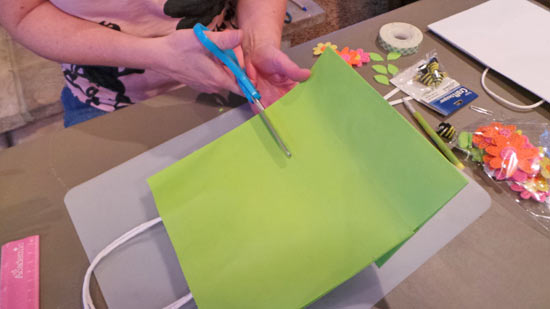
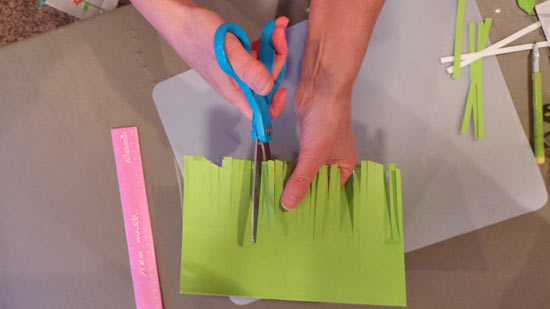
2. Once you’ve cut the top off of the green bag, cut slits around the edge. The slits should be about 2-3 inches. Cut slits around the whole bag.
3. Place the white bag inside the bottom of the green bag. If they’re the same size, the bags should fit perfectly.
4. Trim the blades of glass so they look uneven. This will make them poke out and look more realistic. It adds a fun, 3D effect to the project.
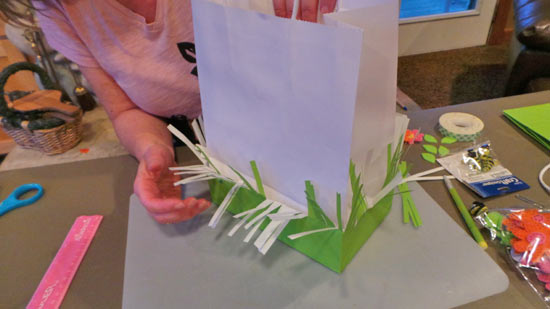
5. Use the remainder of the green bag to cut stems for flowers. They can be as tall or short as you like.
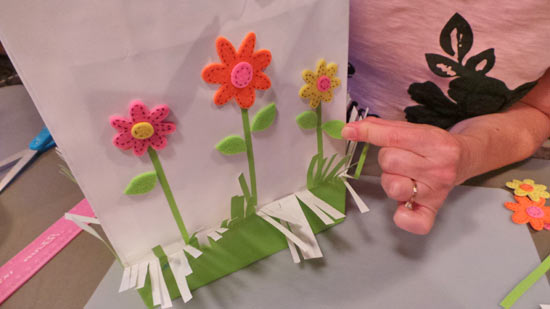
6. Use craft glue to secure the stems to the white bag. Place them so they look like they’re growing out of the grass. It looks cute if they’re all different lengths. Alternate between shorter and longer stems. On my bag, I used 6 stems.
7. Put a piece of double-sided tape between the grass and white bag. This will hold the bag together nicely.
8. Apply your felt flower stickers and leaves to the top of the stems. You could cut paper flowers if you want to, but the felt fabric looks really cute.
9. Attach the bumblebee to the handle of the bag and enjoy!