Search results
80 results found.
80 results found.
My little girl started school this year. I quickly realized I only had one chalkboard for two kids. This sounded to me as the perfect excuse to make her a new pink chalkboard on a wood plank.
Difficulty level: Beginner
Time required: 2 Days
Age range: 10+
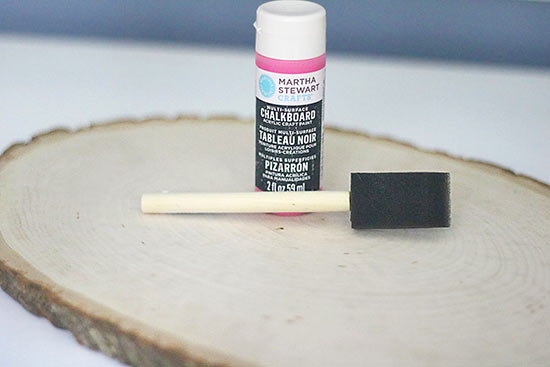
Things you’ll need:
Natural Wood Tree Trunk Slice Base
Raspberry Martha Stewart Crafts Chalkboard Paint
Small Poly Foam Brush
Chalk
Things to do:
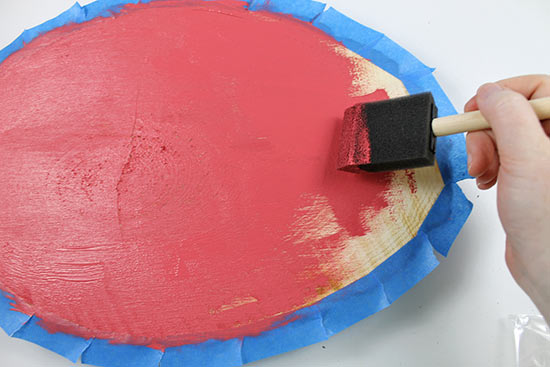
1. Start painting the edges of the inner circle of the wood plank with the Raspberry Martha Stewart Chalkboard Paint. Gently dab the paint along the edges, then pull the paint towards the center of the wood plank.
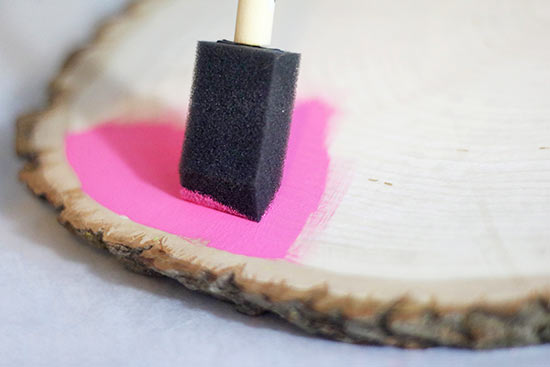
2. Continuing painting along the edges until you have painted all of the edges of the inner circle of the wood plank. Try to smooth in any globs of paint, as much a possible for a more even drying.
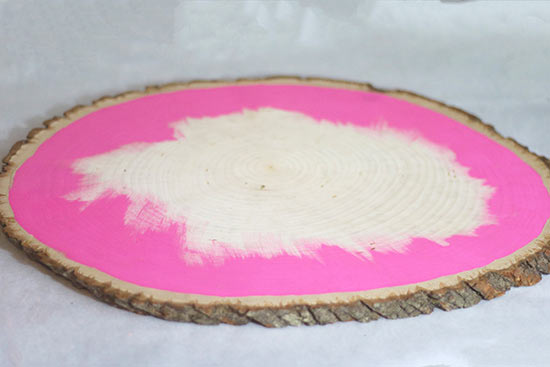
3. Fill in the the rest of the inner circle of the wood plank with the Martha Stewart Raspberry Chalkboard paint. Allow the chalkboard paint to dry for at least one hour.
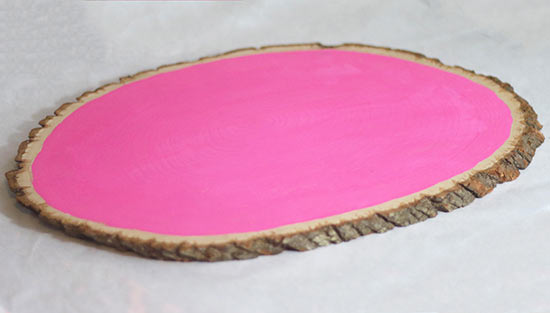
4. After waiting a least one hour between coats, repeat steps 2 and 3 until final color desired has been reached. The instructions on the Martha Stewart Chalkboard Paint says to use at least two coats of paint. I used 3 coats of paint.
5. Allow the chalkboard paint to dry for at least 24 hours after final coat.
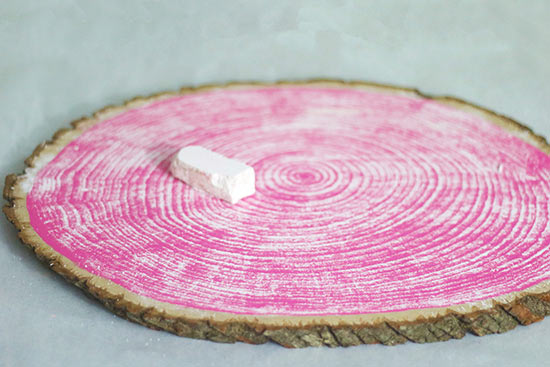
6. Condition the chalkboard by rubbing chalk back and forth across the chalkboard over the entire chalkboard.
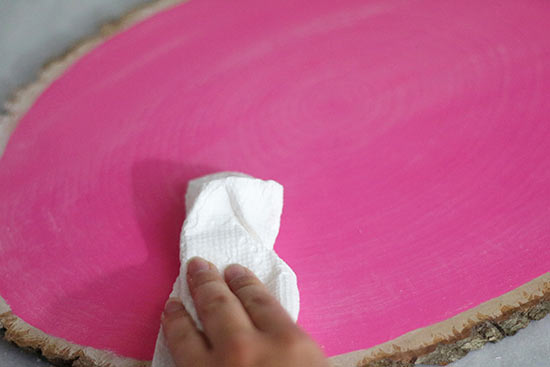
7. With a slightly damp cloth, wipe off excess chalk from the wood plank chalkboard.

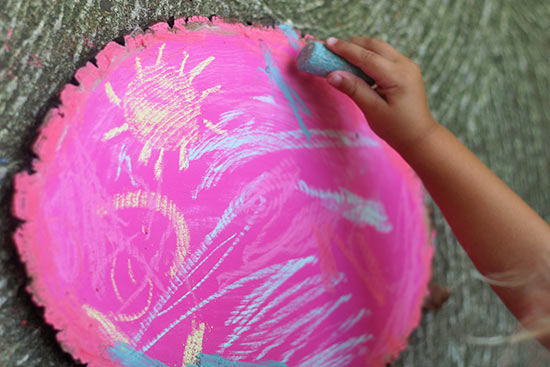
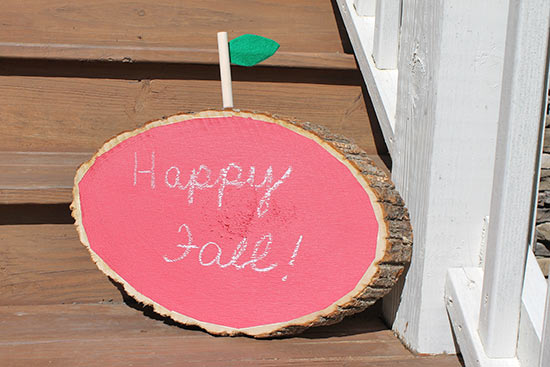
Voila you now have your own Pink Chalkboard Wood Plank!
My daughter was so excited to draw on her new pink chalkboard, I could barely get her to pose for this photo. The Pink Chalkboard Wood Plank would be great for first day of school, weddings, baby showers, every day fun and more!

Difficulty level: Intermediate
Time required: 45 minute, plus 25 hours of drying time for paint
Age range: 12 and up with adult supervision for drill and saw
Things you’ll need:
Wood Tree Trunk Slice
Painters tape
Habanero Martha Stewart Chalkboard Paint
Green felt
Tracing tool such as a pen or marker
Scissors
Glue gun and glue sticks
Foam paintbrush
Saw
1/2″ Dowel Rods
Drill and 1/4 drill bit
Chalk

Things to do:
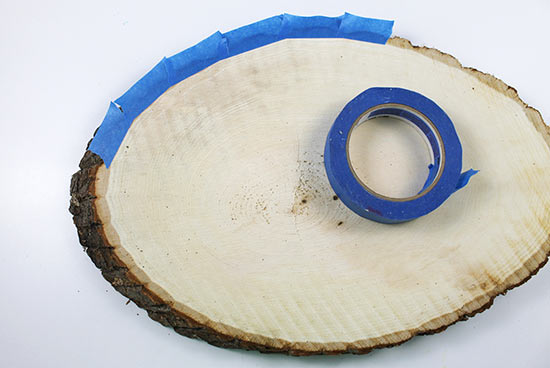
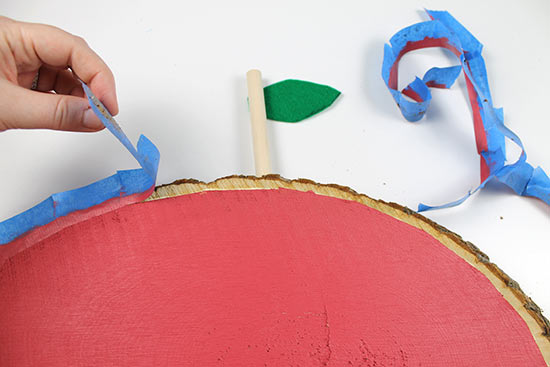
1. Apply painter’s tape to the edge of the wood slice, applying it in sections so that the tape is smooth around the curves of the wood.
2. Using the foam brush and chalkboard paint, paint one layer onto the slice. It’s easiest to paint in the direction of the grain, and you’ll find that painting in one direction is easier and smoother than painting in the other direction. You may need to wiggle the foam brush just a little to get into some of the rough parts of the wood. Allow the paint to dry for about an hour.
3. Repeat step 2, applying a second coat of paint. Allow the paint to cure for 24 hours.
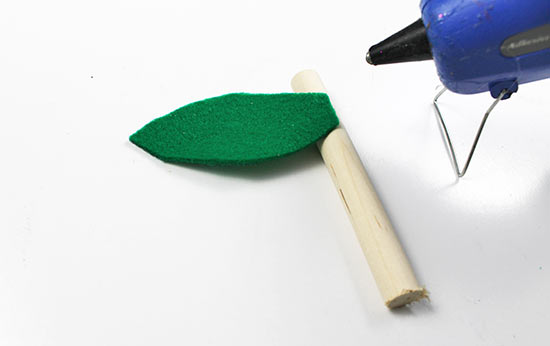
4. While the paint dries, use a saw to cut a dowel to 4″ long.

5. Draw a leaf shape onto the felt. We drew a leaf that’s 3″ tall and 1 1/2 ” at its widest point.
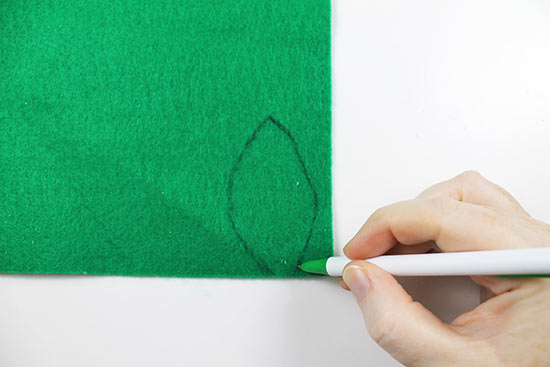
6. Cut out the leaf.

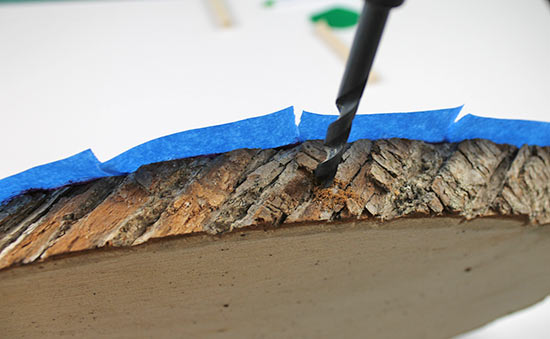
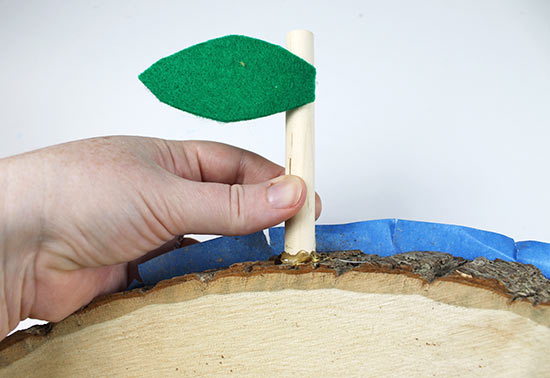
7. Using a 1/4 drill bit, drill two indentations into the middle of one long side of the wood slice. The holes do not have to be very deep; they should just be enough to wedge the dowel into.
8. Hot glue the leaf to the side of the dowel stem.
9. Add hot glue inside the indentations you drilled, then push the dowel into the hole.
10. Once the paint has dried completely, remove the painter’s tape from the edge.
11. Using chalk, write a message on the chalkboard paint. You can write anything from “Welcome” to “Happy fall!” – it’s your choice! When you want to write a new message, just wipe away the old one and use chalk to write a new message.