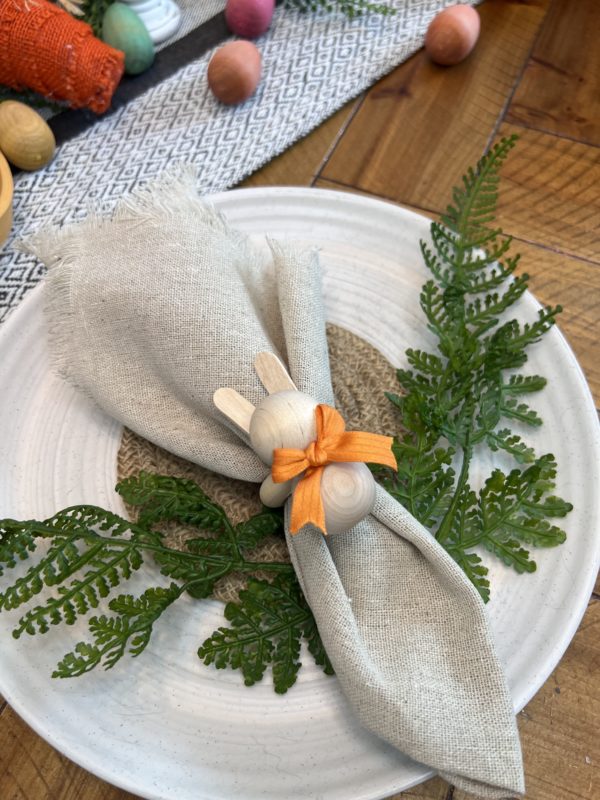
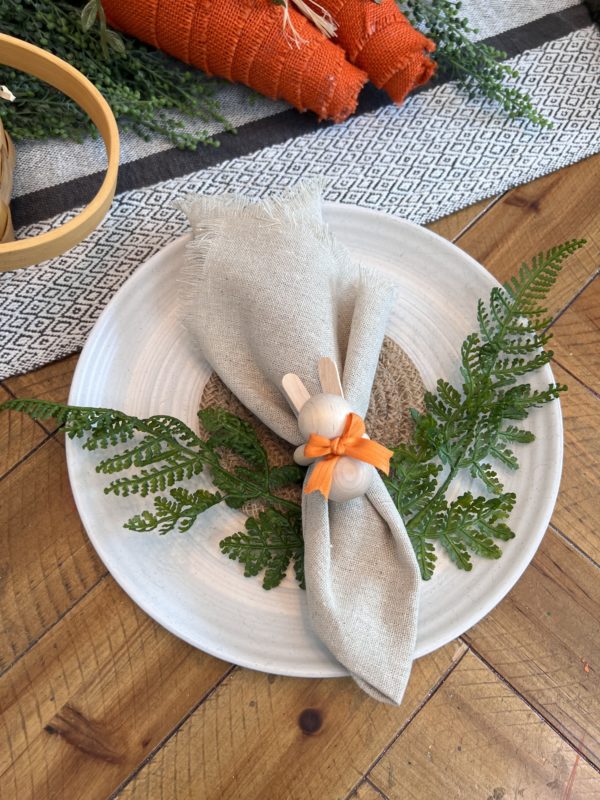
Create a simple Easter decoration for your springtime fun! These can be made into napkin holders, tiered tray decor, and jar toppers for those candy displays!
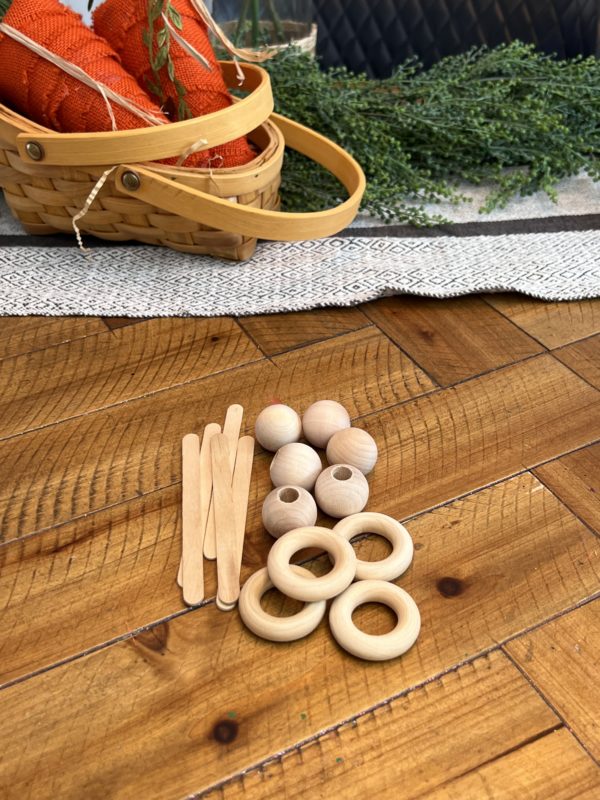
Materials Needed:
1″ Round Unfinished Wood Beads
1″ Unfinished Wood Balls
Unfinished Wood Toss Rings
3/8″ Purple Velvet Ribbon
Orange Stitched Satin Ribbon
Wood Craft Popsicle Sticks
Bright Yellow Grosgrain Ribbon
Hot Glue
Scissors
Material list here: https://factorydirectcraft.com/catalog/advanced_search_result.php?keywords=fbbnnywdbd
Let’s grab your supplies, channel your inner artist, and let get crafting!
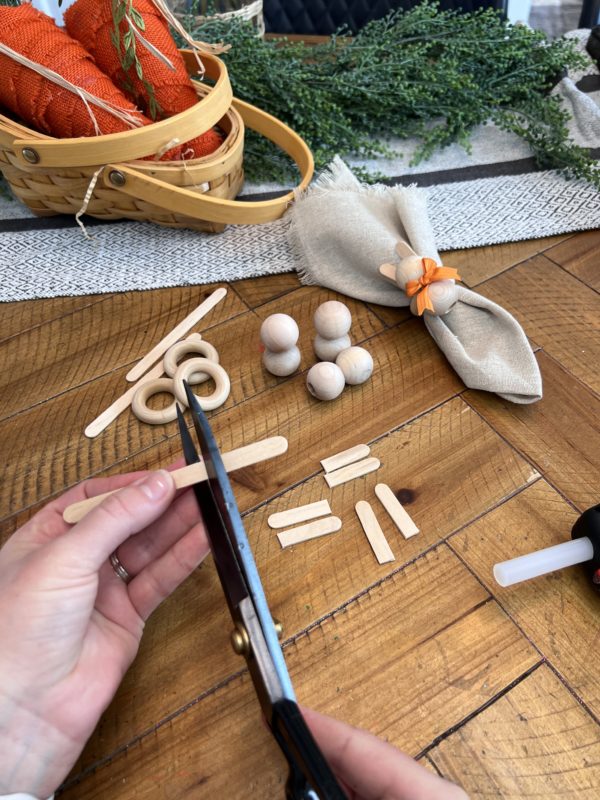
Step 1:
Here we will get the materials set to make the cute bunnies. Grab your popsicle sticks and cut them to your desired length. I choose to make them a bit longer. I cut them right about at 1 1/4 inch in length.
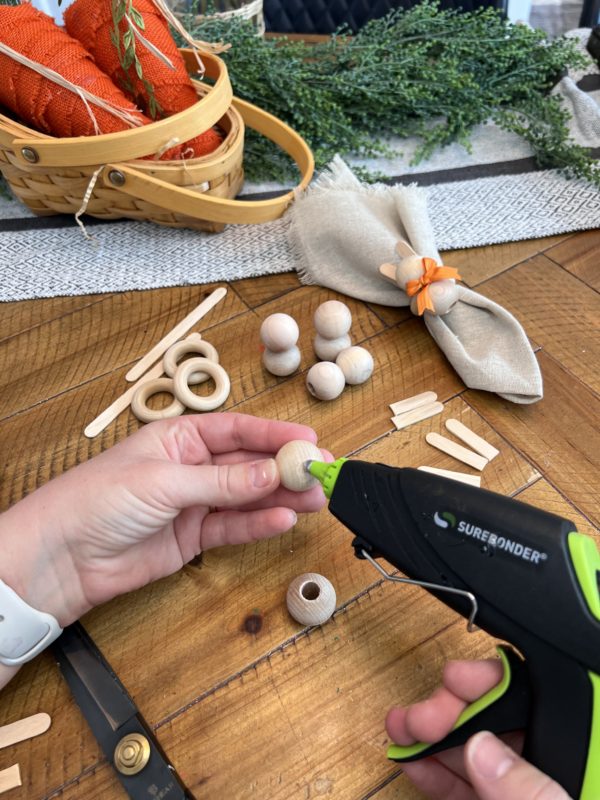
Step 2:
Grab your 1 inch wooden bead with the hole or you can use a wooden ball with a flat bottom. This will be the ‘body’ of the bunny. Grab 1 of the 1 inch wooden ball that has no holes. you will glue those together with the hot glue gun.
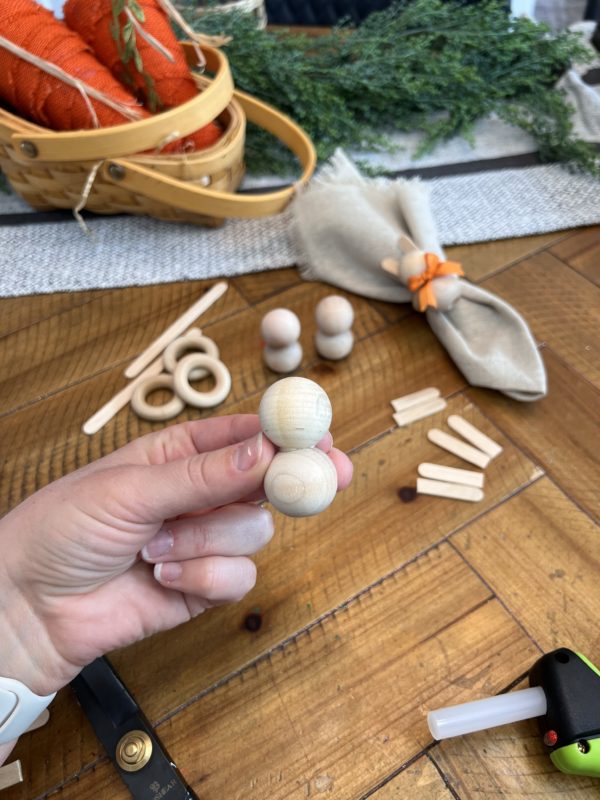
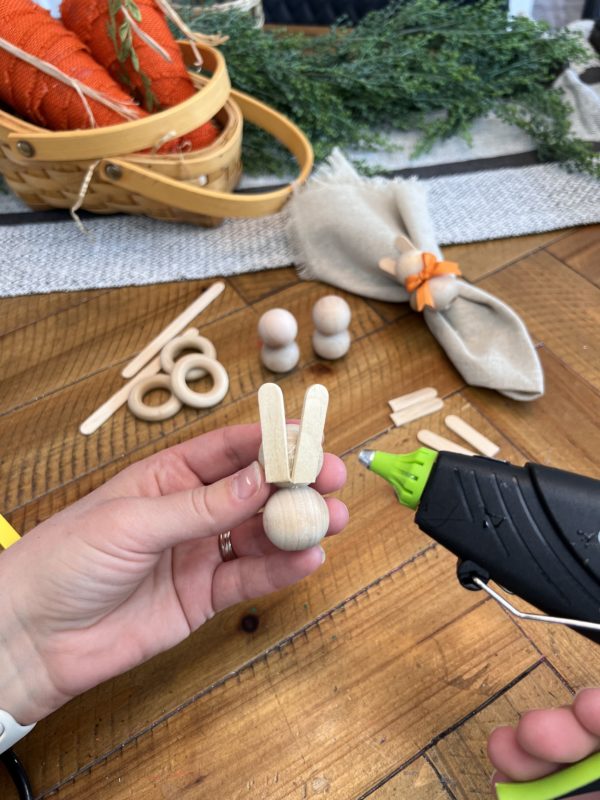
Step 3 :
You will take your popsicle sticks that you cut and glue them on the top wood ball. These will make the cute ‘not so floppy’ ears! You will want to glue them up towards the middle of the ball. This will leave room for the toss ring that will come into play next step.
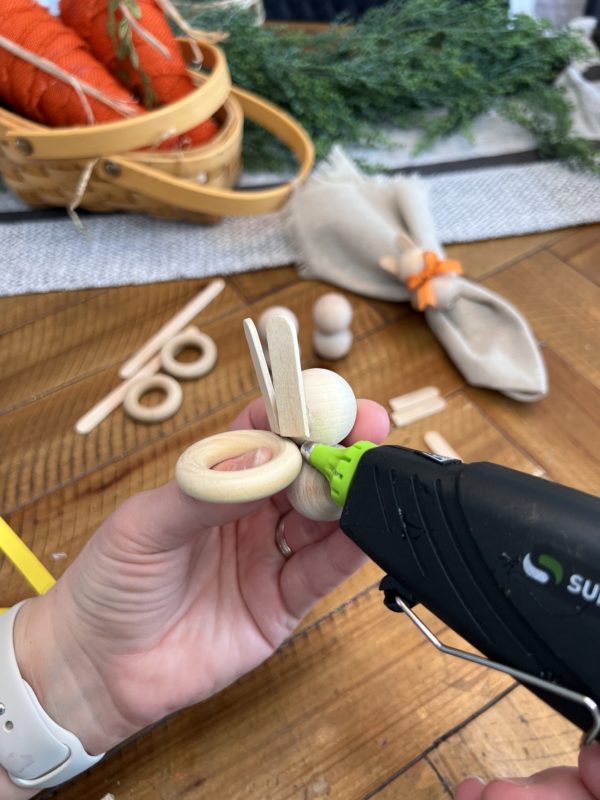
Step 4 :
Grab your toss ring and you will then glue that in the crease of the two balls. This will become the ring to allow you to use as the napkin ring holder.
Step 5 :
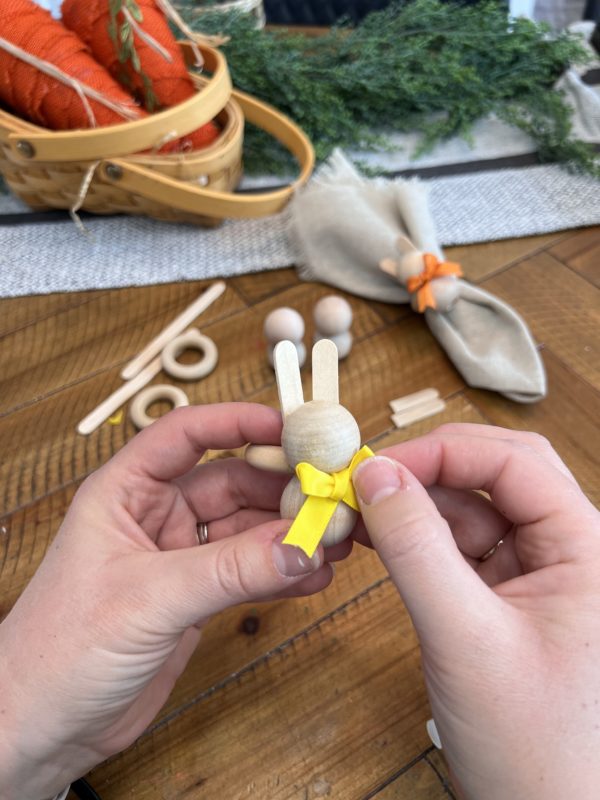
Lastly, grab your desired colored ribbons to add a special touch to the cute widdle guys!