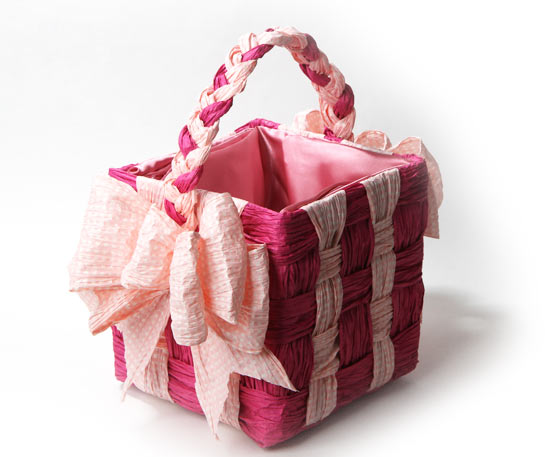
Im taking it back old school today! Do you remember those paper Easter baskets back in the 80’s? It is a great way to use old boxes (a little upcycling is always an added plus) and you can revamp it by using newly updated color schemes (instead of the mauve and Williamsburg blue combo you probably remember) 😉 Here I have used a pink color combo for this upcoming Easter (I may tend to just like pink in general lol) and have kept the retro big bows because I like them. But you could add some pretty paper twist rosettes or other embellishments. You could also use this basket for gift baskets during the holidays or other special occasions.
Things you need:
Cardboard box of desired size for basket (I used an 8″ x 8″ box)
Glue gun and glue sticks
Paper twist (colors of your choice)
Things to do:
1. Cut off all the top flaps of your box and make sure the bottom of your box is taped closed.
2. Roughly estimate the length youll need for your vertical strips of paper twist by starting at the top of your box (about an inch inside of it) and wrapping it loosely around the other side. Take that measurement and add another inch. For my box I cut 30″ strips of each color to go from the top of the box, around the bottom and to the other side. These are your front/back strips. If your box isnt a perfect square, youll have to repeat this step to create your side to side strips.
3. For your horizontal strips of paper twist, you will do the thing. Start at one corner of the box and loosely wrap around until your ends meet. Take this measurement and add two inches. If you have excess paper twist later, you can always cut it off.
4. Now comes the fun part. Your paper twist will come tightly wound, so sit and watch your favorite show or movie and gently untwist each strip until they are all unrolled. If your making your basket with the kiddos, this is a part where they could help!
5. You should lay out your design of the basket before you start your actual gluing. Create your crosshatch for the bottom using your vertical strips (front/back and side to side). Glue the crosshatched paper twist to the bottom of the box with a few dabs of hot glue on each of the corners.
6. Start weaving your horizontal strips one at a time until you have used all your paper twist strips.
7. Carefully hot glue all your paper twist ends inside the box.
8. To create a handle for your basket. Measure the length you want the handle. Then cut two pieces of one color and one piece of the other color. Braid together and hot glue to each side of the basket.
9. Add puffy bows or petite rosettes to the outside and line your new basket with fabric or fill with Easter grass.