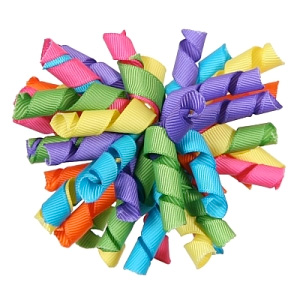
 Korker ribbon is simply a curled ribbon and is often used to make bows. Korker bows are often seen on young children to add a little flair to an already adorable outfit. Cheerleaders wear them to show a little more spirit and bounce to their peppy routines. You can make korker ribbon out of any type of ribbon such as grosgrain, satin, or even organza ribbon. You can add korker ribbon onto any ribbon project for a fun little curl!
Things you need:
Grosgrain Ribbon (I would recommend a 1/4″ or 3/8″ ribbon)
1/4″ Wooden Dowel Rods (Once you get some practice in you can play around with different sizes)
Clothespins
Fray Check (You could also use clear finger nail polish) or a Lighter
Things to do:
1. To begin making your korker ribbon, preheat your oven to 275 degrees. Line a baking sheet with foil and be sure that your oven is clean so that your korker ribbon does not get dirty.
2. Clamp one end of the grosgrain ribbon onto the dowel rod with a clothespin.
3. Slowly begin spinning the dowel rod, wrapping the ribbon around the dowel and not overlapping the grosgrain ribbon. You can leave spaces, or you don’t have to leave any space at all, just depends on how tight you want your curl to be.
4. Wrap your ribbon to the end of the dowel rod. Once you have reached the end, cut your ribbon and clamp the end with another clothespin. You may want to give the clothespin a little twist so that you know its all the way around.
5. Wrap as many dowel rods as you wish for your project.
6. Lay each wrapped dowel rod onto your baking sheet and bake for about 25 minutes (depending on your oven).
7. After your ribbon is done baking, take your dowel rods and slip the korker ribbon off. Use fray check (you could also use clear finger nail polish) or a lighter to be sure the ribbon ends don’t fray. Now you have korker ribbon curls ready for any project!
Project Notes:
For a different method of making korker ribbons, soak the ribbon in water and then spray with starch. This will make your korker ribbons more durable and stain resistant.
If you are wanting to make mini korker ribbons, then just use a smaller diameter dowel rod along with the narrowest ribbon you can find.
The newer your dowel rods are, the more difficult it will be to slide off the korker ribbon once they are done baking. This will get become easier the more you use your dowel rods.
You may need to repeat the baking process if your korker doesn’t seem to be tight enough or if it seems to be still damp in spots. Repeating the baking process for another 10 minutes until the korker is tight and dry.
Remember the lighter the ribbon color the longer it will need to be in the oven. If you are using white, light pink, or any other light color ribbon, it is more likely that your ribbon will show burn marks from being in the oven too long. Just be sure to keep an eye on them while they are in the oven, checking on them periodically and letting them air dry if needed after the initial 20 minutes.
2 Comments
I can’t wait to try this idea! I was just thinking about this ribbon the other day and didn’t know how they made it or if you could buy it. Thank you!
This is fantastic. I bought a car bow for my granddaughters ribbon. The lady who made it did not make it as the picture shows. All it is is an oversized Christmas tree bow. I know how to make the bow but not the curls. You really helped me
Thanks.