Skip to search Skip to navigation menu Skip to main content Selecting option will reload page

DIY Wedding Ribbon Wands

ribbon_wands
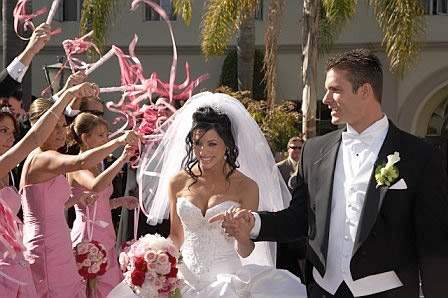
Ribbon wands are a fun way to celebrate the newly weds. Ribbon wands are perfect for any occasion, especially weddings where no noise makers or rice is able to be thrown. Since throwing rice is out of the question…throw some colors around, and create a wedding keepsake at the same time! They are a simple yet beautiful item that adds flair and fun to any wedding. You can create and personalize your own ribbon wands using simple craft supplies such as ribbon and wooden dowel rods. Ribbon wands can be personalized by using the wedding colors as a palette. You can use play with different ribbon widths, patterns, and material of ribbon to add a fun unique look. You can also add flowers, feathers, and other embellishments to add more detail and reflect your wedding style.

Things you need:
Approx. 20 yards Of Ribbon (color of your choice)
Wooden Dowel Rods
Hot Glue Gun and Glue Sticks
Apple Barrel Acrylic Paint (color of your choice; optional)
Mod Podge (optional)
Double Sided Tape (optional)
Scrapbooking Paper (optional)
ribbon_wands2
Things to do:
1. First thing is to decide whether you want to paint the dowel rods or leave as is. You can paint the dowel rods in a color of your choice or leave them as they are; a natural light wood. We recommend painting the dowel rods white, black, silver, or chocolate brown. Then you can play with ribbon strands for accent colors. Now you may be tempted to try spray painting the dowels but the color doesn’t usually apply evenly. So take your time to hand paint the rods and it will be well worth it when they are finished. You can also even try decoupaging pretty paper onto the dowel rods as well using Mod Podge
2. If you want to use several different strips of ribbon, simply cut several lengths of ribbon of varied colors, materials, and widths. Tie the ribbons in a knot around the end of the wooden dowel rod. If you are more of a minimalist, you can stick with one strand of ribbon. Cut you ribbon strands into 12″ pieces and stick a strip of double sides tape at each end of your ribbons. Then carefully wrap the ribbon around the top of the dowel rod. If you are comfortable using a hot glue gun you can use that instead of the tape (Personally I am not so good with the hot glue. I tend to glue things to the table and burn myself).
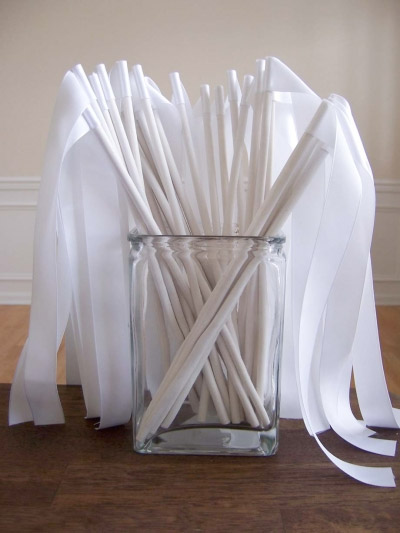
3. You are basically finished. Feel free to play with embellishments such as feathers, rhinestones, or even little flowers to add some personality to your wands. Display your ribbon wands in a large glass vase, fill with sand, pearls, stones, or glass marbles and simply place your wands in the vase. Voila!

Photo Credits:
Get Married
Continue Reading

Baby Loopy Chenille Lamb

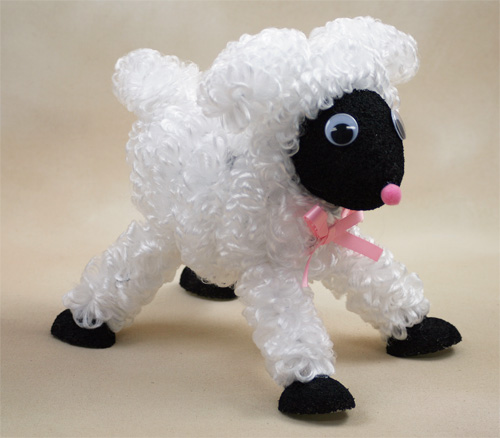
lamb_loopy_chenilleCheck out this loopy chenille lamb! This loopy chenille lamb is super simple and quick to make. Loopy chenille has been used to make a variety of craft projects to add a soft and fuzzy texture. Loopy chenille is flexible and can be bent to hold any shape you desire. This loopy chenille lamb can be made for an Easter decoration or even a centerpiece for a special occasion, such as a baby shower!

Things you need:
1 Hank – White Loopy Chenille
1 – 4-3/4″ Styrofoam Egg
1 – 3-3/4″ Styrofoam Egg
1 – Craft Stick
1 – 1/2″ Pink Pom Pom
2 – 2″ Styrofoam Eggs
2 – 3/8″ Dowel Rods
2 – 25mm Googly Eyes
Black Apple Barrel Acrylic Paint
Paint Brush and Accessories
Floral U Pins
Hot Glue Gun
Glue Gun Sticks
Ribbon and Flowers as Desired

Things to do:
1. To start your loopy chenille lamb, take your two 2″ styrofoam eggs and cut them in half. These will later become the little feet of your loopy chenille lamb. Paint all four halves with the Black Apple Barrel acrylic paint. Set aside and let dry.
2. Take your 3-3/4″ styrofoam egg and paint half of the egg black (starting from the smaller point and go half way down). Set aside and let dry.
3. Once your half painted styrofoam egg has dried, press the craft stick half way into one side of the white (unpainted) section of the styrofoam egg.
4. Cut about 15″ of white loopy chenille from your hank. Begin wrapping the entire white (unpainted) section of the half painted styrofoam egg with the white loopy chenille. Secure the loopy chenille with floral u pins and hot glue. This will be the head of your lamb. Be sure to leave the black painted half uncovered. This will be its face.
5. Cut two – 6″ strips of white loopy chenille and bend each strip in half. These will be your lamb’s ears. Pin the ears loopy chenille halves onto the top of your lamb’s head, just behind where the white loopy chenille meets the black styrofoam egg using floral u pins and hot glue. See photo for placement.
6. Wrap the 4-3/4″ styrofoam egg with the white loopy chenille until completely covered. Secure with floral u pins and hot glue as needed.
7. Press the remaining half of the craft stick into the larger styrofoam egg, just behind the smaller end of the egg. Secure the craft stick to the styrofoam egg with a dab of hot glue. Your lamb’s head should now be attached to your lamb’s body.
8. Cut your dowel rods in half, making each rod 6″ in length. Place each half into the four “corners” of your lamb’s loopy chenille covered body. See picture for placement if needed. Secure the dowels with hot glue. Be sure as you add the dowel rods that you are placing them just right, so that your lamb will be sure to stand on its own.
9. Take your small 2″ egg halves that you painted earlier and place them flat side down. Gently press the ends of your dowel rods into the top of your egg halves. Be sure that you do not press to far, or you might ruin the egg halves. Add a dab of hot glue to insure that the little black feet stay in place.
10. Cut four – 7″ strips of white loopy chenille. Wrap each loopy chenille strip along the exposed dowel rod legs. Secure with hot glue as you wrap the loopy chenille.
11. Cut one – 4″ strip of white loopy chenille and bend in half. This will become the lamb’s tail. Secure with floral u pins and hot glue at the end of your lamb’s body. For specific placement refer to photo.
12. Glue on your googly eyes and pink pom pom onto the black section of your lamb’s face. Finally, adorn your lamb with ribbon or flowers of your choice.

Continue Reading
Change Your Country
Please select your country, this will change the site to your country's currency:

Cancel