Difficulty level: Intermediate
Time required: 20 minutes
Age range: 8 and up
Things you’ll need:
Super bulky yarn
Scissors
Blunt tapestry needle
Things to do:
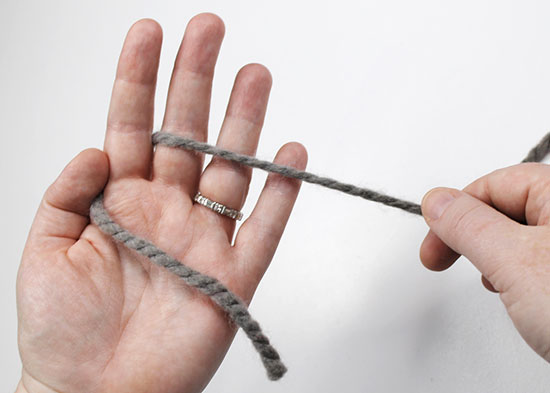
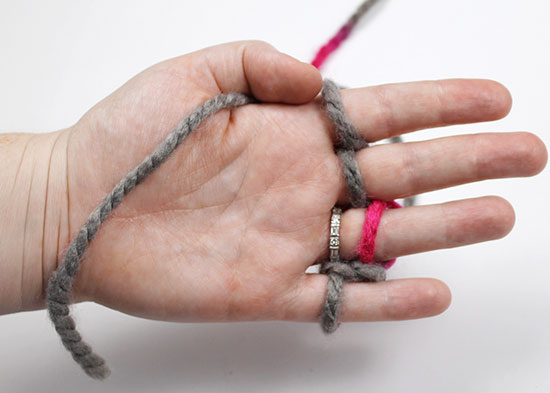
- Grasp the end of the yarn with your thumb. Wrap the yarn behind your forefinger and in front of your middle finger.
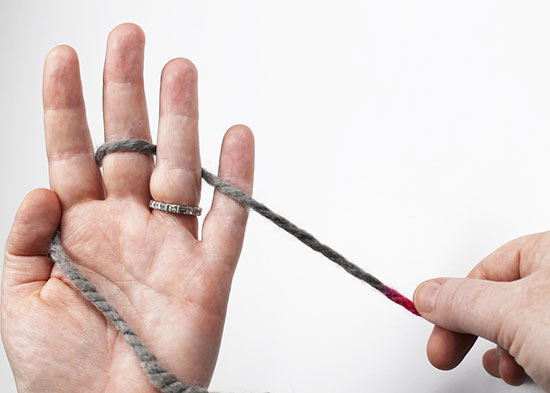
- Wrap the yarn behind your ring finger and in front of your pinky finger.
- Working in the opposite direction, wrap the yarn behind your pinky, in front of your ring finger, behind your middle finger, and in front of your forefinger.
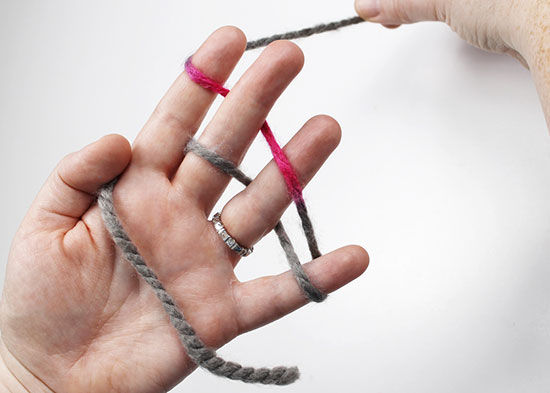
- Push the yarn down on your fingers.

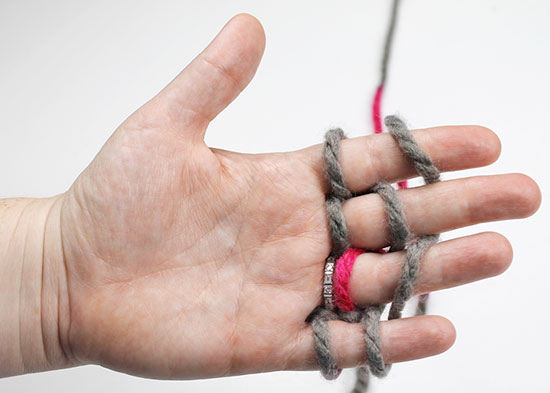
- Repeat steps 1-3 to wrap a second row of yarn.
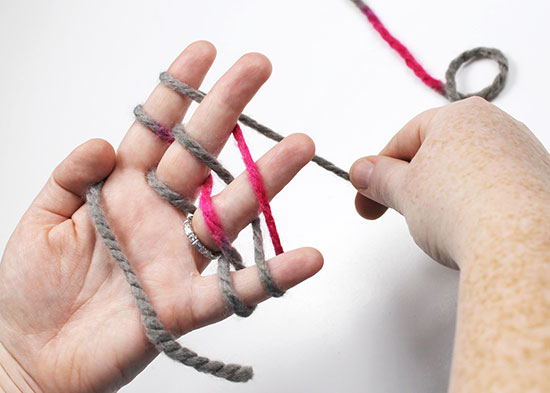
- Starting with the forefinger, pull the bottom loop over the top loop and off your finger.
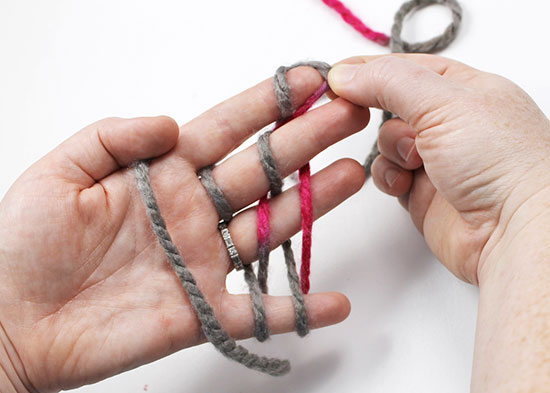
- Repeat step 6 on your middle finger.
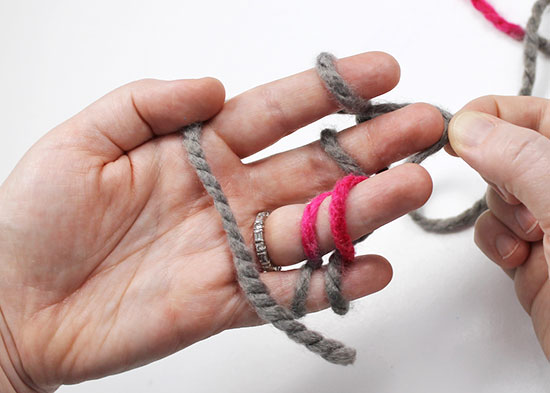
- Continue across your fingers, pulling the loops over until only one row of loops remain. Push the loops down onto your fingers.
- Repeat steps 3-8 again. Note that after you have worked a few rows, you can let go of the yarn tail.
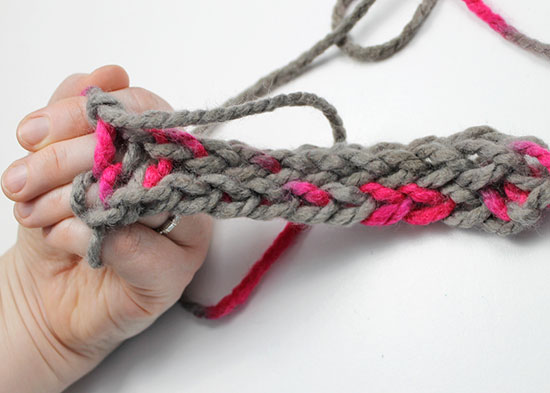
- The bracelet will begin growing behind your fingers. As you work, pull the bracelet down to elongate the loops.
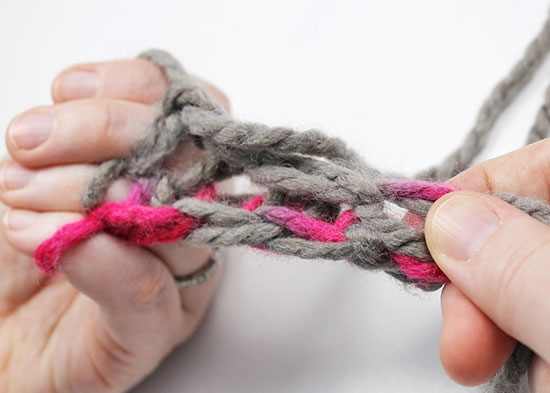
- Continue to repeat steps 3-8 until the bracelet is the desired length.
- To fasten off the bracelet, place the loop from your forefinger onto your middle finger.
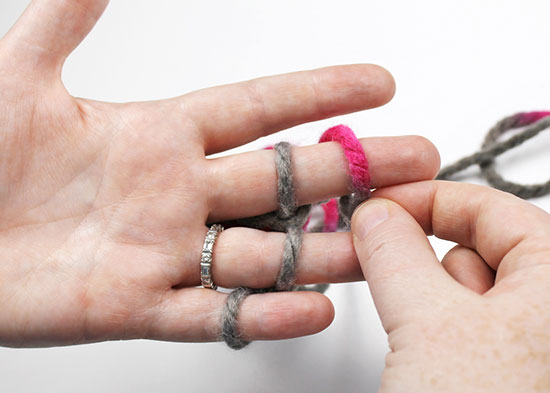
- Pull the bottom loop over the top loop and off your finger.
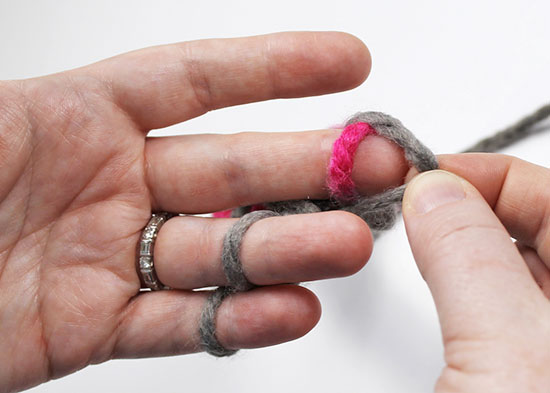
- Continue across the row, moving the loop from one finger to the next, until you have one loop left on your pinky finger.
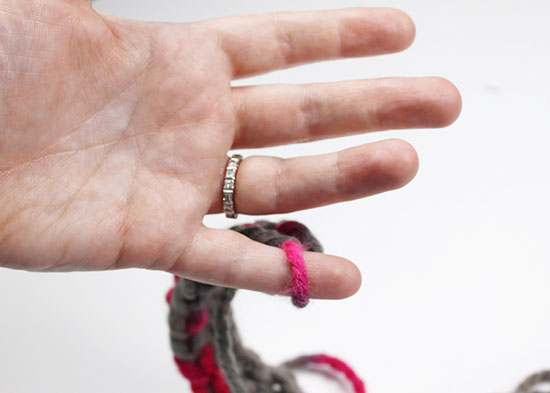
- Remove the loop from your finger. Trim the yarn, leaving a tail that’s about 6″ long. Slip the yarn tail through the loop and pull to secure it.
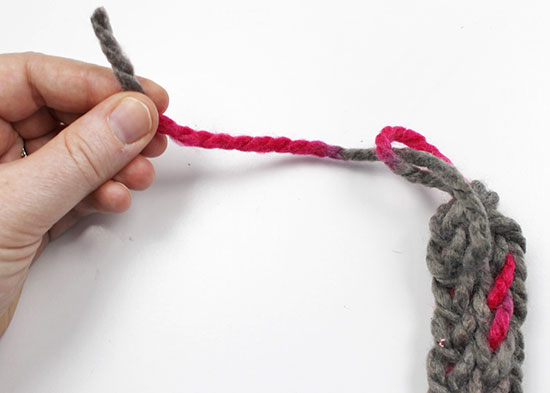
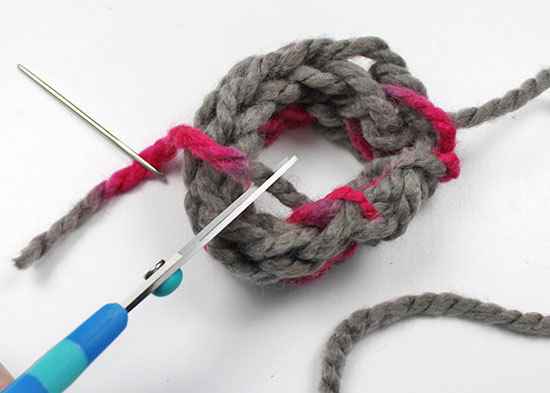
- Thread the yarn tail through a blunt needle. Sew the ends of the bracelet together to form a circle.
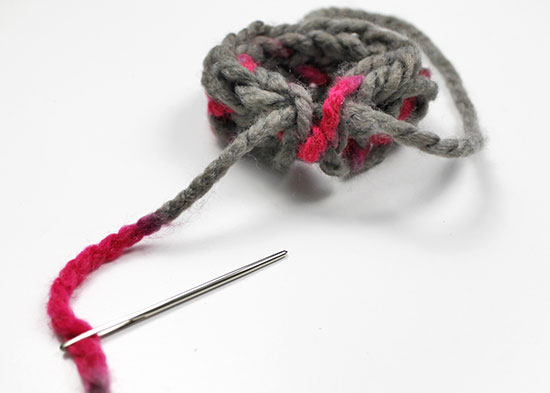
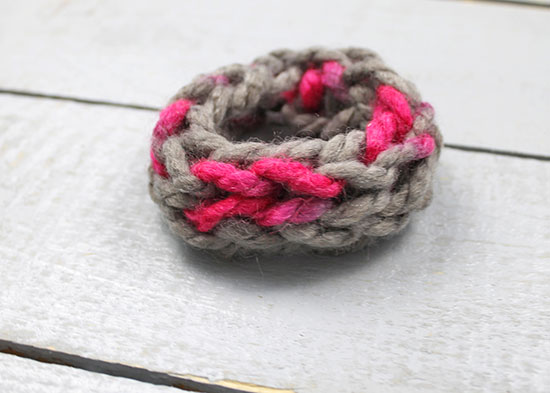
- Weave the ends of both yarn tails through the bracelet, then trim the ends. The bracelet will stretch slightly, so you can slide it over your hand and onto your wrist.