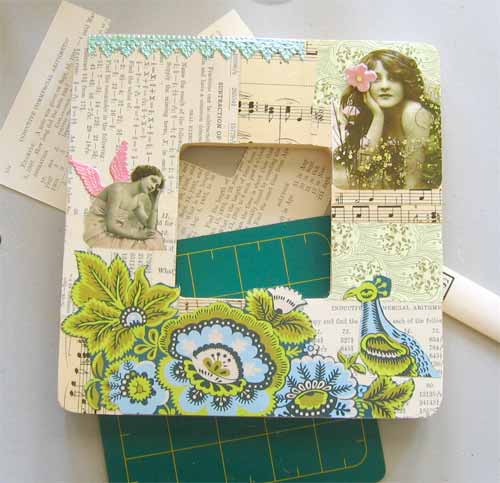
With a little creativity and a few basic supplies, you can transform plain, inexpensive wooden picture frames into personalized masterpieces. These simple to make decorative frames will grace walls and tabletops in style, and are so easy on the budget that you’ll never hand out school pictures in envelopes or baggies again.
Things you need:
6″ Unfinished Wood Picture Frame
Scrapbook paper
Mod Podge
Wood Stain or Apple Barrel Acrylic Paint
Sand paper
Paint brush
Hobby Knife
Things to do:
1. Paint or stain the back, inside, and outside edge of the frame and allow to thoroughly dry.
2. Coat the front of the frame with an even layer of Mod Podge. Let it set up for 30 seconds or so and then apply a second layer.
3. Lay scrapbook paper on top of the frame and use a rubber kitchen spatula or credit card to smooth out any bubbles.
4. Place the frame face down on top of a cutting mat or cardboard to protect the surface beneath, and use the hobby knife to cut away excess scrapbook paper.
5. Fingertip sand any rough edges. If you’ve sanded away the finish, reapply paint or stain with a paper towel.
6. Apply 2-3 coats of Mod Podge to the surface of the frame, drying 15 minutes between each coat.
While scrapbook paper works great for this project, there’s no reason to limit your selection to stock paper designs. Vintage wallpaper, shelf paper, seed packets, and even pages from old children’s books serve as excellent mediums, and will give your frame a truly unique look.
Whip up a few coordinating wooden hearts, flowers, or stars for a one-of-a-kind photo grouping, or scatter the pieces throughout your decor to create a cohesive theme. Display these decorative masterpieces in your own home, or share them with family and friends. Everyone loves to receive photo gifts, especially when they’re presented in decorative frames!
Photo Credit: Lizzy J Designs
4 Comments
Do I have to use Mod Podge for this craft, or can I use any kind of glue?
You dont have use Mod Podge, you could probably do what you used to do in grade school and mix a little Elmer’s and water together to get the same effect. We just recommend Mod Podge, because it saves some time and is easier. But you will definitely need some sort of sealant to seal and protect your finished project. Please let me know if you have any other questions! Happy Crafting!
Jessica
I am planning on using modpodge to apply and seal a photo onto a box that comes with a tung oil finish. Can I do this safely with this type of finish already on the box?
You can still mod podge your box, it will just require a few more steps. Since your box is already stained with an oil based stain, you will need to seal it with an oil based sealer. You could also use an oil based decoupage product instead Mod Podge or Elmer’s because they are water based and will not stick to your project.