Difficulty level: Intermediate
Time required: 1 hour, including baking time
Age range: 8 and up with some adult supervision required
Things you’ll need:
Upcycled tin can (15-oz. can for adults and older children; 8-oz. cans for small children)
Sculpey Clay Set
Clay roller
Ruler
Oven
Clay tool set
Things to do:
1. Preheat your oven to 275 degrees Fahrenheit. Remove the clay colors you’d like to use from the packaging. (We used four colors, but you can use as many or as few colors as you’d like.) Knead each block of clay with your hands to soften it. For an adult-sized bracelet, we used about half a block of each color.

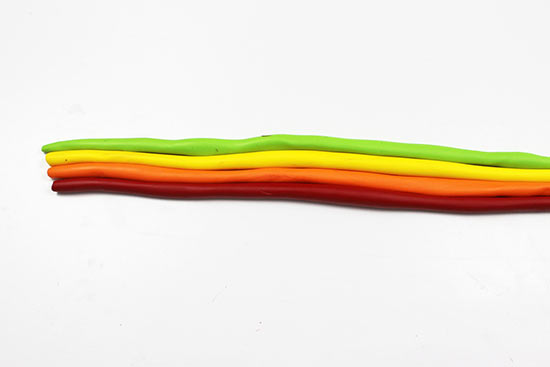
2. Use your hand to roll each color into a long tube. Try to roll each tube to the same evenness if possible.
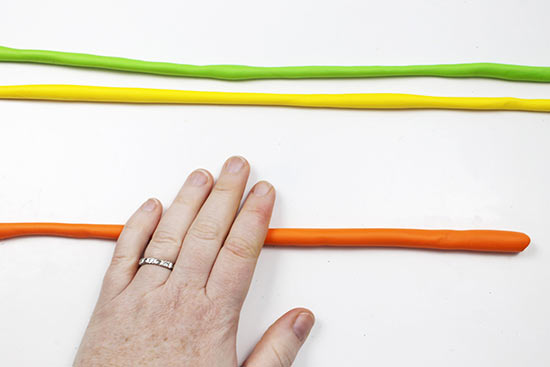
3. Push all the colors together to create one long strip, lining up the ends of each tube.
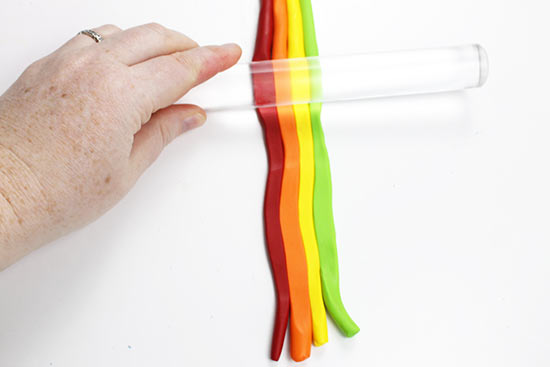
4. Using the clay roller, roll the strip out to an even thickness of about 1/8″.
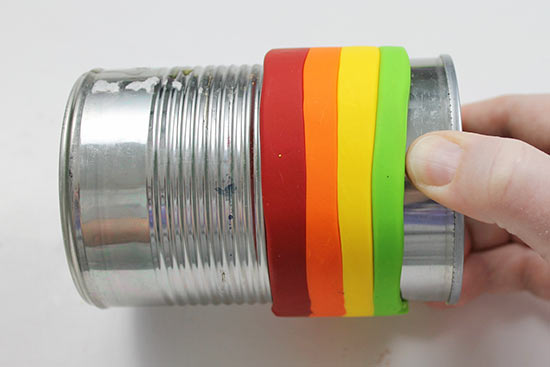
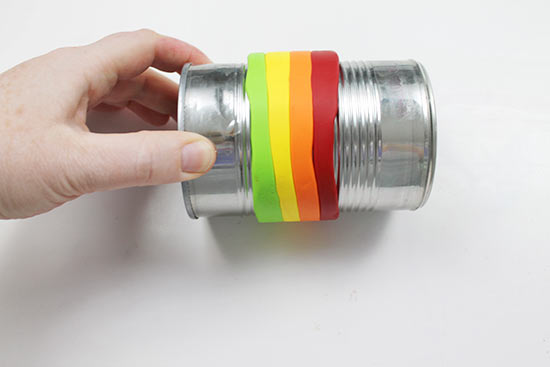
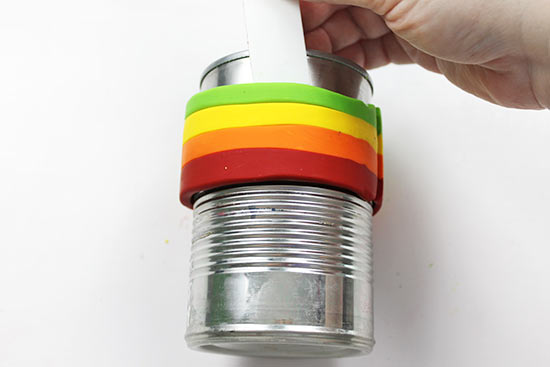
5. Begin wrapping the flattened clay around the can, using the rings of the can as a guide to wrap the clay evenly around.
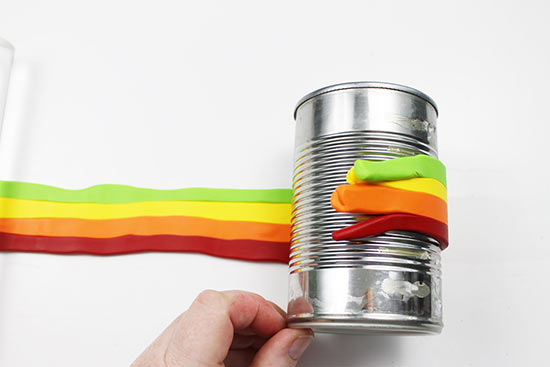
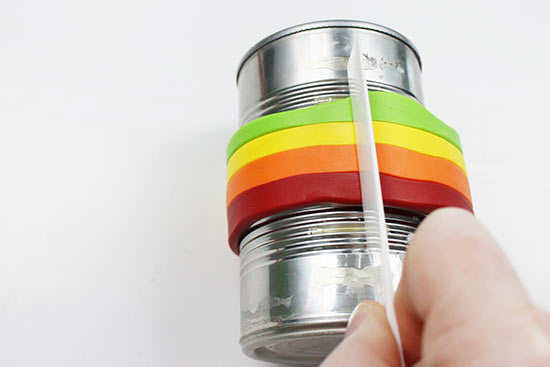
6. Using a clay tool, cut the bracelet to make sure the edge is even.
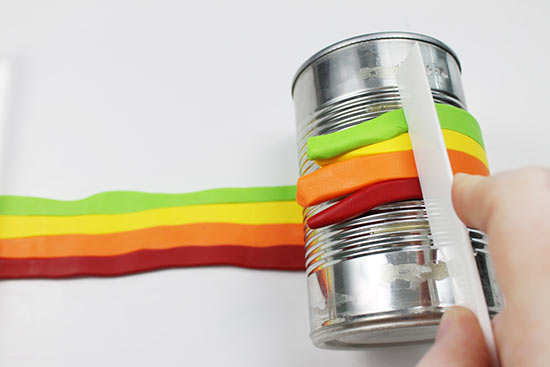
7. Continue wrapping the bracelet around the can until you reach the edge. Using the clay tool, slice through the clay evenly at the point where the two ends meet.
8. Press your fingers into the joining seam to stick the two ends together securely.
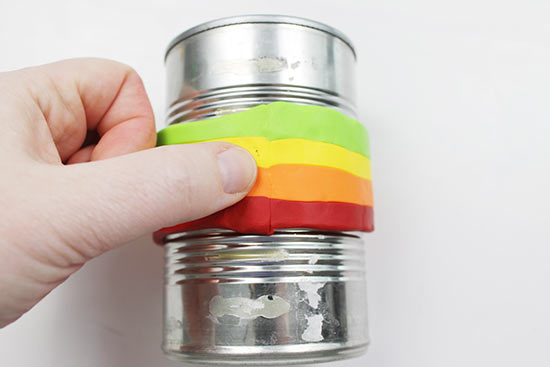
9. If your join has fingerprints or bumps, roll the can over your work surface to even out the join.
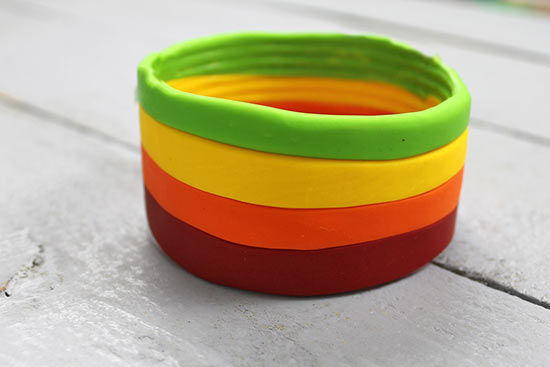
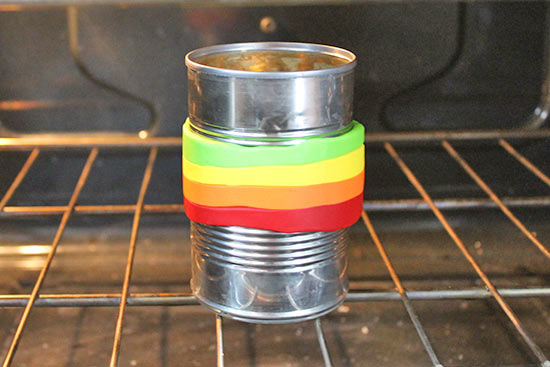
10. Place the can in the oven and bake for 20 minutes. Allow the can to cool once you remove it from the oven.
11. Once the can is cool, wedge a clay tool between the bracelet and the can to remove it. Do not force the clay tool forward, otherwise the bracelet might crack.
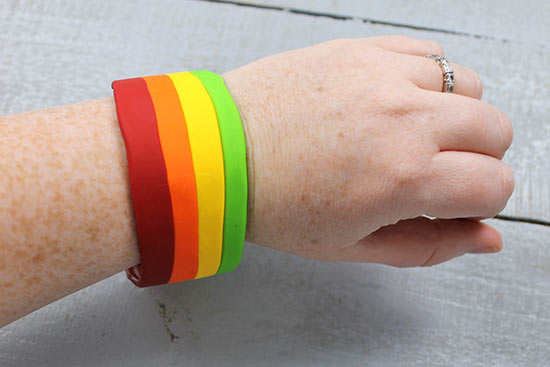
12. If your bracelet still won’t budge from the can, press the sides of the can in gently in different sections to separate the can from the clay. With some patience, you will be able to remove the bracelet from the can. Then you’re ready to wear it!