
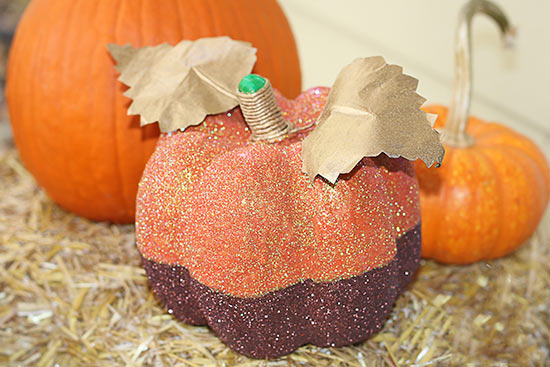
Want to add a little more sparkle than scary to your Autumn decor? Then the DIY Ombre Glitter Pumpkin will fit perfectly in your Fall decor. Here is how to make your own.
Difficulty level: Beginner
Time required: 2 hours of crafting plus paint and glitter drying time
Age range: Adults
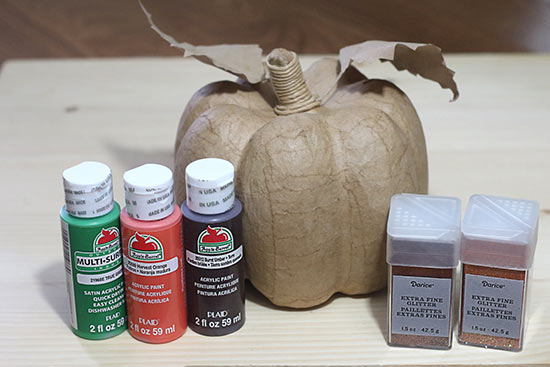
Things you’ll need:
Paper Mache Pumpkin
Mod Podge
True Green Multi-Surface Acrylic Paint
Pumpkin Orange Extra Fine Glitter
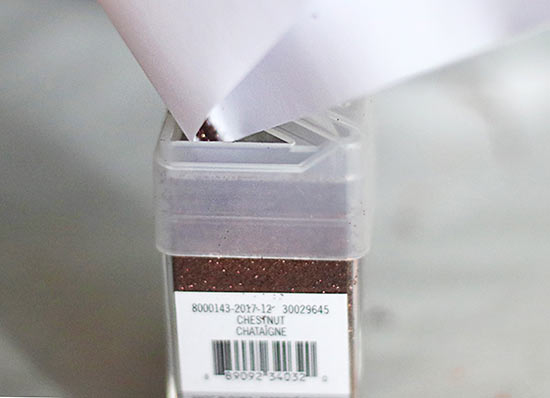
Chestnut Brown Extra Fine Glitter
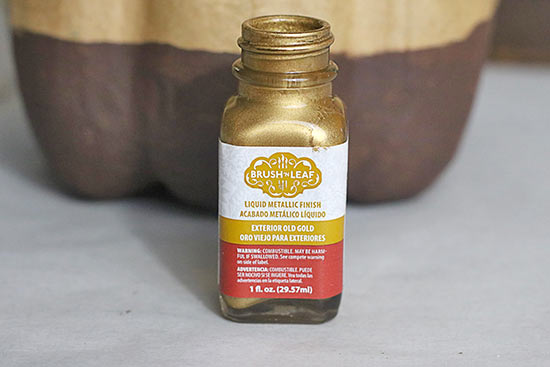
Old Gold Brush ‘N Leaf Exterior Metallic Paint
Burnt Umber Apple Barrel Acrylic Paint
Harvest Orange Apple Barrel Acrylic Paint
Darice Flat Red Sable Artist Paint Brush Set
Small Poly Foam Brush
Krylon Glitter Blast Clear Sealer Spray
Things to do:
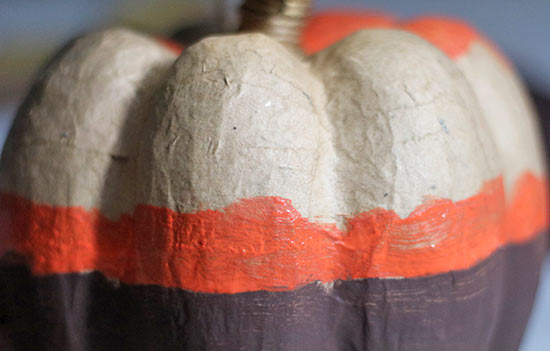
1. With the Burnt Umber Apple Barrel Acrylic Paint, paint a line around the entire pumpkin.
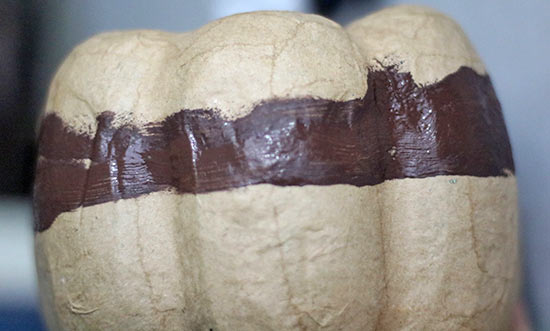
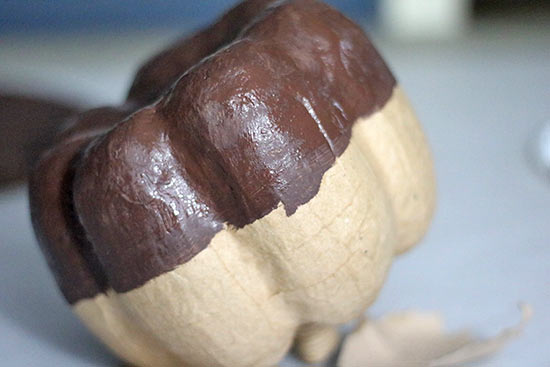
2. Continue painting the pumpkin from the line to the bottom, including the bottom of the pumpkin. Allow the paint to completely dry.
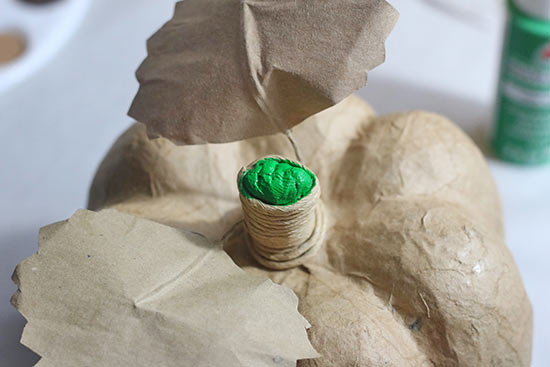
3. Paint the very tip of the pumpkin stem green. Allow the paint to dry.
4. Be sure not to eat or drink while using the Old Gold Brush ‘N Leaf Exterior Metallic Paint, as it does contain copper. Wash hands thoroughly after use.
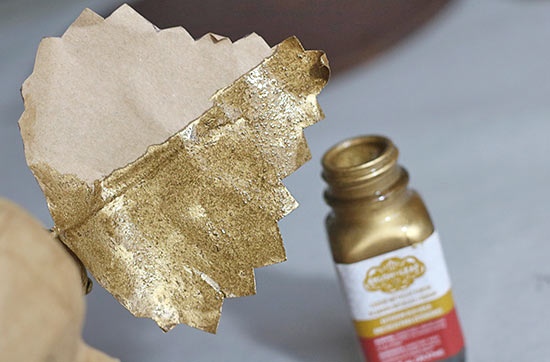
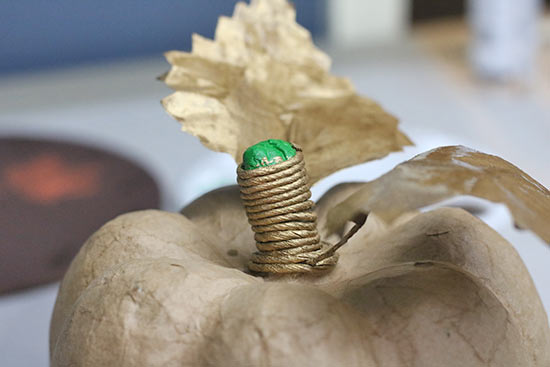
5. With the Old Gold Brush ‘N Leaf Exterior Metallic Paint paint the leaves, stem and wrap around the stem. Paint the underneath of each of the leaves first. One coat of paint should be sufficient. Allow the paint to completely dry.
6. Since the area is small, some Old Gold Brush ‘N Leaf Exterior Metallic Paint may have dropped on the pumpkin stem, touch up the the pumpkin stem with the true green paint.
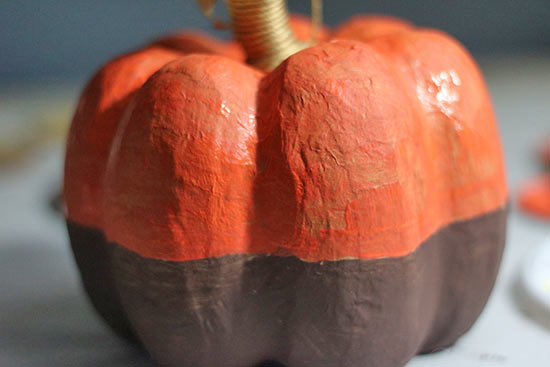
7. Use the Harvest Orange Apple Barrel Acrylic Paint to paint around the stem of the pumpkin.

8. Then paint a line around the pumpkin to match up to the brown on the bottom of the pumpkin.
9. Continue to fill in the rest of the top of the pumpkin with the harvest orange paint. Allow the paint to dry.
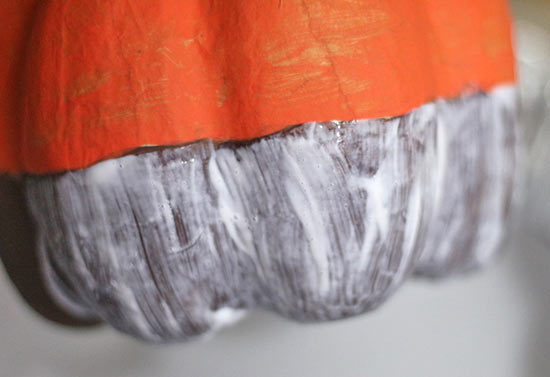
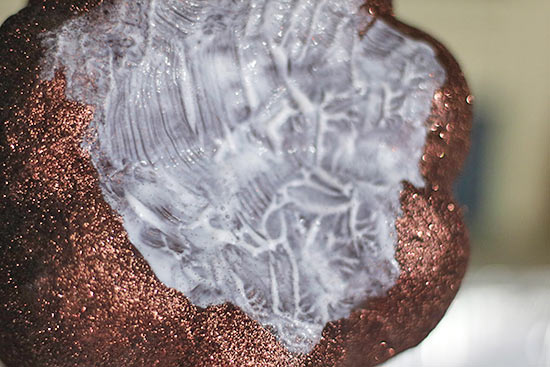
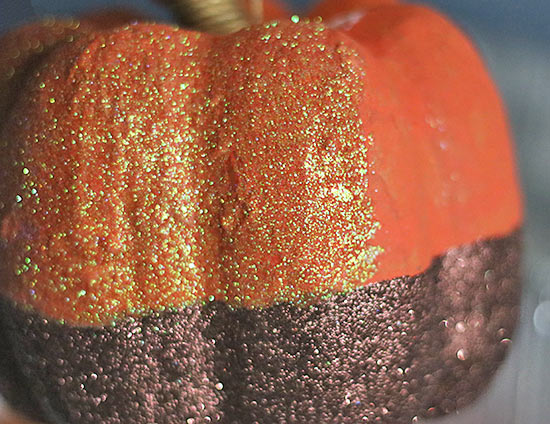
10. Brush a layer of Mod Podge on one side of the bottom of the pumpkin covering the brown paint. I break the sides up in quarters. Try to get a nice even smooth coat. Too little Mod Podge will leave open spaces in the glitter and too much Mod Podge will cause the glitter to clump. It is easier to fill in the open spaces, than to get rid of clumps.
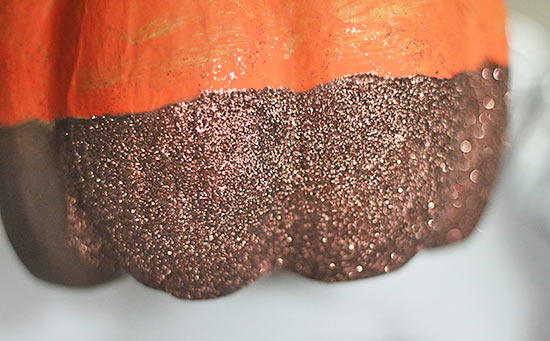
11. Over a container lined with a sheet of paper generously pour the chestnut brown glitter over the Mod Podge layer. Make sure the Mod Podge is completely covered. Wait a few seconds, then shake off excess glitter. Repeat this step on all four sides of the bottom of the pumpkin.
12. Brush a layer of Mod Podge on the bottom of the pumpkin. Then, generously pour a layer of the chestnut brown glitter. Wait a few seconds, then shake off excess glitter. Fill in any open areas with more mod podge and glitter.
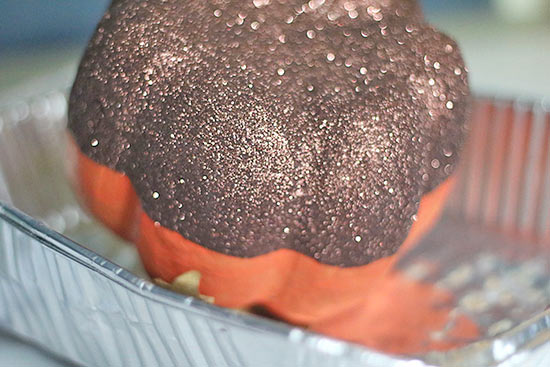
13. Set pumpkin upside down, making sure the glitter edges are not touching the pan, to dry completely.
14. Fold the piece of paper containing the excess the glitter in half. Then, pour the excess glitter back into its original container.
15. Once the glitter on the bottom of the pumpkin is thoroughly dry, add the mod podge to the top of the pumpkin covering the orange paint, again in quarters.
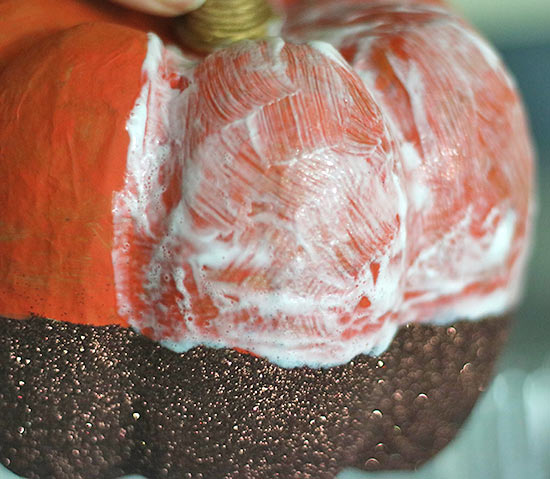
16. Pour on pumpkin orange glitter over the mod podge and repeat the same steps as the brown the glitter above, until the orange paint is covered in glitter. I found the orange glitter needed more touch ups than the brown glitter.
17. Set pumpkin back on pan to thoroughly dry. To keep glitter from falling off, spray the pumpkin with the Krylon Glitter Blast Clear Sealer Spray. Turn the pumpkin upside down, spray the bottom of the pumpkin in a well ventilated area. All to dry thoroughly before flipping the pumpkin over and spraying the top part of the pumpkin. Allow to thoroughly dry.

Voila! You now have your own DIY Ombre Glitter Pumpkin!