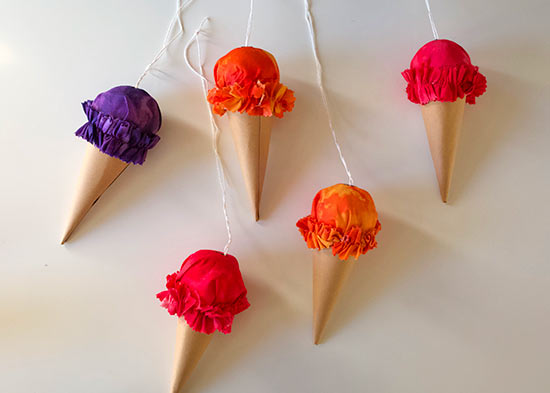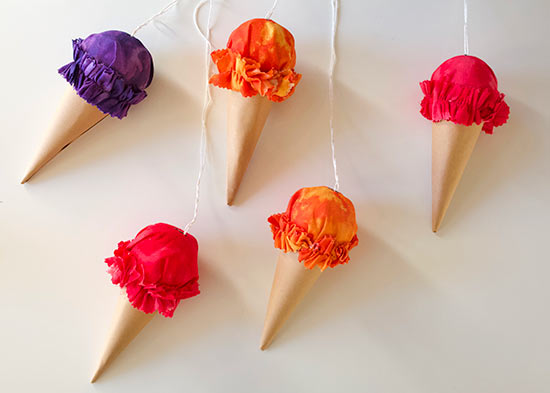
Celebrate a birthday with these festive ice cream cone decorations! This sweet treat brightens up your space, adding a colorful, playful vibe to any party!
Difficulty level: Beginner
Time to complete: 45 minutes
Age range: 12 and up
Things you’ll need:
2 1/2 inch styrofoam balls
Brown cardstock
Fabric
Sewing machine
Hot glue gun and glue sticks
Tacky glue
Bakers twine
Pen
Ruler
Compass
Pinking shears
Floral pins
Things to do:
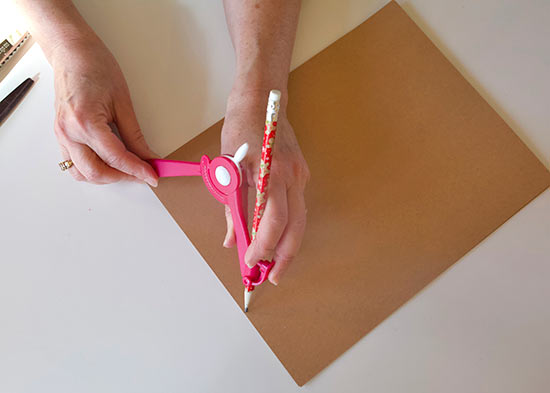
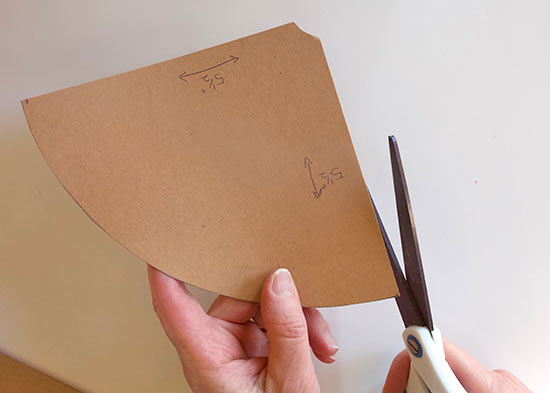
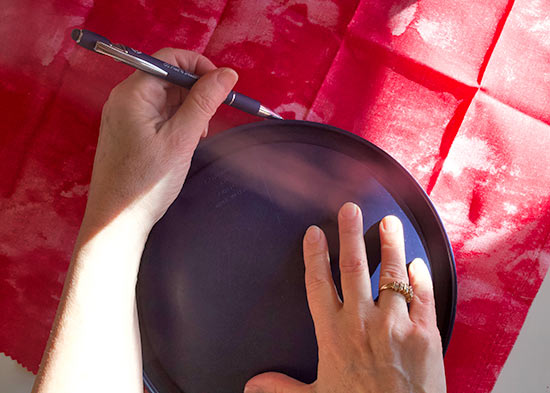
1. First, make a pattern for your cones. Use a compass to draw a 1/4 circle that is 5 1/2 inches tall. Cut out the shape.

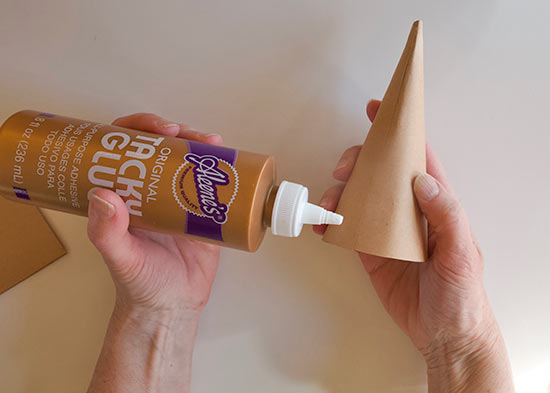
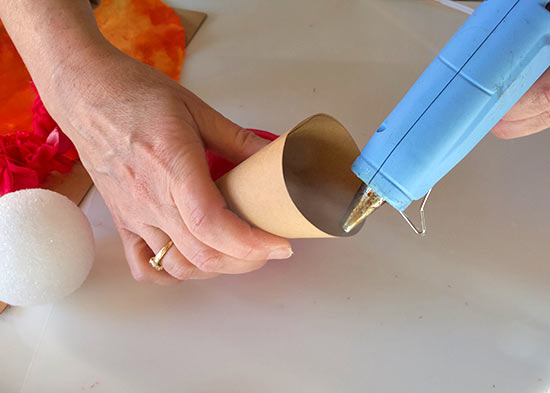
2. Cut a notch off the end and roll the cardstock into a cone shape, overlapping the paper roughly 2-inches at the widest part of the cone. Use glue to hold it in place.
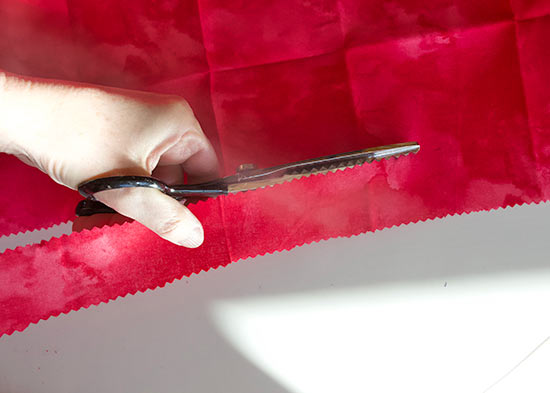
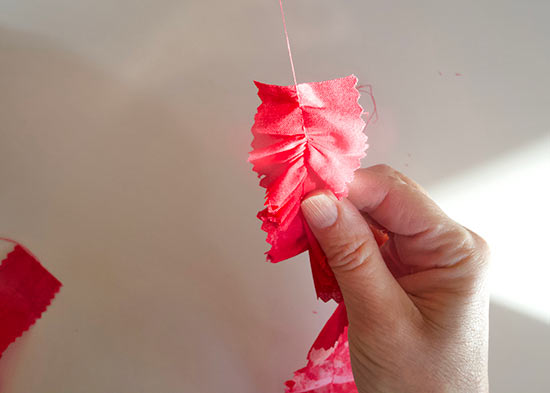
3. Cut a 42-inch x 1 1/2 inch strip of fabric and trim the edges with pinking shears.
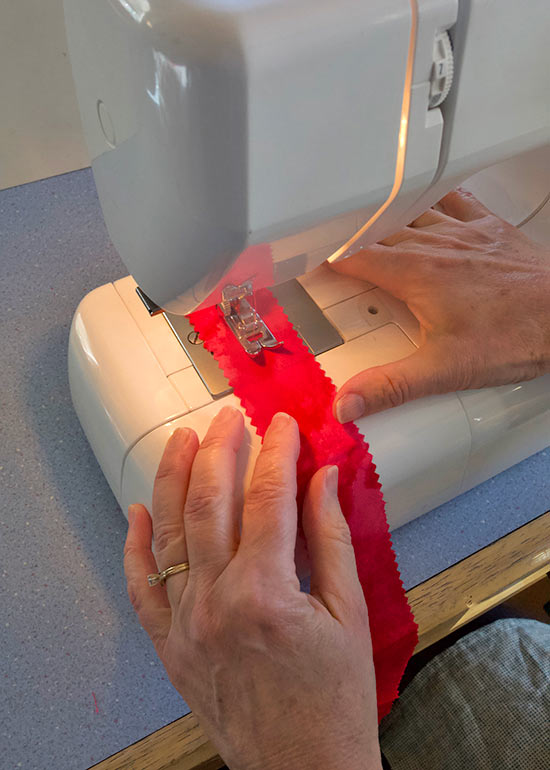
4. Sew long stitches down the center of the fabric and pull the thread to gather the fabric until the length measures 8-inches. Trim excess thread.
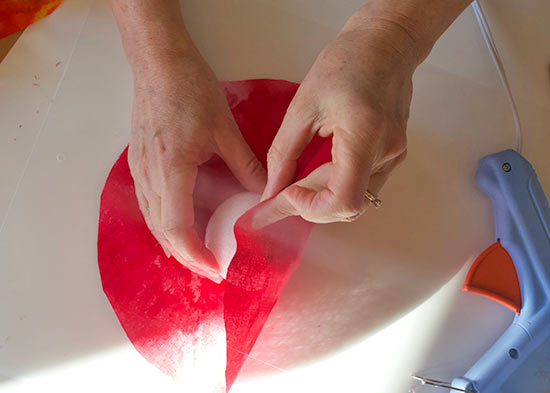
5. Cut a 9-inch fabric circle and wrap it around your Styrofoam ball, using hot glue to secure.
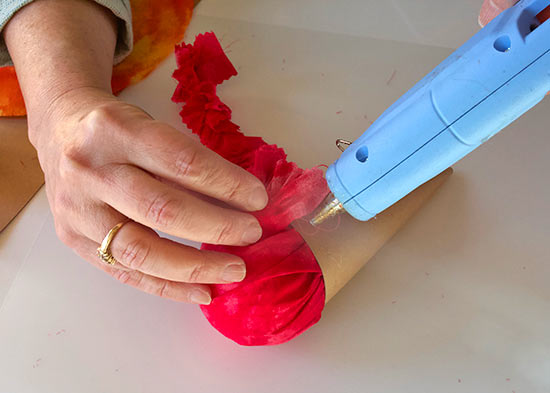
6. Run a line of hot glue around the inside of your cone and slide the Styrofoam ball onto the cone.
7. Use hot glue to attach your ruffle to the top of the cone.
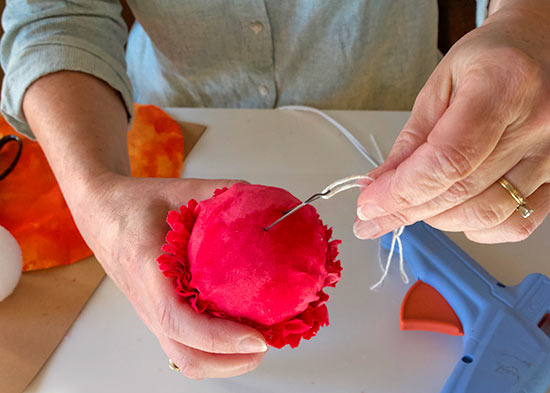
8. Finish your cone by cutting a 24-inch piece of bakers twine, folding it in half and using a floral pin to attach it to the top of your cone.