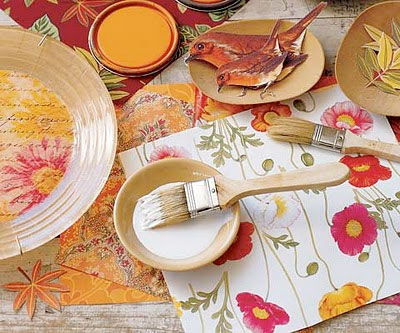
Learning how to decoupage is pretty simple and opens a wide range of crafting possibilities. Decoupaging is the art of using pretty paper cutouts and glue on an object’s surface, creating a delightful inlay. You can pretty much decoupage anything your heart desires, even if the surface is made of wood, metal, stone, glass, or ceramic. Once you have a bit of beginning knowledge and “know how” to prepare, the sky is the limit!
Things to do:
You can use any artwork you wish; such as postcards, newspaper, wrapping paper, books, photos, scrapbooking paper, etc (I’m sure you’re getting the idea by now). Before you go and cut any loved photos or special scrapbook paper that you have been too afraid to use – be sure that you have a copy or an extra sheet. If you are using photos, try scanning the photo and printing out a nice copy to use for your decoupaging. Also, if you are printing out photographs or images from your computer, using an ink jet printer, be sure to let the ink dry before you start applying the Mod Podge. I would recommend testing a sheet of paper with the glue before you actually start decoupaging. The moisture from the glue may smear your images and ruin the paper. If you are concerned about bleeding, try spraying three coats of Krylon Crystal Clear Spray on the images before decoupaging. If you are a person who desires more detailed lines in your images simply trace the images with a fine point marker or pen.
Now for the meticulous step in decoupaging. It’s time to cut out your images! This may take some time and requires some attention to detail but it will be all worth it in the end when your product is finished (I promise). You will want to use a sharp pair of scissors or a craft knife. When using a craft knife be sure to point your knife blade slightly to the outside edge of your image. This will create a downward beveled edge and will also prevent the edges or back color from showing on your final product. Take your time and try not to leave any neighboring images or backgrounds. You could also consider tearing the edges of your images to create that added element to your final product instead of straight cut edges.
If you are decoupaging glass, be sure to clean the surface with alcohol and let dry. If you are using wood as your medium for decoupaging, gently sand the surface with a fine grit sandpaper (400-grit would work well) and then dust off any remaining grit from the surface using a clean cotton cloth. Usually you will be decoupaging your images to the top surface of your project but with the case of glass items, you will usually want to decoupage your images to the non-used side of the surface. So for example, if you are wanting to decoupage a glass plate, you would lay your plate face-down and glue your image face-down onto the plate’s backside. This way the glue does not distort the smoothness of the glass surface, and it will also prevent your image from being in contact with food (aka you won’t be eating paper later on).
If your image is frail and very thin you may want to coat it with some Mod Podge and let it dry before using it. Now its time for the fun part! Organize and layout your images the way you want and what you have envisioned for your final product. You can even overlap your images to create a hodge podge type of look. When applying the glue to the surface of your project and image, use an appropriate sized sponge sponge and dip your brush in a small bowl of water then into the glue each time. Be sure that you have enough glue of proper consistency to finish each image. Carefully apply a light coat of Mod Podge to the surface of your project. Then apply another light coat onto the underside of your image (if you are decoupaging the top of a surface). Then gently place the image on the surface starting at one end and pressing down as you go to get prevent any air bubbles. After the image is on the surface of your project, carefully smooth the surface of the image with a sponge brush. Be sure to do this slowly and carefully to prevent any tearing or ripping of the image. You can use your fingers to smooth out any bubbles that may have gotten by. You can wipe any glue that may have flowed out during the process with a damp cloth or paper towel, press as you go to secure the edges of your image. Once you have all your images on the surface of your project set aside, and let dry thoroughly. For glass items, you may want to thin out your Mod Podge before applying it to the surface. Glass has a non-porous surface and if the glue is too thick it will have place to go, causing the glue to lump up as you try to smooth the surface.
Finally, it is time to seal up your artwork with layers of Mod Podge. The number of layers depends on the look and type of you project you have in mind. Just remember the more layers you apply of Mod Podge, the more your images will fade into the surface and the more they will look like they were painted on. Allow sufficient drying time between each coat. Just stop when you have accomplished the desired look!