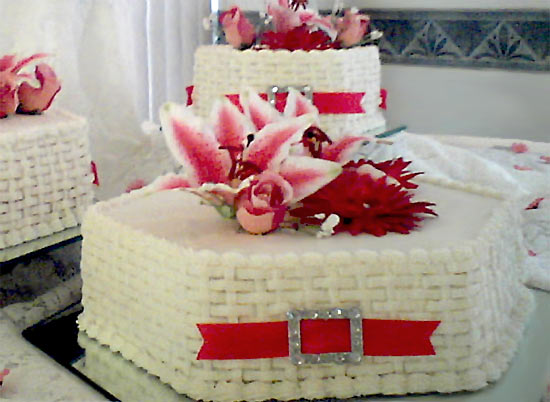
I developed this buckle for a wedding in June of 2007 for a bride that wanted a little glitz, but was on a tight budget, as most of them are. She was very pleased with them! I used clear or diamond like rhinestones and silver glitter, but you could us colored on both if you prefer.
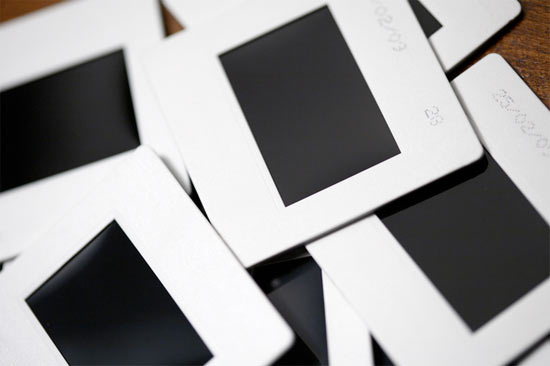
I was looking for this shape in chip boards but could not find it is why I used the slides, lightweight also. The picture slides in case some of you don’t know are what they put the negative in to see a picture through a projector. It opens up and is connected in the center by perforations, which then will be a rectangle. They have glue on the inside, so that once you put the negative in, can be sealed shut to hold it there. You could use chipboard or light wood in other shapes, like hearts, diamonds, etc. that have the center cut out to achieve this in those shapes. I got the slides in a camera shop.
Things you need:
Rhinestones
Toothpicks
Glitter
Tacky glue
Ribbon
Empty picture slides
Things to do:
1. I took a toothpick broke off to fit to the size of the slide, lay inside on the sticky in the center of your opening and close the slide casing and seal.
2. Lay your rhinestones on it to see what pattern you want. You can either use all one size or various sizes.
3. Cover front of slide with glue (I used Tacky glue), take the rhinestones that you want to use and place them on the glued side. Now you may notice there are gaps where your stones aren’t covering, that is ok.
4. Take your glitter of choice and sprinkle all over it to cover up gaps and/or you could even use tiny tiny seed beads.
5. Let dry thoroughly.
6. Now you are ready to run your ribbon or what have you thru the buckle over the toothpick (my ribbon was the size of the opening so toothpick would not show).
7. Now I used them on a cake. We took toothpicks on the top inside corners of the buckles to hold them on the cake. (Did not show at all)
Guest blogger:
Sandy Collier
Facebook Page
