
Skip to search Skip to navigation menu Skip to main content Selecting option will reload page

Category: Spring Crafts

Fun in the Sun Beaded Toe Ring and Sunglass Chain

beaded_toe_ringsDon’t let rainy spring days dampen your creativity! If thunderstorms are whisking you indoors, why not make the most of your inside time with a few fun and simple craft projects? Our funky beaded toe ring and sunglass chain are sure to raise your spirits, giving you a sneak preview of the fun-in-the-sun that’s just around the corner.

Beaded Toe Rings
Paired with the perfect pedicure, these funky toe beads will have you sandal-ready in a flash!

Things you need:
Bead Kit
Large Accent Bead (optional)
Stretchy Cord
E6000 Glue
Toothpick

Things to do:
1. Thread seed beads onto a piece of elastic until you have a large enough piece to fit snugly around the top segment of your toe.
2. Slide on the larger bead and tie off with a square knot.
3. Dab glue on the knot, and then use the toothpick to tuck the knot inside the larger bead. For a sassy touch, add a few dangle beads or charms.
beaded_fun_in_sun
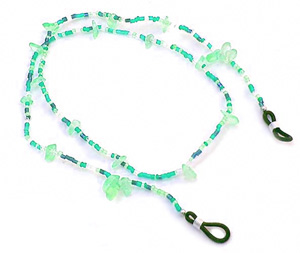
Dazzling Sunglass Chain
Keep your shades at the ready with this cheery sunglass chain.

Things you need:
Bead Kit
2 eyeglass connectors
Needle Nose Pliers
Wire Cutter or Fingernail Clipper

Things to do:
1. Cut wire to a handy length for dangling sunglasses, making sure it’s long enough to put them on/take them off easily.
2. Use needle nose pliers to secure eyeglass holder to one end and string beads in pattern of your choice; finish off with the remaining eyeglass holder and use a wire cutter or fingernail clipper to snip off sharp tips.

With so many colorful beads to choose from, accessorizing your summer wardrobe will be a breeze! Enjoy flaunting your feet and stowing your shades in style this summer.
Continue Reading

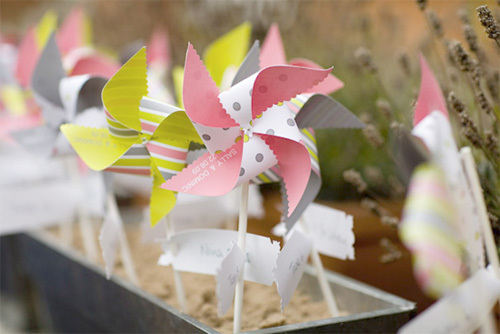
Paper Pinwheels – Breezy Centerpieces for any Occasion

paper_pinwheels
As refreshing as they are appealing, paper centerpieces bring a whimsical touch to any affair. Paper centerpieces and decorations can be whipped up in no time, and are guaranteed to be as easy on the eyes as they are on your pocketbook.

Things you need:
12″ x 12″ sheets of coordinating scrapbook paper or wallpaper remnants
Floral Tape
Hole Punch
Scissors
Scallop edge scissors
Dowel Rods
Wooden Ruler
Spray Adhesive
Pencil
Decorative Push Pins (with a head larger in diameter than your hole punch)

Things to do:
1. Choose two different colors or patterns of paper for a more dimensional pinwheel. The size of the paper does not really matter, as long as your paper is a perfect square in shape. Use spray adhesive to affix the wrong sides of the two sheets of coordinating scrapbook paper or wall paper remnants together; allow to dry thoroughly.
2. Cover the dowel with florist’s tape, overlapping the edges as you wrap.
3. Place the ruler diagonally at a corner and lightly draw a line measuring 5 1/2″ in length toward the center; repeat on remaining three corners.
4. Use scallop edge scissors to cut on the drawn lines and to trim all paper edges.
5. Punch a hole in the center of the paper, and at the point of every pinwheel tip.
6. Create the pinwheel by aligning holes, bringing tips toward the center without creasing or folding.
7. Slip a decorative pushpin into the hole and press into the dowel to secure.
8. Add finishing details, such as glitter, charms, ribbons, or other embellishments, and allow to dry thoroughly before displaying.

Bundle several paper windmills together to form a decorative bouquet for centerpieces, use to line walkways, or make a few miniature paper windmills to use as cake decorations or buffet table accessories. Perfect for the young, and the young at heart, paper windmills give even the most formal of occasions a much-needed breath of fresh air.

Photo Credit: Unknown

Continue Reading
Change Your Country
Please select your country, this will change the site to your country's currency:

Cancel