Skip to search Skip to navigation menu Skip to main content Selecting option will reload page

Category: Party and Special Occasion

Haunting Silhouette Plates

Haunting_Silhouette_Plates3
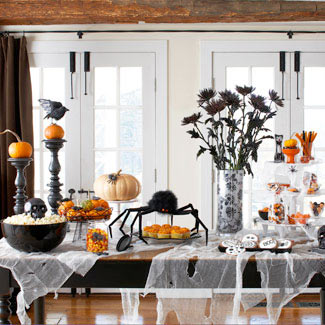
Halloween is a big deal in our neighborhood. What started out as a small pumpkin carving party has turned into a multi day party on our block with pumpkin carving, a parade, a pizza party and finally group trick or treating up and down the streets. As the hostess of one of the parties, I’m always thinking up new ways to decorate the table in fun and spooky ways.

This year I’m planning on spicing up my every day dishes with contact paper silhouettes of witches. It’s a great temporary way to change up the ordinary and add a little Boo! to the table. If you’re not hosting a party, why not hang a few silhouette plates on your wall as part of your Halloween decorations?

Things you need:
Black contact paper
Witch Template
Spray adhesive
Scissors
Plates

Things to do:
1. Print out the Witch Template and cut out each image.
Haunting_Silhouette_Plates
2. Spray the back of the image (you can use either side depending on which direction you want your witches facing!) with adhesive and press onto the back side of the contact paper, smoothing out any bubbles.
3. Cut out the contact paper witches.
Haunting_Silhouette_Plates2
4. Remove the backing from the contact paper and smooth onto plates.
Note: These stickers are temporary and should be used on plates where dry snacks will be displayed.

Continue Reading

Pop-up Halloween Party Food Table Cards

halloween_table
These cute and easy-to-make pop-up cards can be used on the food table to let party guests know what creepy foods they’re eating. Simply make and handwrite such things as: Eyeball Punch” (green grapes in fruit punch), or Worms in Dirt” (Brownies with oreo cookie crumb and gummy worm topping).

Things you need:
Heavy orange paper
Fine-tip black Sharpie
Pumpkin or Jack O’ Lantern rubber stamp (should be about 2″ diameter)
Black ink pad
Craft knife
Cutting mat

Things to do:
1. Use the carft knife to cut the paper into 4″ x 6″ sheets.
2. Stamp the pumpkin image onto each of the sheets, making sure that the top half of each pumpkin falls above the center fold line when the paper is folded over.
3. Use the hobby knife to cut out only the top half of the pumpkin.
4. Fold the paper in half (but not the cut out portion) so that the top of the pumpkin stands up.
5. Label each card with the Sharpie.

Continue Reading
Change Your Country
Please select your country, this will change the site to your country's currency:

Cancel