Skip to search Skip to navigation menu Skip to main content Selecting option will reload page

Category: For the Home

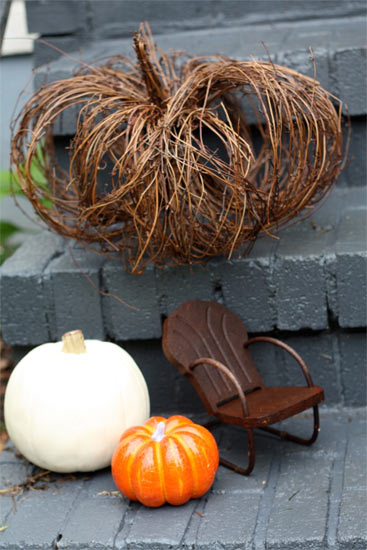
How to Make a Grapevine Pumpkin Tutorial

Grapevine_Pumpkin
Grapevine decorations are one of the heralds of fall. Hardy and outdoorsy, grapevine stands up well to the autumn elements and looks warm and inviting for guests and family alike. In addition to wreaths, grapevine garland can be formed into a woodsy pumpkin to nestle amongst the orange beauties on your front doorstep to welcome fall. And don’t forget to stuff them full of Christmas lights on Halloween to add to the eerie glow of the evening!

Things you need:
1 – Grapevine garland
Floral Wire
Wire cutters

Things to do:
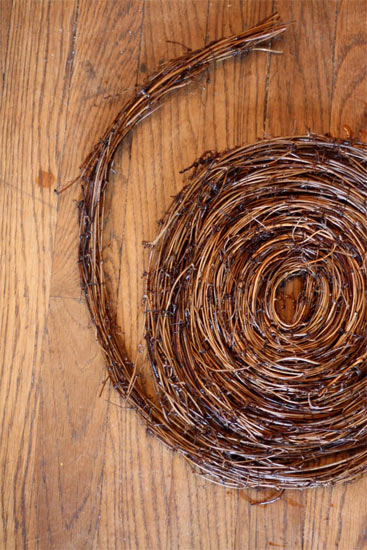
1. Soak your grapevine in a tub of water for a few hours to soften it up. This will make it easier to work with.
Grapevine_Pumpkin2
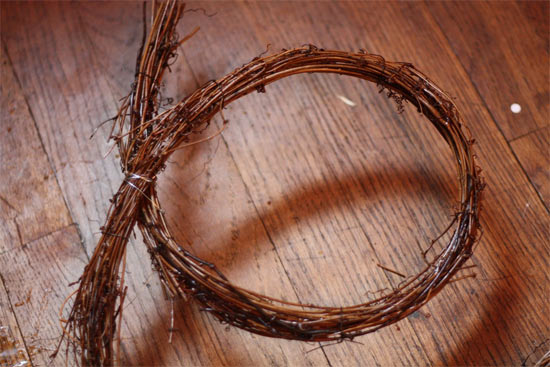
2. Leaving a 6″ long tail out the top, bring the vine around into a loop and wrap wire tightly where the two layers meet. The tail will be the stem of the pumpkin.
Grapevine_Pumpkin3
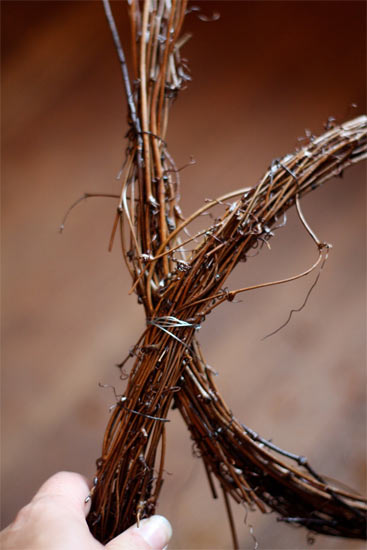
3. Loop the vine around again, making approximately the same size loop, and secure with wire. Remember that some of the most interesting looking pumpkins are knobby and slightly uneven, so having your loops identical isn’t necessary.
Grapevine_Pumpkin4
4. Continue to loop and secure until you have reached the end of the vine, working the loops around to form a pumpkin shape.
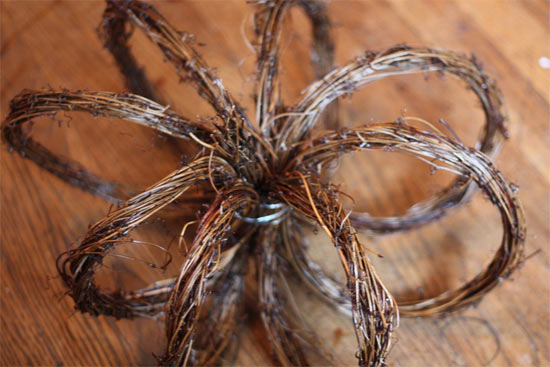
Grapevine_Pumpkin5
5. Untwist or cut the small wires that hold the vine in bunches so that the strands of the vine can be spread out.
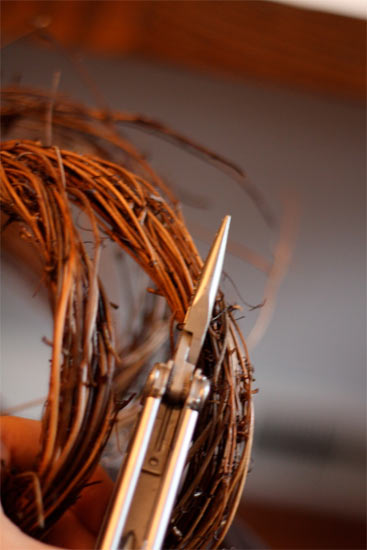
Grapevine_Pumpkin6
6. Use the small wires you just removed or short lengths of floral wire to pull strands of vine together to keep the vine evenly distributed around the pumpkin shape.
7. Wrap a sort length of wire around the stem to help keep the loose ends formed into shape.
Continue Reading

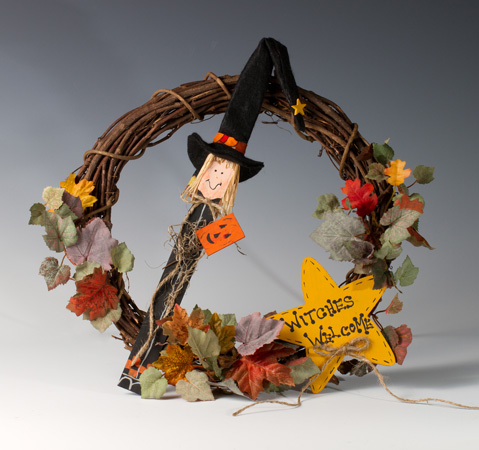
Witches Welcome Wreath

Witches_Welcome_Wreath
Things you need:
12″ Unfinished Wood Paint Paddles
12″ Natural Grapevine Wreath
5/8″ Standard Wood Stars
5-1/2″ Classic Wood Star
Raffia
Black Felt
Natural Jute Twine
Spanish Moss
Harvest Orange Apple Barrel Acrylic Paint
Country Grey Apple Barrel Acrylic Paint
Creamy Peach Apple Barrel Acrylic Paint

Black Apple Barrel Acrylic Paint

Antique Gold Apple Barrel Acrylic Paint
Autumn Fall Silk Maple Leaf Bush

Thing to do:
1. Cut off 1-3/4 of paddle, this is your pumpkin and paint it orange. Grab another paddle and paint the small end of it peach for the face. The rest of the paddle paint it black for the dress. Paint both stars gold.
2. On the large star after it dries, paint ” Welcome Witches.” Letters don’t have to be straight across, staggered or any other way you would like. When adding the dots to the welcome witches you can use the other end of the paint brush. Paint a small stitch line around the edge of the star.
3. Using a black felt cut out a 3″ circle out and then in the middle cut a slit as long as the paddle at top where the face is at. Take another black felt and fold into a triangle by taking the top right corner and bottom left corner together, then cut down that folded line. Bring together one piece of felt and glue to make the rest of witch hat. Glue the small star at point of bent hat.
4. Paint a gray line down front of the dress. Also, Paint a hem line and humps for shoes.
5. Take a small amount of orange paint and mix that with the peach paint, this color with give a shade for the cheeks and chin area on the witch’s face. Glue raffia hair onto the head with whatever length you would like.
6. Make two small bows with the natural jute twine for neck of witch and for the welcome star. Glue pumpkin to tooth pick in spanish moss bunch. Then place on wreath as desired.
7. Place and glue the fall leaf bush wherever you desire around the wreath.

Continue Reading
Change Your Country
Please select your country, this will change the site to your country's currency:

Cancel