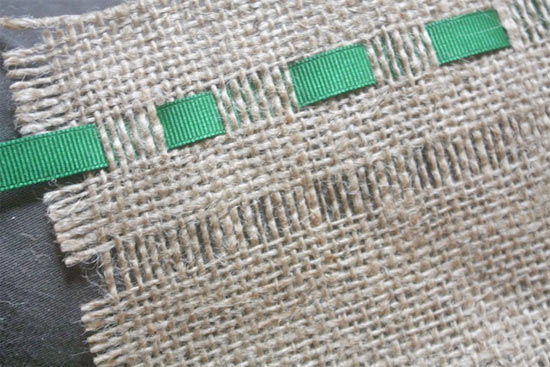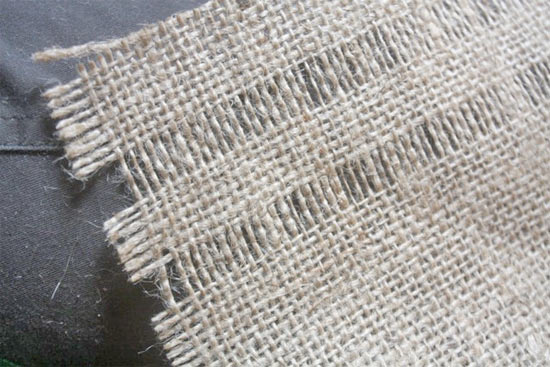
Burlap is such a useful craft staple. It can cover surfaces, wrap gifts, be turned into bags… the possibilities are practically endless. It adds a rustic edge to projects that otherwise might be a little stiff. But sometimes burlap is a little too rustic, and this technique softens the edges of burlap just that right amount. Before you get started on this, be sure to check out our tutorial on cutting burlap, it will make the process of adding ribbon much easier (and straighter!)
Difficultly level: Intermediate
Time required:10 minutes, more for larger pieces of fabric
Things you’ll need:
Burlap fabric
Ribbon
Scissors
Things to do:
1. Cut your burlap to the size and shape you need. Be sure your cuts are straight along the grain line of the fabric.
2. Measure the width of your ribbon against the burlap to determine how many threads you’ll need to remove.
3. Gently pull away enough threads running the opposite way you want the ribbon to run. Repeat for each spot you want the ribbon to run through.

4. Thread the ribbon through the burlap, weaving in and out. Repeat across the fabric until you have the look you want.
1 Comment
It is important to seal the edges of the burlap with something (Fray Check) to keep it from continuing to unravel. This is a good idea. Just think of the things you can do – great gift bags, placed mats- endless possibilities.