
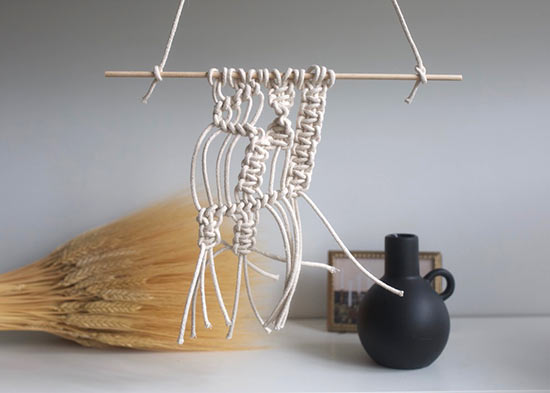
Once you’ve learned the three basic Macrame knots, it’s time to take on a wall hanging! This mini project is a great place to start practicing your knotting skills.
Difficulty level: Beginner
Time to complete: 30 minutes
Age range: 12 and up
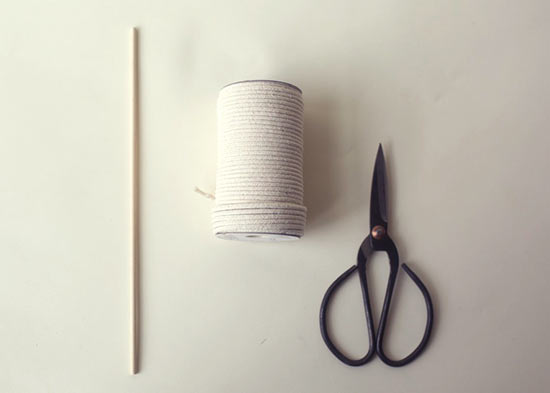
Things you’ll need:
Dowel
Macrame cord
Scissors
Things to do:
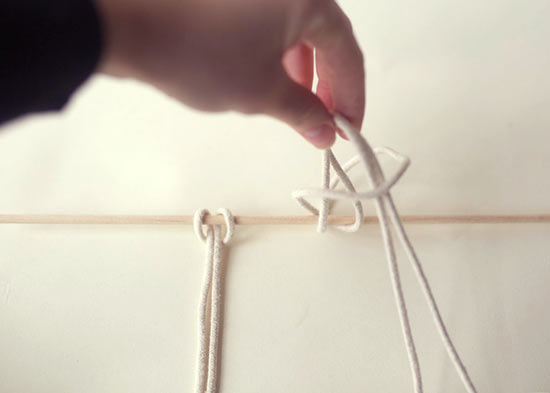
1. Cut seven pieces of macrame cord that measure 5-feet in length.

2. Fold your macrame cord in half, lay the dowel over the loop in the center and flip the ends over the dowel and up through the loop. Repeat this step with all seven pieces of macrame cord.
3. Now you’re ready to knot! You don’t need a pattern to make a mini macrame, just start knotting, alternating between the square knot, spiral knot, and half hitch knot. For my mini macrame wall hanging, I started with the four cords on the far left and tied square knots about 3 inches down.
4. Next, I moved to the next four cords and tied spiral knots until they reached the same length as my square knots.
5. Finally, I moved to the remaining six cords and tied half-hitch knots, until I reached the same length as my square and spiral knots.
6. To finish the piece, alternate between the square knot, spiral knot, and half-hitch knot until you’ve reach the end of your cords.
7. Trim any excess cord.
8. Cut a two-foot piece of macrame cord and tie it to both ends of your dowel, creating a hanger.