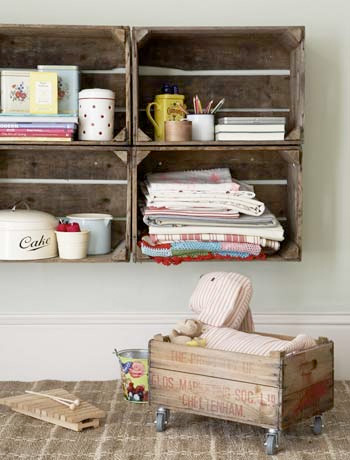
Even the most inexpensive bookcases can look like a major investment if you need a significant shelving space for an extensive home library. In a pinch, you can always stack the crates, but if you want a slightly more formal look rather than going for Early Dorm Room Decor, this project is fairly easy even for those without carpentry skills.
Things you need:
Wooden wine crates
Screwdriver
Hammer
Screws
Ball Knobs or Casters
Sandpaper
Wood varnish
Wood paint (optional)
1. Acquire some wooden wine crates. If you’re an oenophile and already buy your favorite wine by the crate, you may have some on hand. If not, visit a store that sells good wines (i.e., not the kind that comes in cartons). Some stores will give you the old crates for free, others may ask for about $1/crate. In some cases, you can even scavenge crates sitting next to the dumpster behind upscale food and wine retailers. Check to make sure your crates are in good condition.
2. Prepare the wooden crates to become furniture instead of books. Clean them, and remove any extraneous nails or staples. Sand the interior of the crates, and seal the wood. You can paint the crates if you want, or just treat with plain varnish. Taking the time to do this will enable you to clean your bookcases and make them look more like real furniture. If you want, get creative: paint the interior of the crates a different color than the exterior or leave treat the crates with plain varnish only but paint the exterior rims of the boxes a color that complements your decor.
3. Decide which crate will form the base of your bookcase. Attach ball knobs or casters to the bottom. When choosing these at the hardware store, go for sturdier and stronger over cheaper, you don’t want the castors to collapse under the weight of multiple stacked crates holding books. Lifting the unit slightly off the floor will help prevent your books from becoming dusty, but if you are in a hurry you can skip this step. An alternate method of doing this would be to get a wooden board the same dimensions as the base of the crate and attach it to the bottom using wood glue or nails and brackets as below.
4. Use brackets and screws to connect one crate to another in back. Small nails on either end of the front of your crates will keep your units from slipping as you stack one crate on top of another.
4 Comments
I am going to try some of these crafts. I really, like the crates for shelves. I am going to do this. I need shelves for my craft room.
Great idea – showed this on my blog, full credit was given to you with a link back.