Things you need:
Green Stem Floral Wire
Green Floral Tape
Scissors
Ribbon (of your choice)
Things to do:
1. To make your ribbon rose, cut approximately 3 feet or 1 yard of ribbon of your choice. Once you are comfortable with the technique feel free to play around with the length of ribbon to create larger or smaller ribbon roses.
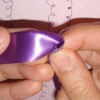
 2. Hold the ribbon in your left hand and fold the right end of the ribbon downwards, creating a 45 degree angle. Be sure to leave a 2″ tail.
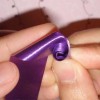
 3. Start rolling your ribbon to the left, this will create the center or bud of your rose. Roll about two or three complete turns for a good solid bud and base area.
 4. Now you are ready to create your ribbon rose petals! Take the long length of ribbon and begin folding it backwards, making a sharp 90 degree angle and wrap it around the center bud. Shape as you go. Be sure that you never let the bottom stem part go while you are wrapping with petals around with the other hand because everything will unravel. Repeat this folding and wrapping process to form the petals loosely around the bud base of your ribbon rose. You can also try gently twisting your base of the ribbon rose to shape and tighten the rose.
 5. Repeat this process until you have about 1″ or 2″ of ribbon left. Fold the remaining ribbon in half and wrap around the base stem of the ribbon rose. Secure the base of your ribbon rose using clear tape or green floral tape.
 6. Once you have created your ribbon rose, take your green floral wire and stick it in bottom of the ribbon rose (the tail that you were holding the whole time when making the ribbon rose). Use about 2″ or 3″ of green floral tape and wrap it around the entire base of the ribbon rose, starting from the top of the stem going down towards the floral wire.
Photo Credits: Trans-Craft-Inental