Search results
25 results found.
25 results found.
This QUICK project is sure to add a dash of spooky, yet adorable charm to your Halloween decor. Can be added to wreath, homemade webs, alongside your tabletop decor. Let’s spin your creative webs and get crafting this fun Halloween project.
Difficulty level:Beginner
Time to complete: 25 minutes
Needed supplies:
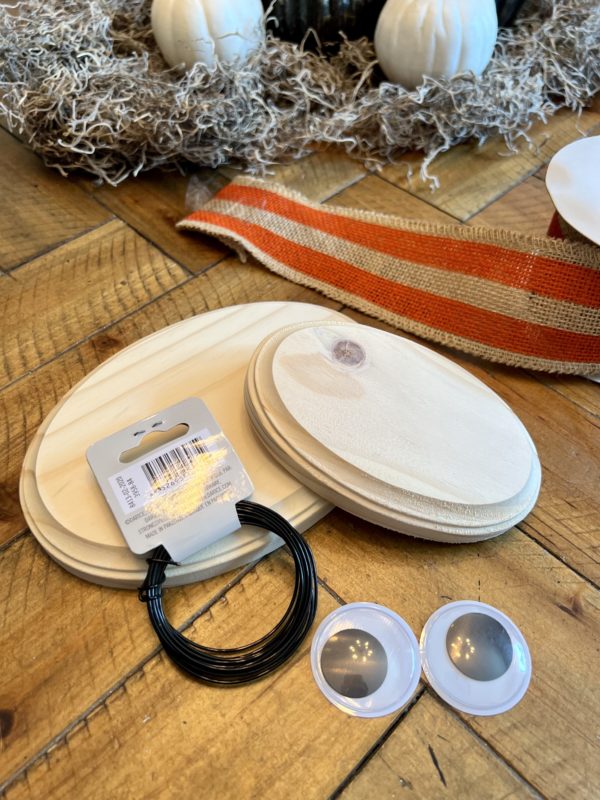
Let’s grab your supplies, channel your inner artist, and let get crafting!
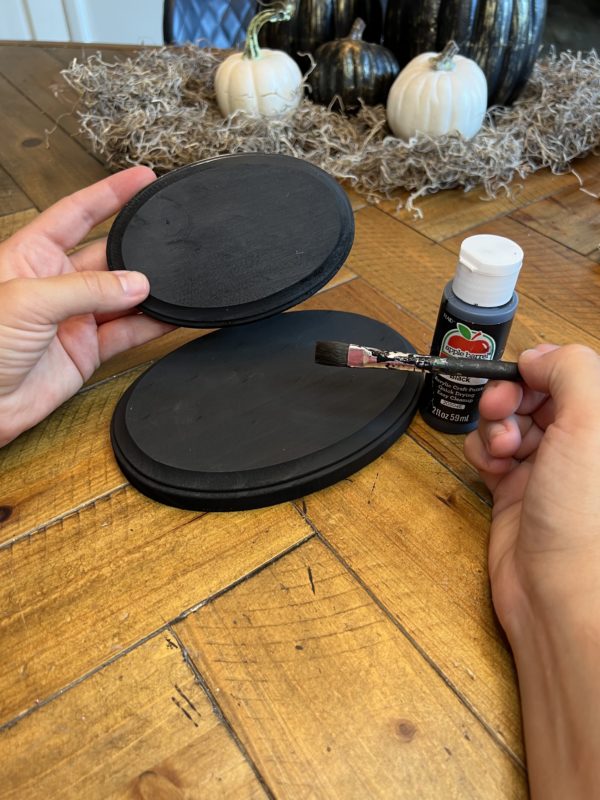
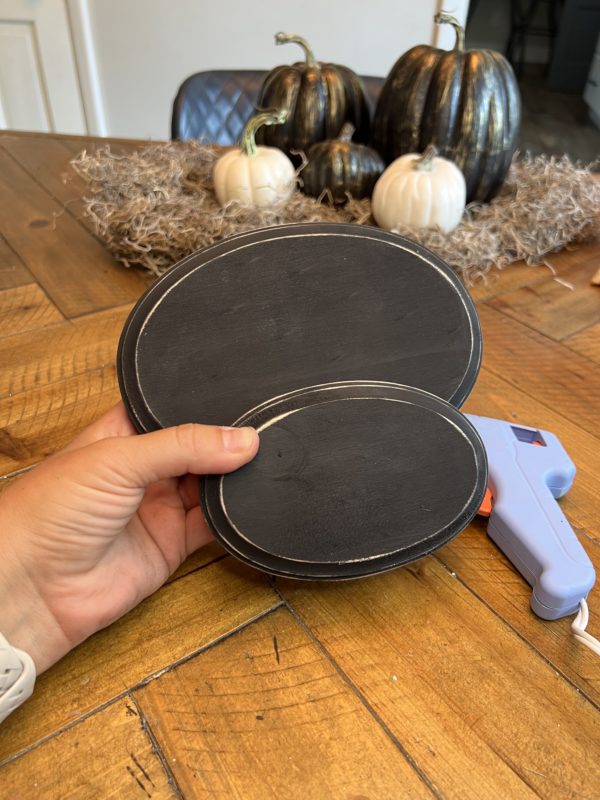
Step 1: Choose your color
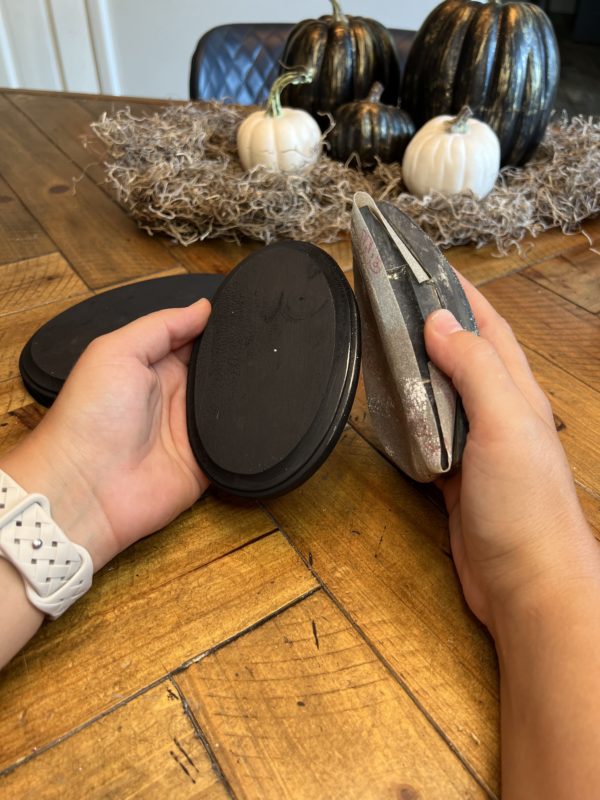
To start off, i chose to paint my plaques black for the spiders body.
Step 2: Add some character
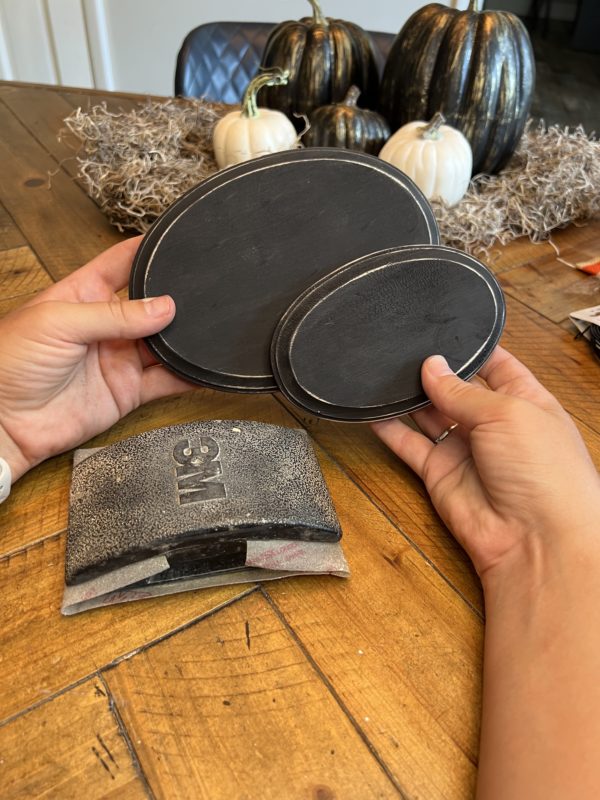
Once dried, I came in with a fine grit sandpaper around the beveled edges on each plaque. This helps add that character so it’s not just that plain black.
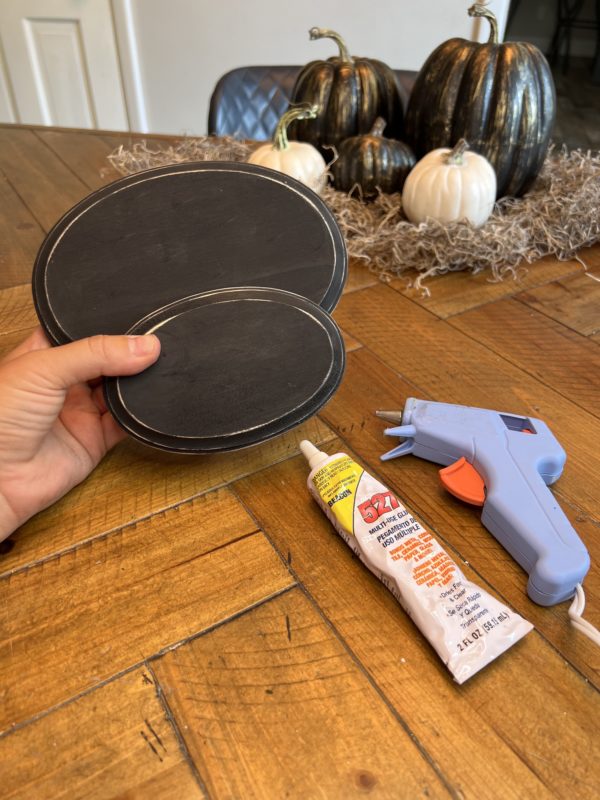
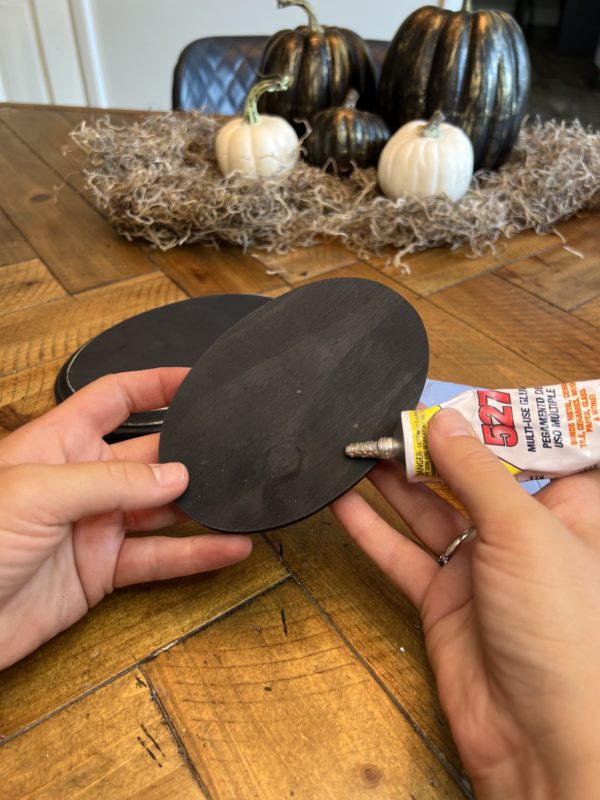
Step 3: Gluing together
Here i came in with the Beacon multi glue and the hot glue gun. I put a good amount of the Beacon 527 in the lower center. Then i came in with the hot glue gun can made a arch around the 527 glue to help hold while that multi glue dries. This all helps and add extra hold.
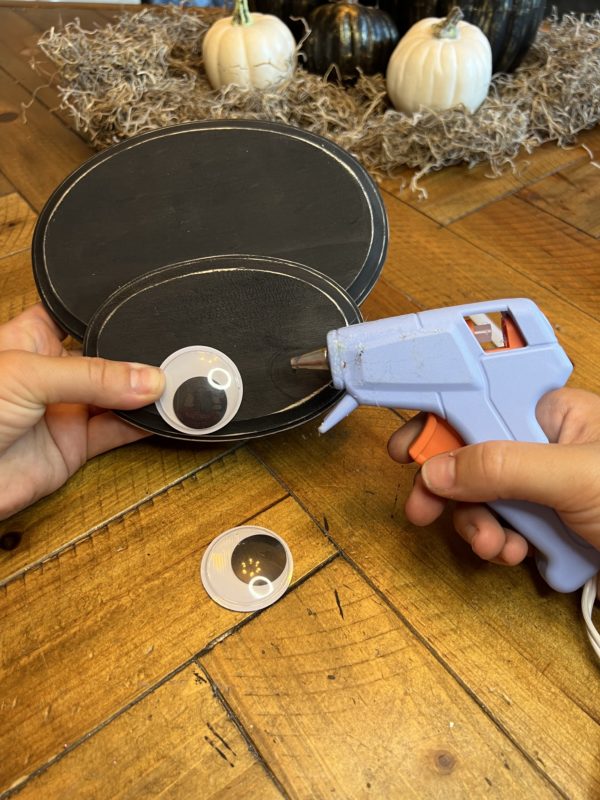
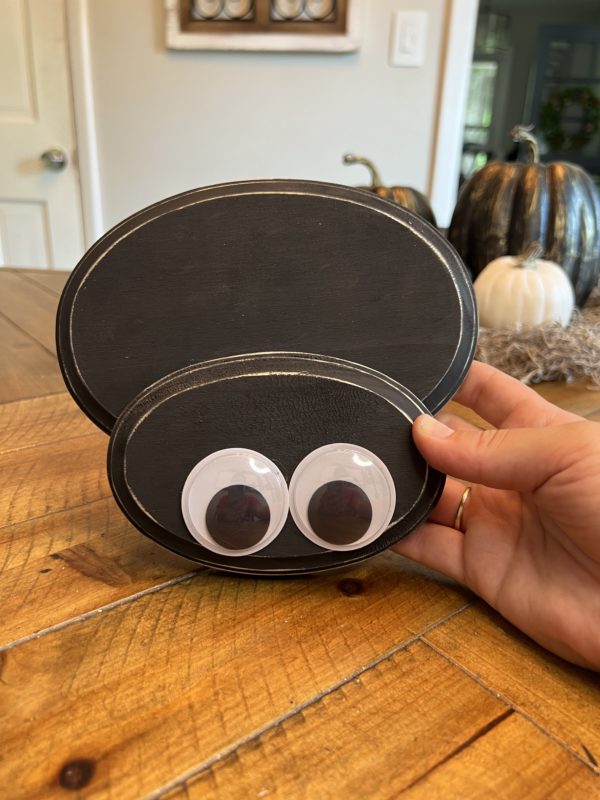
Step 4: Let’s add the eyes
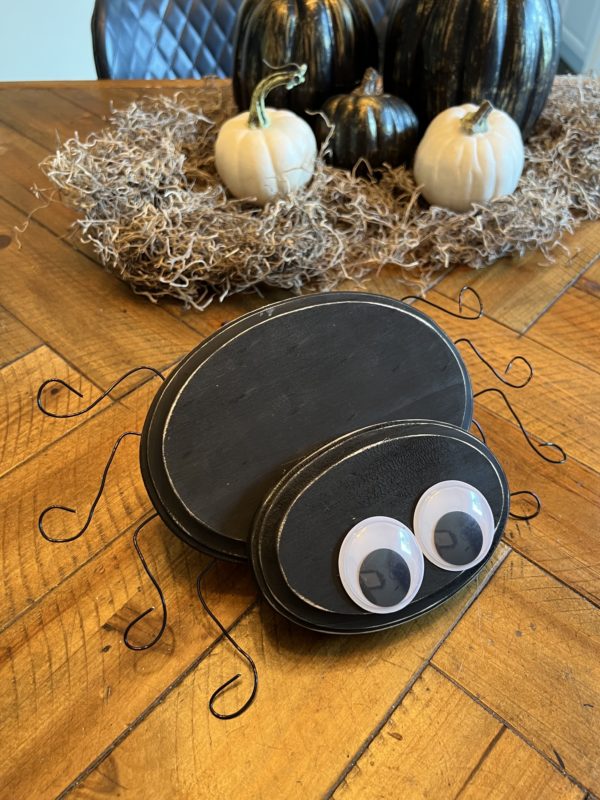
I grab the 40mm googly eyes and hot glued them to the smaller plaque.
Be careful not to touch the gun to the eye, because it will melt the backing quickly. I learned the hard way.😝
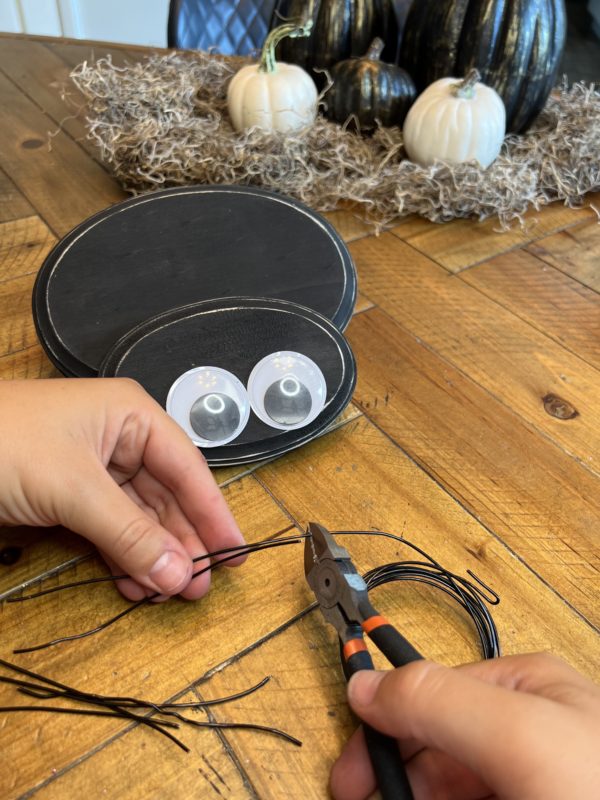
Step 6: Creating the legs
I used the 16 gauge black craft wiring and cut 8 pieces that were about 5 inches.
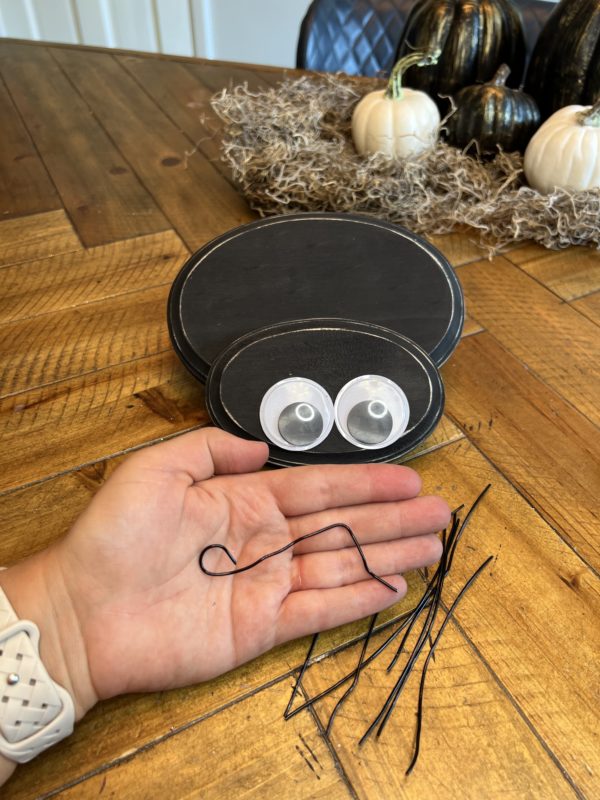
Start bending the legs into the shape you wish. I bent them in the shape of a ‘seven’ with a little ledge on the top for gluing and then curled the bottom.
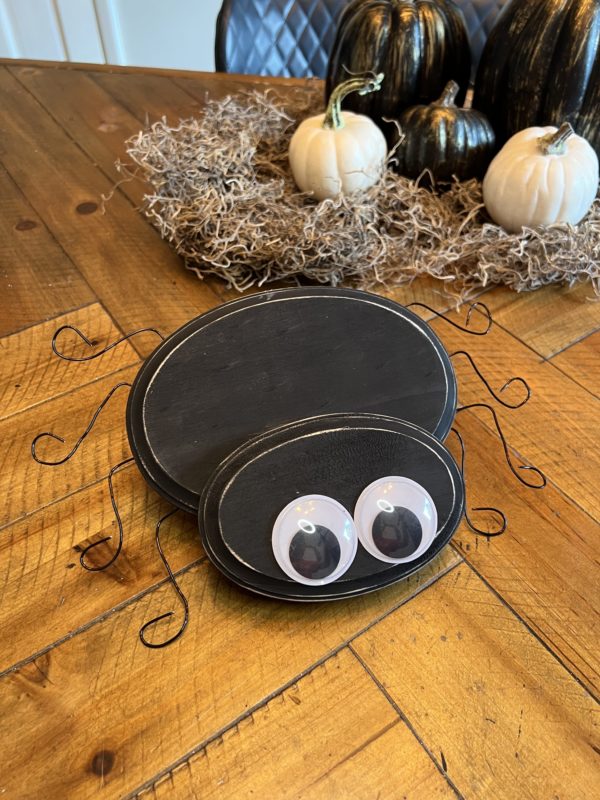
Lastly, Lets glue on the legs. I grab my hair dryer to help speed up the drying time.
Before i glue them in place, i laid them on the table and place underneath the spider to help get my placements. Start with the ones closer to the face and then go up.
*Please not that the wire might get hot if you are holding close to the area of adding the hot glue to.
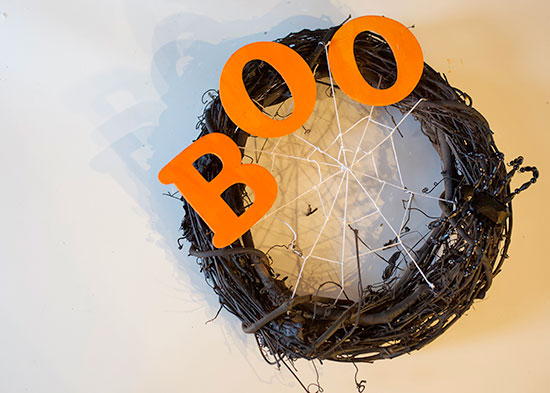
Let’s get SPOOKY! This BOO wreath is the perfect Halloween decoration – Dress up you front door and scare the Trick or Treaters this fall!
Difficulty level: Beginner
Time to complete: 20 minutes
Age range: 12 and up
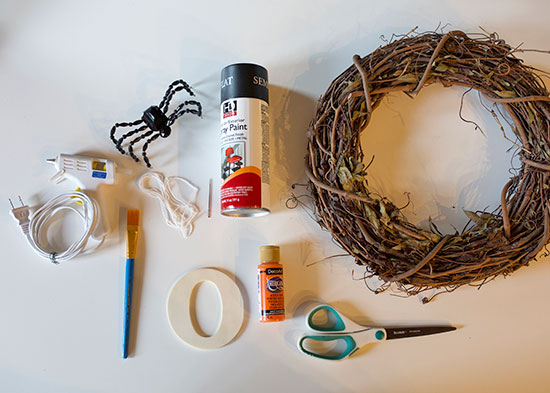
Things you’ll need:
BOO letters
Grapevine wreath
Large spider
White twine
Large needle
Orange paint
Black spray paint
Hot glue gun and glue sticks
Scissors
Things to do:
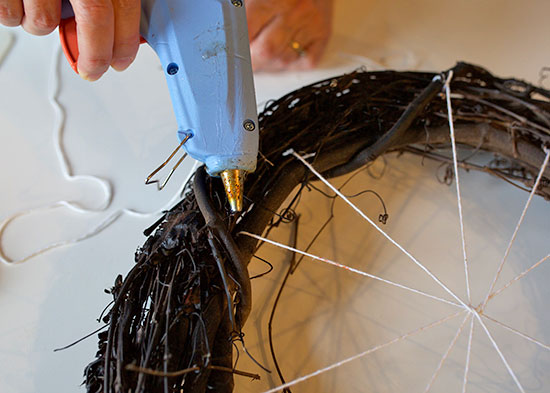
1. Spray paint your grapevine wreath black.
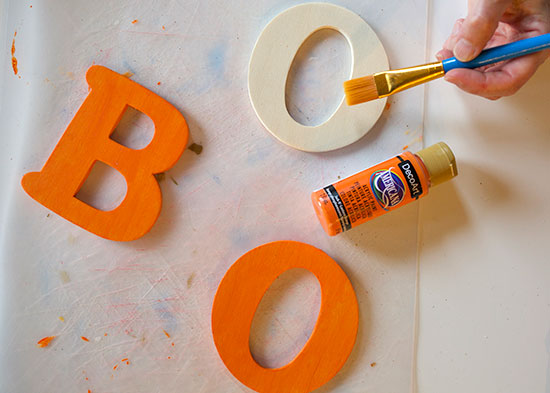
 2. Paint your BOO letters orange.
 3. Use hot glue to attach a piece of bakers twine to the wreath. String it across and wrap it around the opposite side. Repeat this step until it’s crossed 5-6 times.
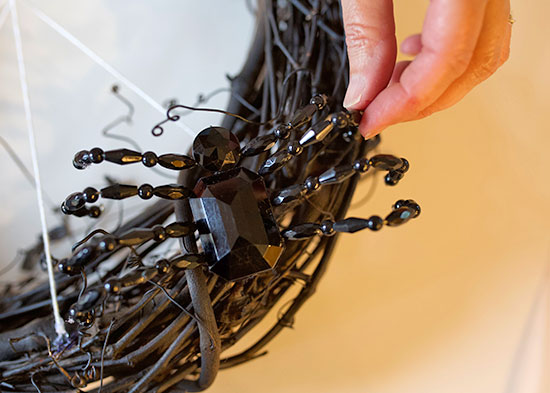
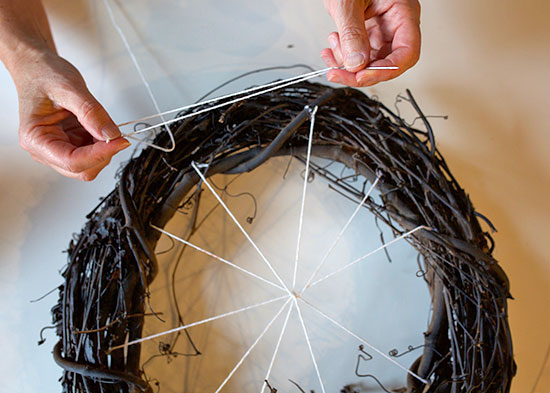 4. Thread a needle with bakers twine and weave it around the strings attached to the wreath, creating a web. Use hot glue to secure the string when necessary.
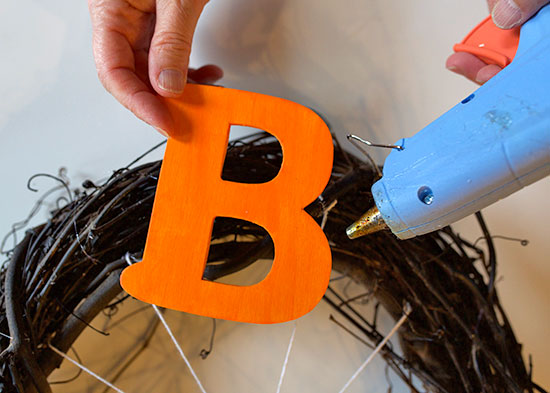
 5. Use hot glue to attach the BOO letters to the top of the wreath.
 6. Complete the wreath by using hot glue to attach the spider to the bottom of the web.