
Search results
2 results found.
2 results found.
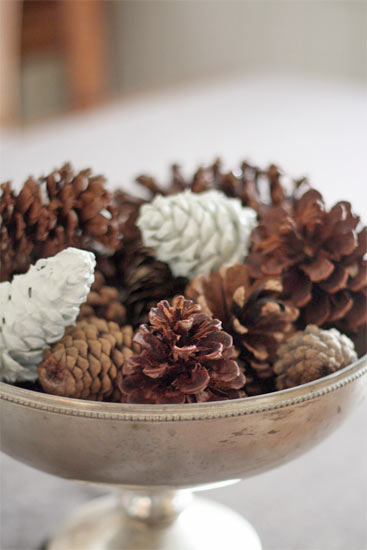
Bring a little winter woodlands into your house during the pre and post holiday months with these pretty dipped pinecones. If the cones around you aren’t fully opened (open cones look best) dry them out in the oven on the lowest setting until they open completely.
Things you need:
Pinecones
1 quart white paint
Floral wire
Newspaper
Things to do:
1. Wrap a piece of floral wire around the top of the cone loosely. You’ll use this both for dipping and drying so you’ll want it either well hidden in the cone or easily removed. Curve the top of the wire so that it is easily wrapped around the hanger.

2. Spread out the newsprint below a hanging surface. A closet hanging rod works well.
3. Shake the paint well and then open. Dip the pinecones slowly into the paint and suspend each over the can for a minute to let most of the excess drip off.


4. Hang over the newsprint to dry. Once the paint has hardened, slip or remove the wire before displaying.

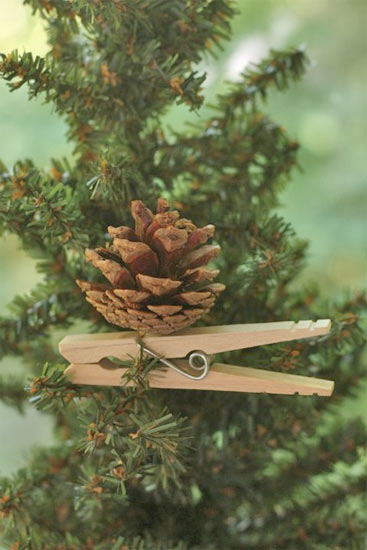
A simple holiday decoration that brings a little of nature’s beauty indoors, this project is easy enough to do with the kids and can be personalized with paint, glitter and even scent!
Things you’ll need:
Pinecones
Craft Glue
Clothespins
Books or boxes
Things to do:
1. If you want your pinecones decorated beyond their natural state, now’s the time to do it. Paint them, dip them, glitter them or add a yummy scent to them then allow the pinecone to dry before proceeding.

2. Break the stems off of the bottom of the pinecones to create as flat and even a bottom as possible.
3. Apply a dime-sized dot of glue to the top of a clothespin and firmly press the bottom of the pinecone in, making sure it’s centered.

4. Use the books or boxes to help keep the pinecone centered and in place and allow the glue to dry thoroughly before moving.