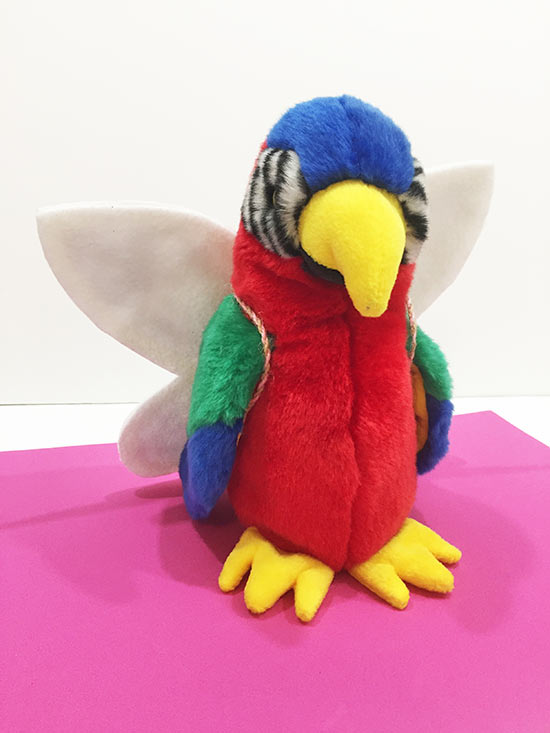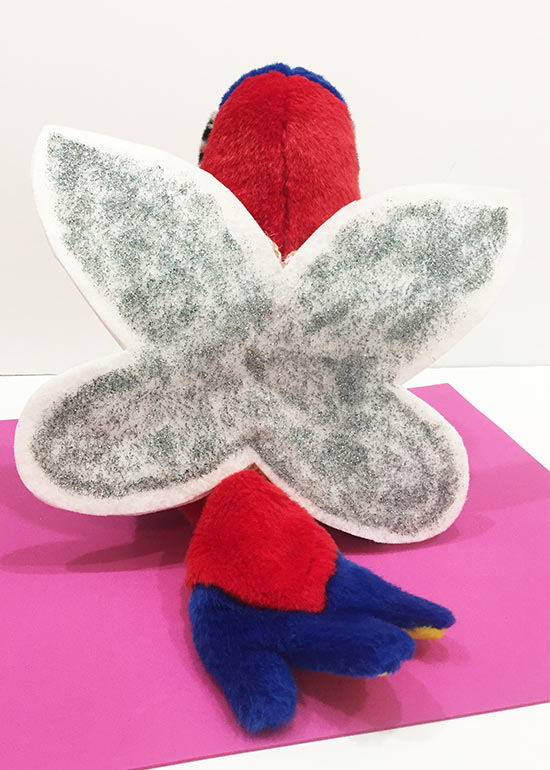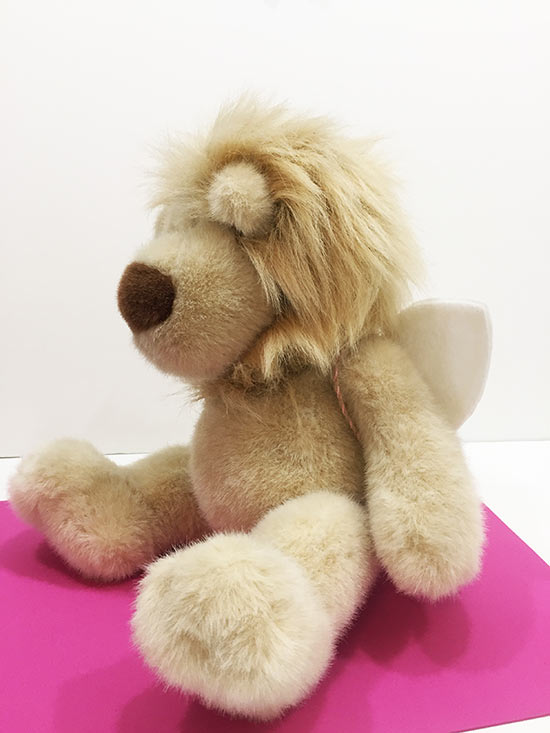
Dress up your beloved stuffed animals with fun and sparkly felt fairy wings! This fun craft encourages creativity and imaginative play. Make them as a gift for your favorite child or make them with your child!
Difficulty level: Beginner
Time required: 1 hour
Age range: 6+
Things you’ll need:
2 sheets of felt
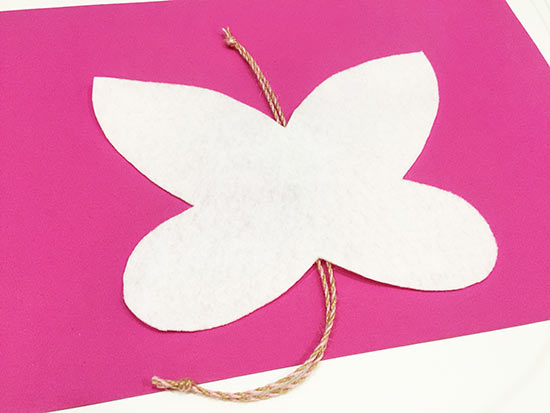
2- 12″ length of cord
Tacky glue
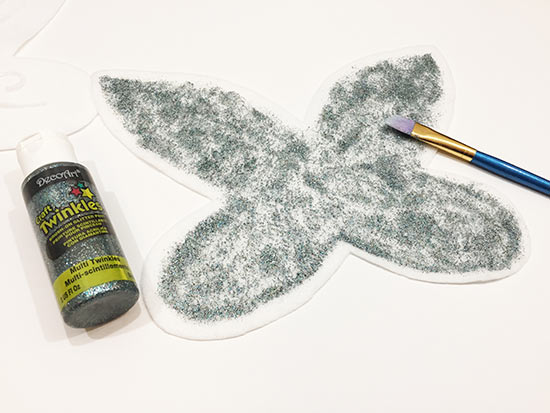
Glitter glue or glitter paint
Paint brush
Hot glue *optional
Hot glue gun *optional
Template
Things to do:
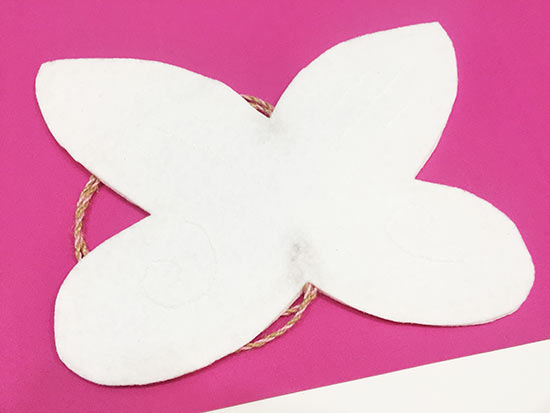
1. Fold your sheet of felt in half (with the short ends touching) and align the flat edge of your template on the fold.
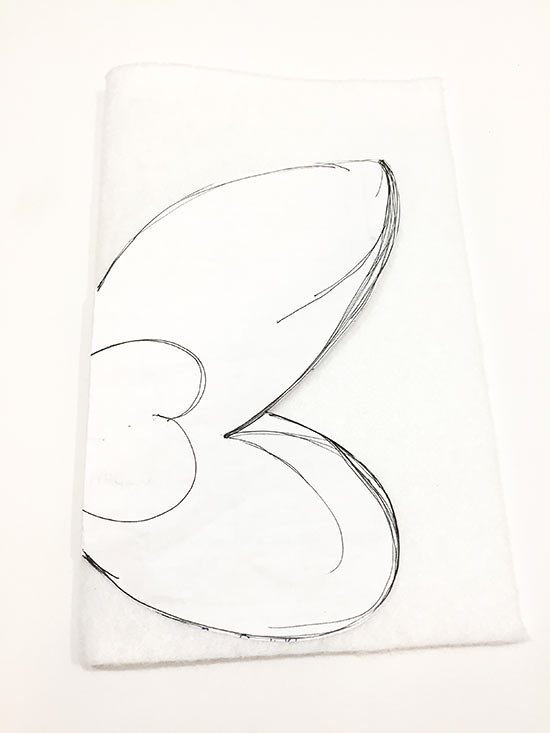
2. Cut out two wings with your template and unfold to reveal the full wing.
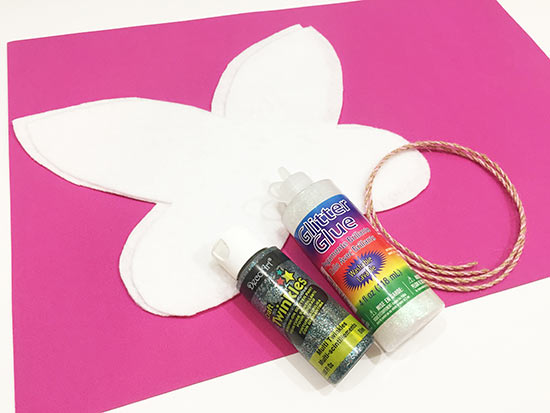
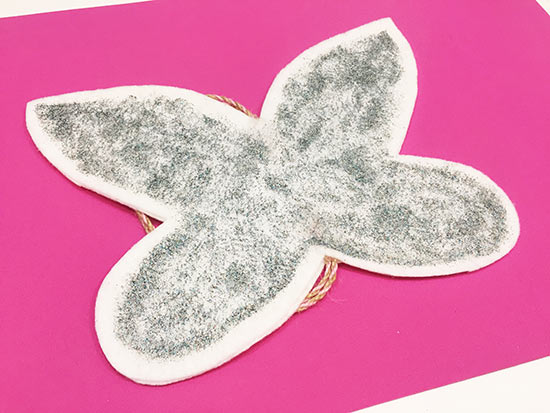
3. Decorate your wings and allow any paint or glitter glue to fully dry before proceeding.
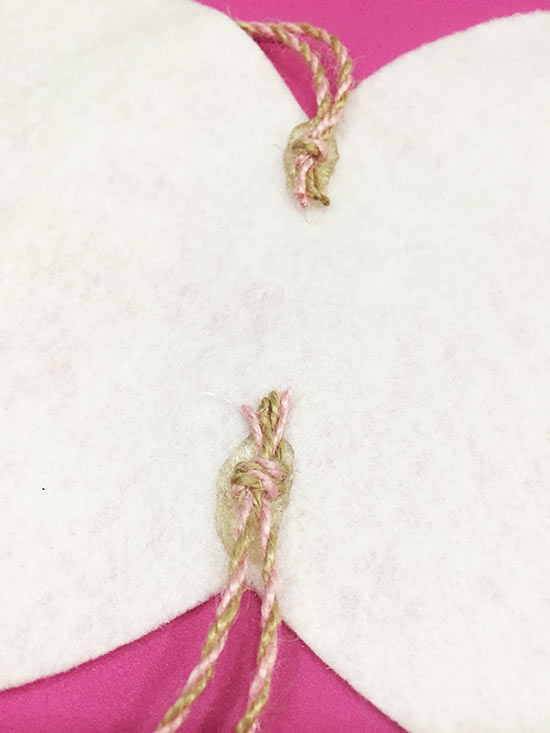
4. Place the two lengths of cord together and knot both ends together. Center the cord BEHIND one of the wings, with one knot at the top and one at the bottom.
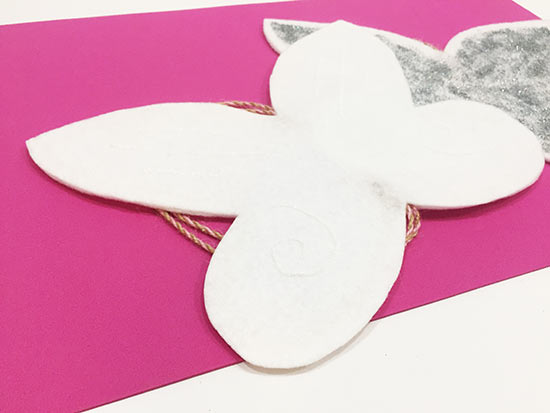
5. Apply a short line of hot glue at the top and bottom of the wings (kind of where they make a “v” shape) and fold the knot over the top/bottom of the felt to secure it in the glue. You may also use tacky glue here but I like hot glue because I know it’s not going to come loose.
6. Apply tacky glue to the entire top of the wing and place the other over the top, sandwiching the knots in the center. Apply pressure to ensure the glue holds and allow the glue to dry completely.