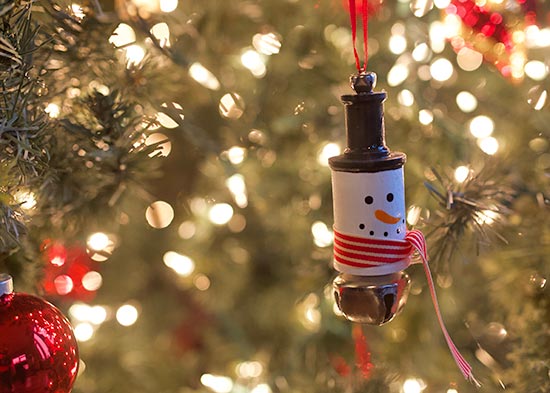
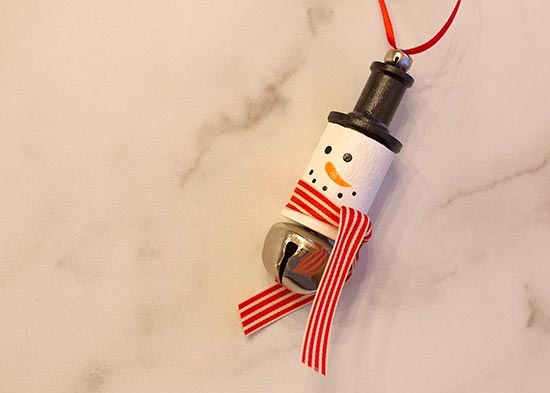
This festive, frosty the snowman ornament is the perfect snowy day project! Kids will love painting and gluing the pieces together to create an ornament of their own.
Difficulty level: Beginner
Time to complete: 15 minutes
Age range: 12 and up
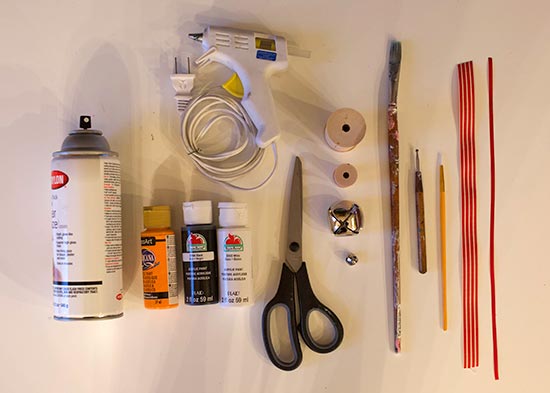
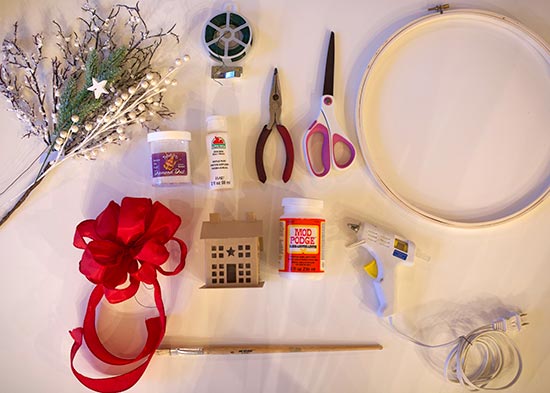
Things you’ll need:
Large spool
Small spool
Narrow ribbon
Black, white and orange paint
Hot glue and glue sticks
Bells (small and large)
Scissors
Sealer spray
Paint brush
Stylist
Things to do:
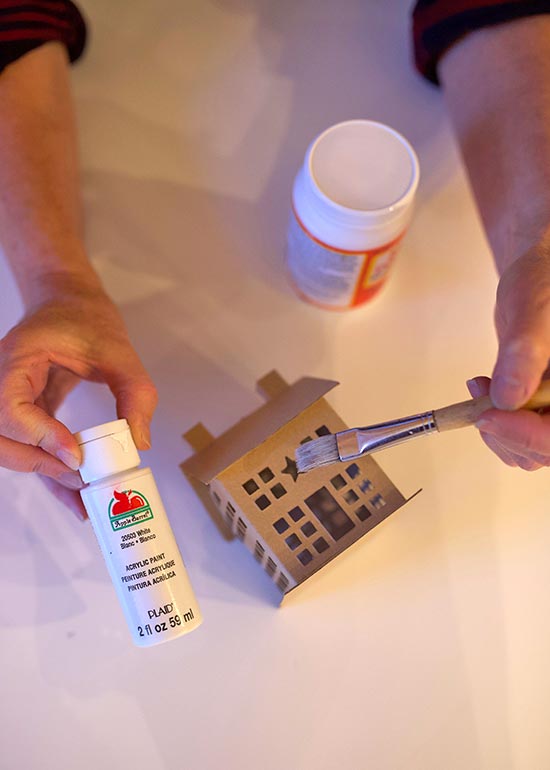
1. Paint your large spool white and small spool black. Let the paint dry.
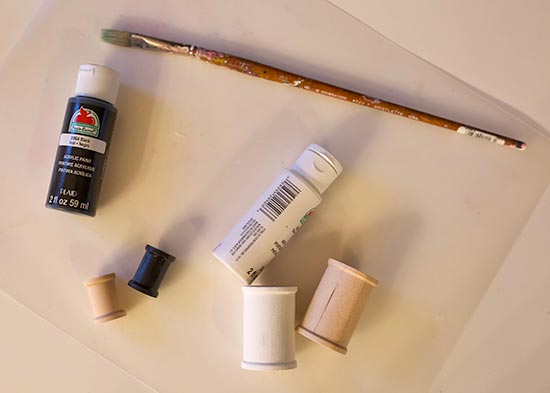 2. Paint the top edge of the large spool black.
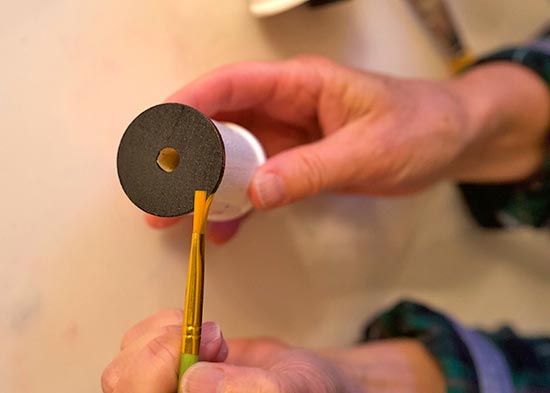 3. Paint an orange nose, black eyes, and black coal pieces for a mouth on the white spool.
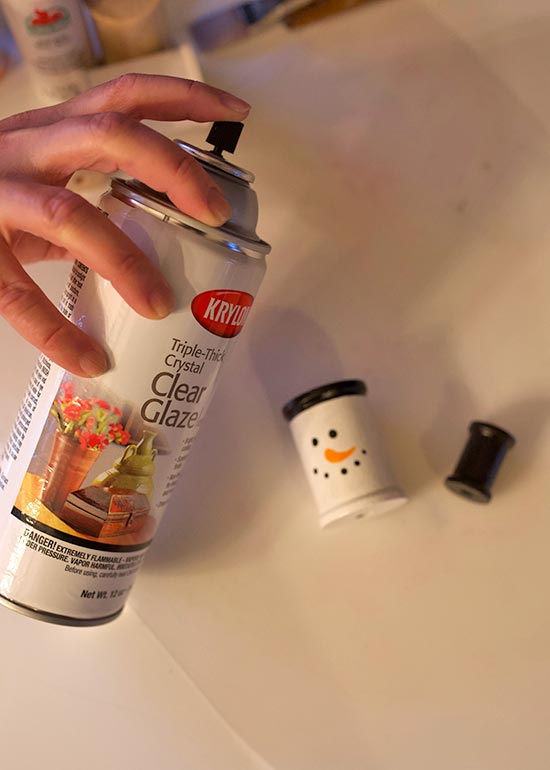
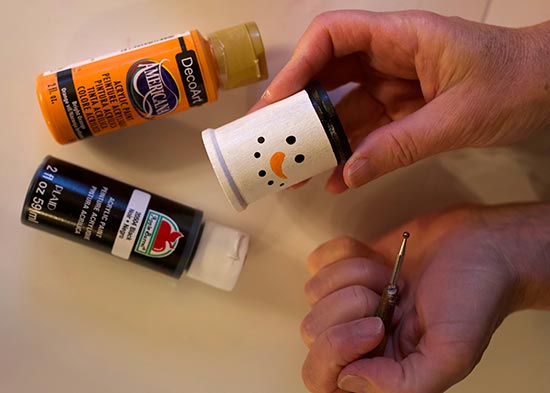 4. Spray with sealer.
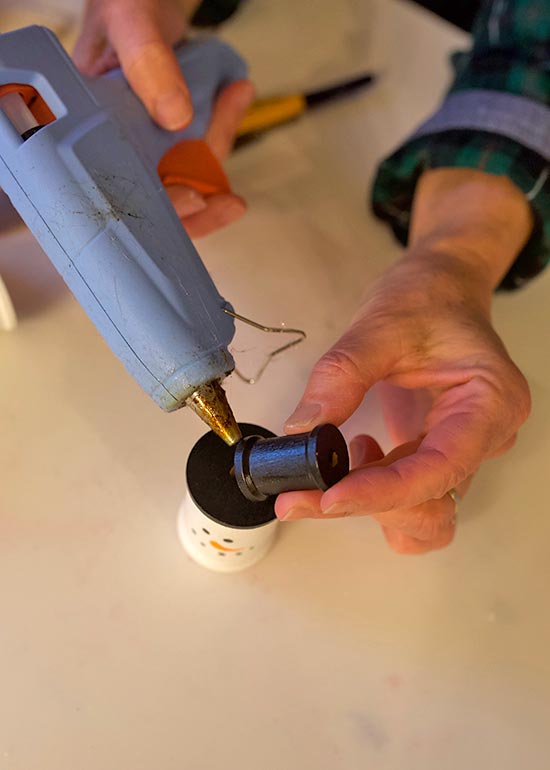
 5. Use hot glue to attach the small spool on top of the large spool.
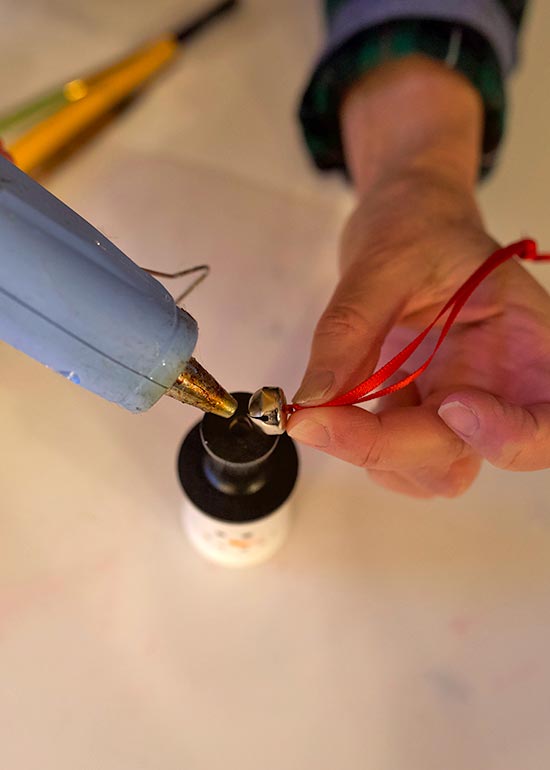
 6. Cut a 12″ piece of ribbon and thread it through a small bell. Glue it to the top of the black spool.
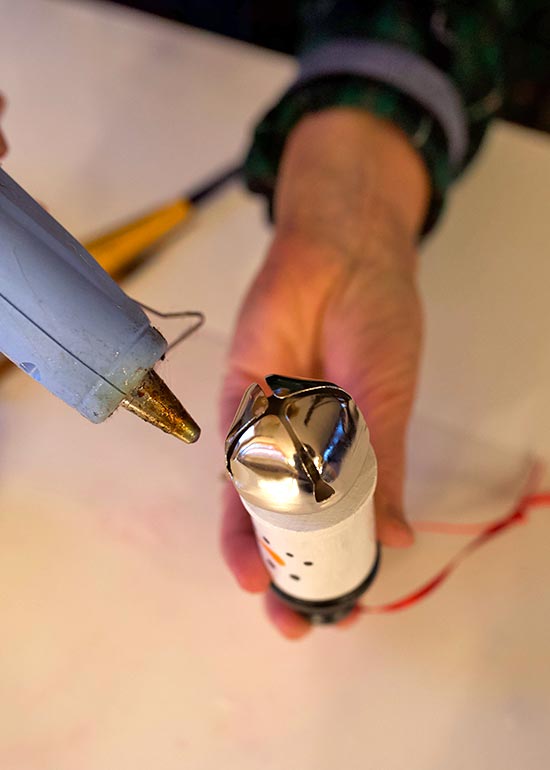
 7. Glue a large bell to the bottom of the white spool, covering the hole.
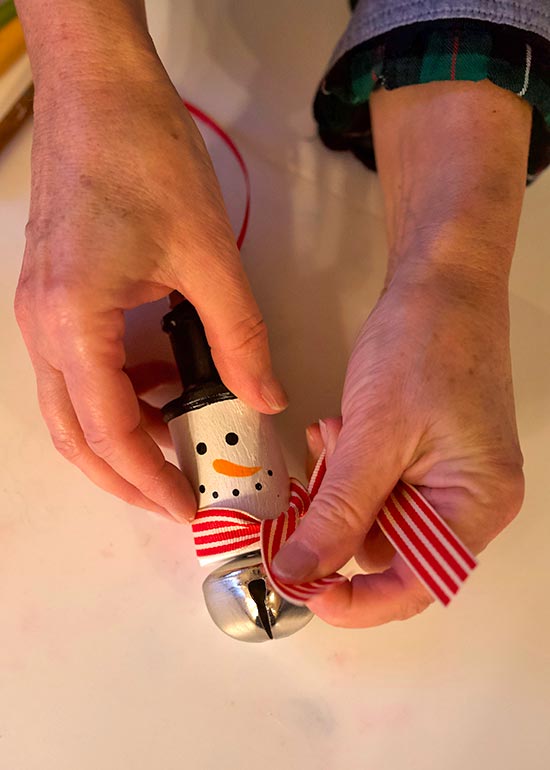
 8. Tie a ribbon scarf around the neck of the snowman.
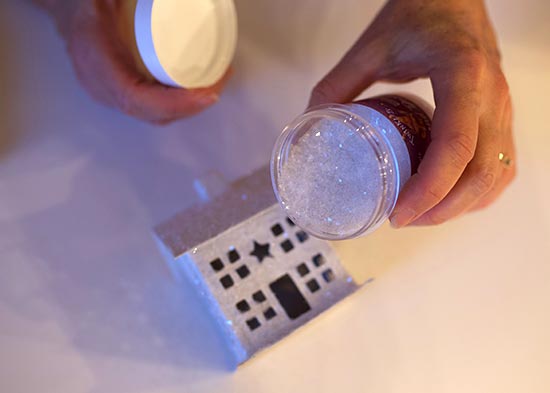
 2. Apply a thick layer of Mod Podge to the entire house then sprinkle on the glitter for a shimmery effect.
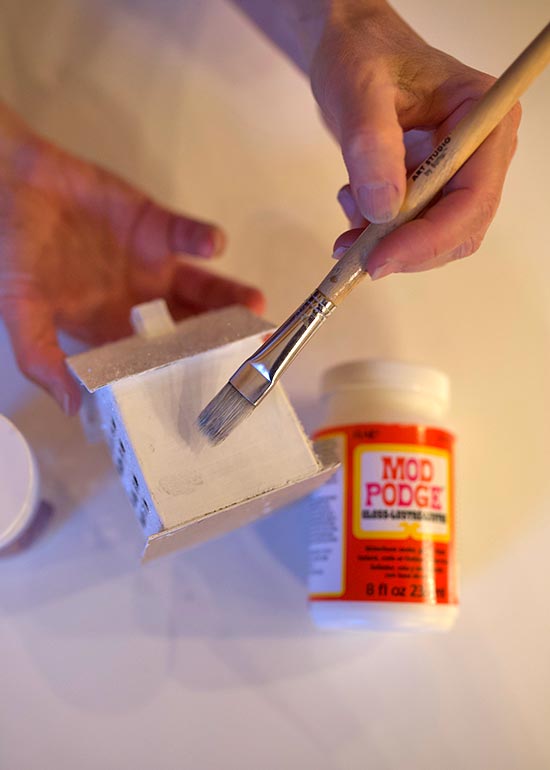
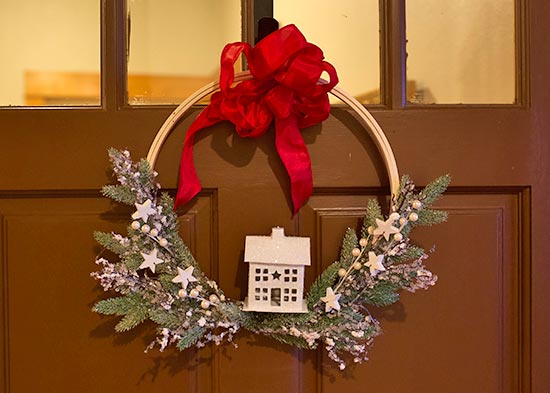
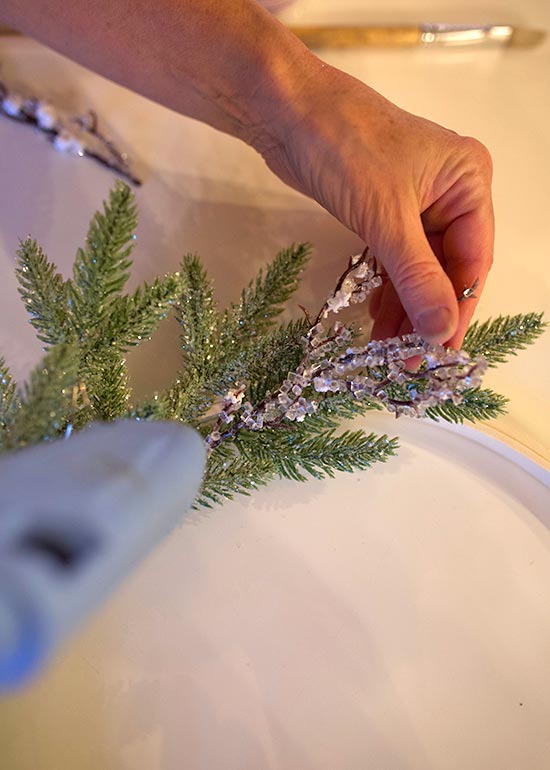
 3. Use wire to attach your greenery picks to the bottom of the embroidery hoop.
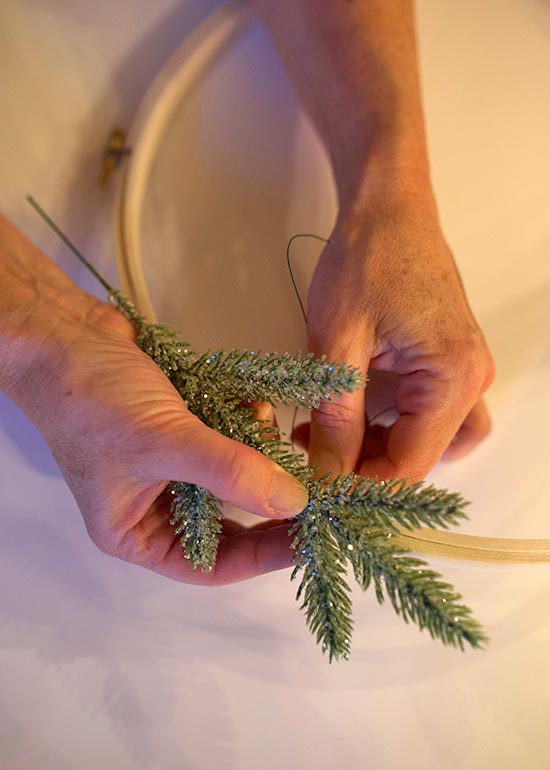
 2. Use hot glue to add your paper mache house. For our wreath, we placed the house in the center.
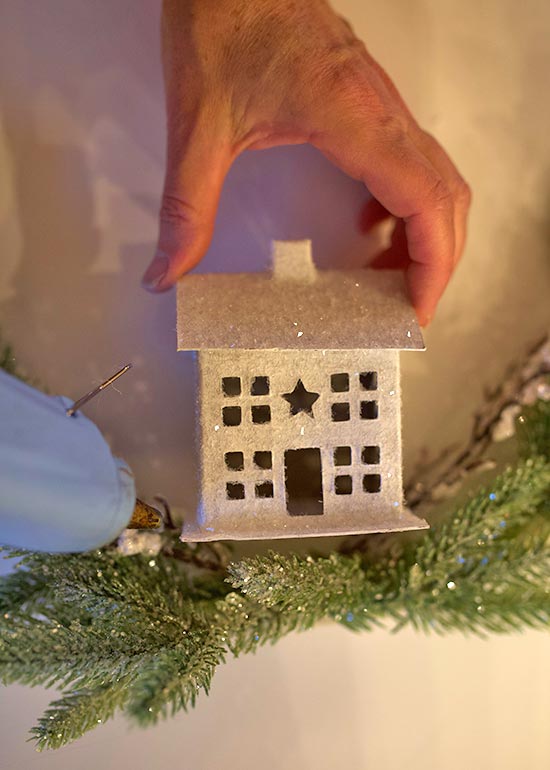 3. Spray the greenery and decor with glitter.