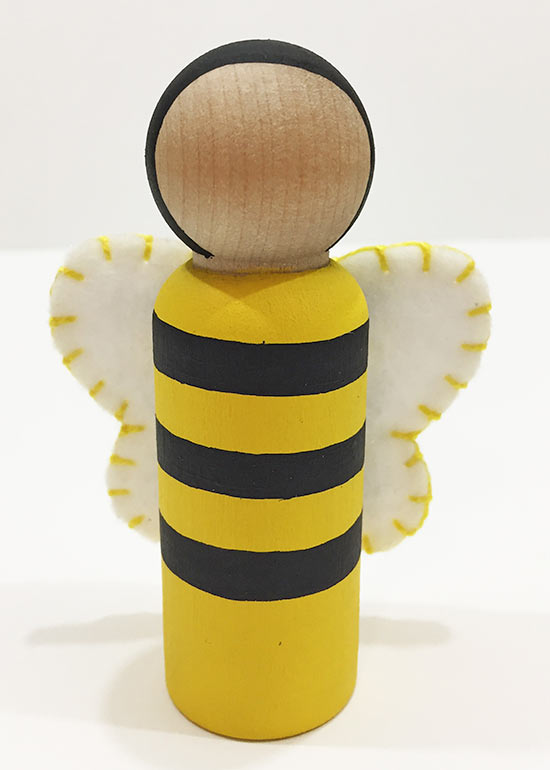
Springtime is here and with the blooming flowers come bumblebees! Create a sweet little peg doll to celebrate.
Difficulty level: Intermediate
Time required: 1-2 hours
Age range: 10+
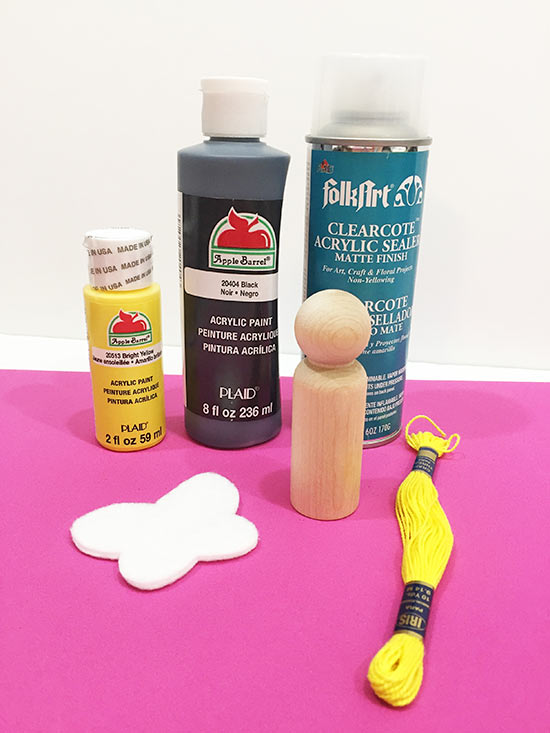
Things you’ll need:
Unfinished peg doll
Black acrylic paint
Yellow acrylic paint
Masking or painter’s tape
Paint brush
White felt
Yellow embroidery thread
Hot glue
Hot glue gun
Embroidery needle
Wing template
Acrylic sealer *optional
Pencil *optional
Things to do:
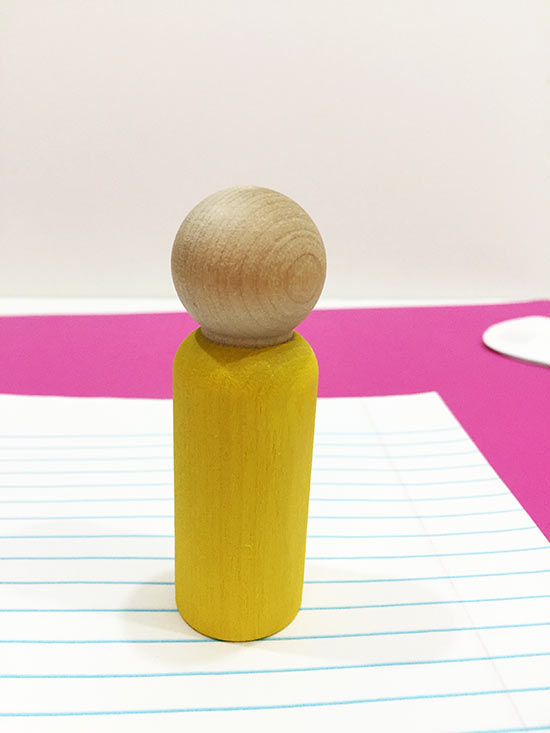
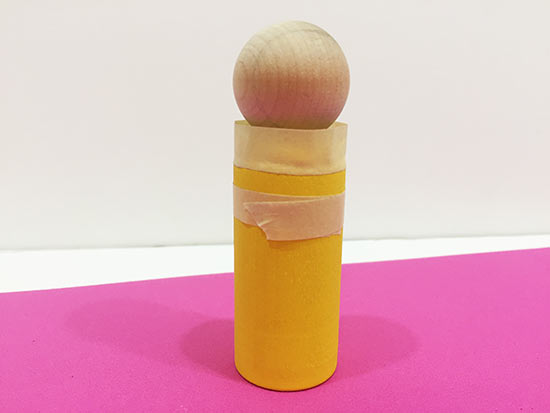
1. Paint the body of the peg doll yellow. Apply 2-3 coats of paint for a deeper color. Allow to dry completely.
2. Apply two strips of tape to the body to create a solid line (about 1/4 inch thick) all the way around the body and paint in between the tape lines. Allow to dry completely and remove the tape
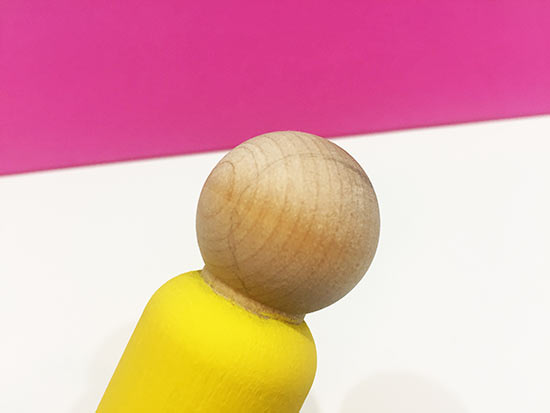
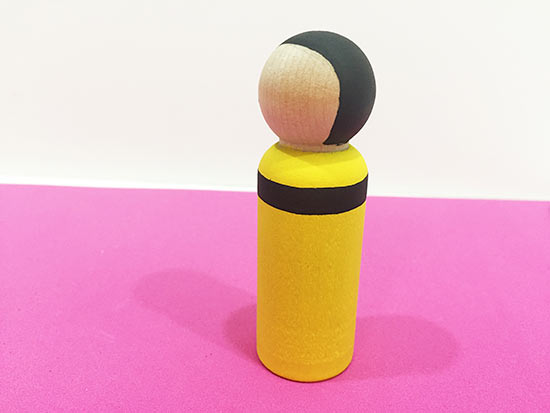
3. Paint the head of the peg doll black, leaving the face exposed (the shape will be similar to the peg doll wearing a hood.) Tip: it is helpful to trace the face shape out lightly with a pencil before starting to paint. You can paint over or erase any stray pencil marks.
4. Create 2-3 more black lines on the body of the peg doll, using the method in step two.
5. Optionally, spray the peg doll with acrylic sealer to coat.
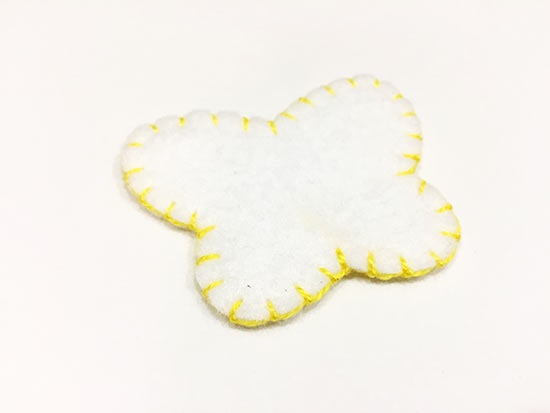
6. Using the template, cut two wing pieces from white felt
7. Sew the two wing pieces together using a blanket stitch and yellow thread.
8. Apply a line of hot glue down the center of the wings, as indicated in the photo, and hold firmly to the back of the peg doll until the glue is dry.