Now that the air feels cooler and it is getting darker earlier the fall season is upon us, and has put me in the mood for a little Halloween and fall decorating! For today’s post I’m going to show you how to make a fun trick not treat decor for your kitchen or to place on your dinning room table.
Things you’ll need:
Bakers Twine: (mandarin orange and charcoal black were used here )
Halloween Cupcake Liners
2″ Styrofoam balls
Spiders
Cheese cloth (optional)
Things do do:
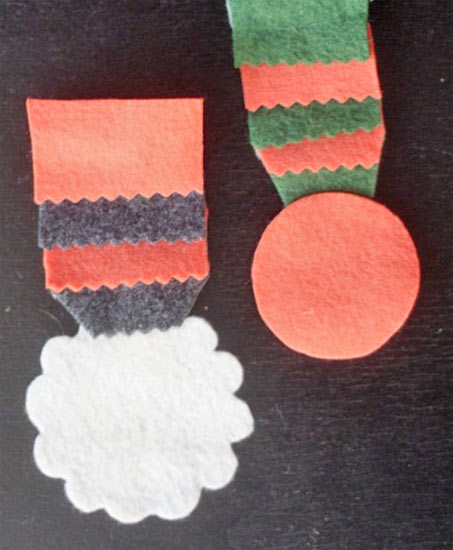
1. Cut a sliver of each Styrofoam ball to make one side flat.
2. Using your hot glue gun put a dot of glue on the top of one of your balls and begin wrapping your first twine in a circle, keeping it tight and close together so that the white on the Styrofoam ball does not show through. Continue to add little dots of glue as you go around and around to keep it in place.
3.When you are ready use your scissors to cut your first twine and switch the twines you are using to give you a pattern. Make sure to add glue where the first twine leaves off and the second one begins. Then wrap the second twine around the ball as you did your first twine. ( You could also just use one twine color for each of your cupcakes” it is totally up to you!)

4. Once you have wrapped your twine around each of your Styrofoam balls, take your cupcake holders ( I opted to keep three cupcake holders together for each cupcake” for a more sturdier base ) and adding a touch of hot glue to the inside bottom place the flat side of your ball on top.
5. You can now attach your spiders where you like it with more glue, and your cupcakes are complete!
6. For a spookier look you can dress up your serving platter with cheese cloth and more spiders.
Thanks so much for stopping by and I hope you have fun making your tricks not treats!
Lisa from Lisa’s Creative Niche